16 Tips You Need When Cooking Beef Ribs, According To Experts
Most meat-eaters who know their way around a kitchen love cooking steak, but the adjacent rib meat often renders them less gung-ho at the grill. If you worry that the tougher tissues of the beef rib rack are beyond your cooking prowess, make like the butcher's counter and chill — we've got you covered. That tomahawk bone chop you love had to come from somewhere, so you're already cooking on terra familiar.
While rib meat is generally tougher than steak filets, it also presents just as much variation — if not more — to offer you exciting opportunities to grow as a cook and impress your friends and family. Beef ribs take very well to a variety of cooking methods, but which one you use will change greatly depending on which ribs you're getting. In addition to my own BBQ experience and expertise, we asked 11 experts for their best tips to cook ribs, while avoiding common pitfalls and boosting your bone-in game.
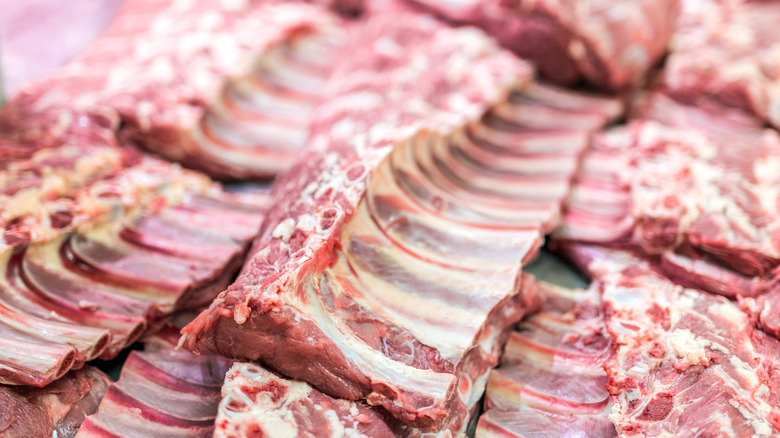
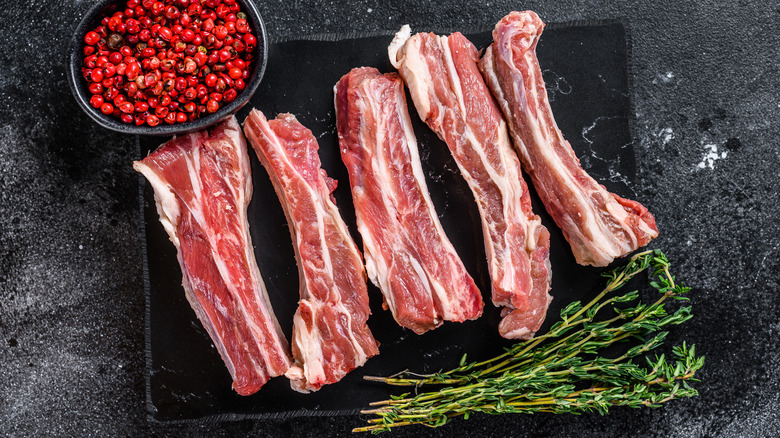
1. Prepare to the rib cut and recipe specifications
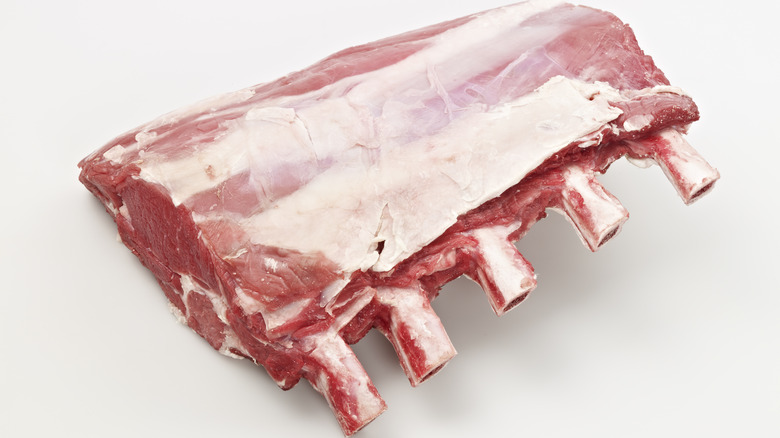
Are these ribs from the spine, belly, shoulder, or rump? How you employ that piece of meat depends not only on which rib cut you're cooking but what end of the bone they come from.
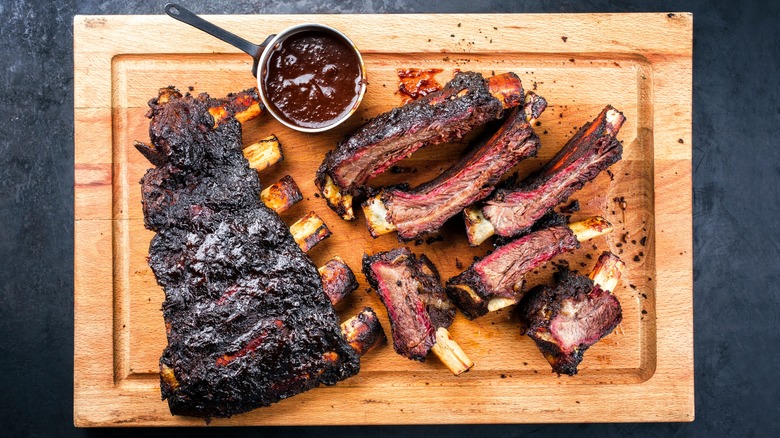
"Even if they come from the same cow, different parts will taste very different," says Barrett Black, pitmaster at BBQ institution The Original Black's Barbecue in Lockhart, Texas (aka the state-recognized barbecue capital). He avoids some cuts entirely. "Stay away from back ribs," he tells us, warning of meager, chewy meat. "... Instead, buy short ribs, either from the chuck or plate section of the cow. The chuck will be smaller, and the plate will be significantly larger, richer in flavor, and impress not only your guests but yourself too."
Rib fat is oleaginous, so trim fattier cuts before cooking. You want guests smacking their lips in joy, not due to sticky fats. But save those trimmings for other dishes.
2. Consider the membrane in your cooking method
The membrane: To remove or not? Some chefs feel the pulmonary pleura (commonly called silver skin) obstructs flavor from the underside, while others prefer it to support too-tender ribs from falling apart. The debate won't ever end.
Joonas Jokiniemi, founder of grilling guidance website Grill Smoke Love, advises you to pull the membrane off prior to cooking (and even the dry rub). "Failure to do so can result in less tender ribs that are difficult to eat," he tells us. "Removing the membrane allows for better smoke penetration and seasoning absorption."
On the other side of the discussion in internet BBQ culture, Barbecue Hall of Famer Meathead Goldwyn — founder of AmazingRibs.com — argues against removing it specifically from beef ribs, where the thicker membrane helps structurally in a way it doesn't on pork. "It should be removed from pork ribs but left on beef ribs," he says. "If you remove it before cooking beef ribs, the meat can fall off the bone. Yes, the membrane can block seasoning from the underside, but most of the meat on the underside is covered by bone, so seasoning the underside is not that important."
3. Remember beef ribs aren't pork

Though they benefit from the same treatment as pork, beef anatomy has thicker muscle fibers. Don't assume that the same weight of ribs for each animal will cook in the same amount of time. Fine-dining chef Dennis Littley of Ask Chef Dennis explains: "Unlike pork ribs, which tend to be leaner and more tender, beef ribs have a higher fat content and larger bones, resulting in a robust beef flavor and juicy, succulent meat when cooked properly."
While you'd (rightfully) think this is due to the interior marbled fat attaining melting point, there's another reason. Verde Farms founder Dana Ehrlich emphasizes the importance of time over tension. "Unlike other cuts of meat, beef ribs have a lot of cartilage and fat, so everything needs to be cooked low and slow — especially as a full rack," he says. "So the connective tissue and tough muscles have time to break down."
4. Calculate the cooking time
Low and slow cooking gives you room to get that protein breakdown right but risks too much smoke exposure or moisture loss. The grilling gurus we spoke with emphasized patience with careful calculation. Chef David Figueroa, co-founder of Melinda's Hot Sauce, suggests viewing these cuts less as rib-cousins to a piggy cut and more like beef-brothers to one another. "I would advise treating beef ribs more like beef brisket preparation," he says. "While pork ribs cook in around 4 hours, beef ribs require 6 to 8 hours due to the longer rendering time for fat and connective tissue."
In addition to drying them out, Littley warns that cooking too fast will irrevocably alter the muscle proteins themselves. "Rushing the cooking process can result in tough, chewy meat instead of the desired fall-off-the-bone texture," he says.
Put simply: In tougher cuts, you can't speed-run softening sinews, ligaments, and tendons; low heat breaks them down without cooking that delicious muscle past all palatability. High heat will tend instead to tighten things up while drying out the more delicate tissues of the muscles. Jokiniemi explains their rich proteins become gelatin, keeping the meat moist and silken in every bite.
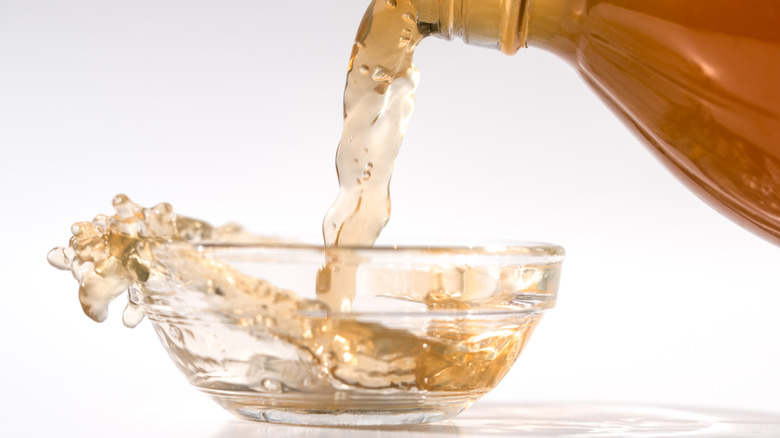
5. Let brine work its magic

Though we sometimes recommend a dry brine over a wet one, there's a great reason to wet brine ribs. A dry brine is typically measured by weight, but an atypically large percentage of rib weight is bone rather than meat, which can throw off attempts to calculate the amount of salt to use. So go with wet — instead of brining by weight, you're salting by volume of water. With the ribs submerged, water distributes salt evenly throughout the meat no matter its proportion to the bones.
Just 1 tablespoon of salt per quart of water will brine just fine. We don't advise going to the full 3 tablespoons per quart you might want for faster salination in a turkey brine. If you do dry brine, remember to use a shallow dish or bag, where the meat will reabsorb lost liquid as its salinity equalizes. Never brine your meat for too long — you don't want to desiccate your meat or make it mushy.
Finally, add sugar to the brine. Like salt, it has a transformative effect on texture. You're not trying to sweeten the meat but enhance other flavors while tenderizing tough proteins.
6. Actually rub the dry rub into each piece of meat
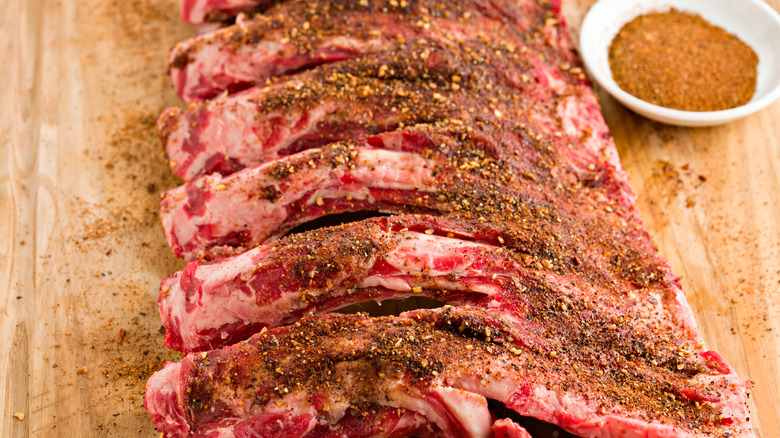
Seasonings don't penetrate very deep into the meat (salt being an exception because of its solubility). Even the meatiest ribs aren't going to derive much benefit from a tenderizing injector, as they're shallow before you hit bone.
Speaking of both meat and bone, Luis Mata, co-founder of premium meat supplier Meat N' Bone, wants you to give that dry rub extra time to work. "They're best allowed an overnight or 24-hour bath in a marinade or pre-seasoning rub to allow the flavors to penetrate into the meat," he says. It's not just time but that added surface area that's going to help make every bite perfect. Since you know your dry rub sits on the exterior, ensure it coats every cranny and fills every fold. Gently knead it into the meat to ensure your herbs and spices are penetrating the microscopic crevices of the rack.
7. Don't be timid about the seasoning
How much seasoning can beef ribs take? Littley advises you to swing big. "Beef ribs benefit from robust seasoning and flavoring agents to complement their natural richness," he says. "Don't shy away from using bold spices, marinades, or rubs to enhance the taste profile and create a memorable dining experience."
But not every chef recommends a dry rub. Black follows his grandfather's advice to stop at salt and pepper, recommending home chefs use quality beef, and tells us, "If you want to get creative with other herbs or sauces, add them towards the end of cooking. Otherwise, the sugars or herbs will burn, slow down your cook, and make everything bitter."
Yet other chefs get award-winning results with a rub. World Barbecue Champion Tuffy Stone says to use any rub you like, but agrees on a combo we heard repeatedly: "It could be as simple as salt, pepper, and garlic." Bottom line: it's either/or. If you're showcasing fancy beef, minimize the dry rub. But if you do use one on standard supermarket meat, go hard.
8. Be mindful of the marinade's acidity and soak time
Acidic marinades softening the cartilage and tougher fat can have a detrimental effect on the more pleasurable textures of the muscle. Rib meat should be tender, not mushy, and you risk ruining the flesh before you soften the sinews. Just as you can over-brine, you can marinate past due time. Better to have understated flavors on a good piece of meat than zesty ones on a ruined rack. You'll ultimately have to figure out how acidic (or alkaline, in a couple of odd cases) your brine is, and how fast it's denaturing the proteins.
As these ribs will typically take a long time to cook, you might do well to remove excess marinade from the surface before you start grilling. Make sure you're not making that mistake — along with some of the other marinade mistakes chef Sunny Anderson previously warned us about.
9. Change the heat level depending on the rib cut
We all know low and slow is the way to go. Except not all ribs fit that slot. Short ribs can also cook well at relatively quick and high heat on the grill, especially if tenderized and if you aren't precious about all that cartilage (maybe you intend to save it to make soup). For many beef rib recipes, you may find even better results from a medium heat of about 350 F for a few hours, or even shorter.
"Thinly sliced beef ribs can be cooked over high heat like direct flame on a grill," Ehrlich says. "While still delicious, cooking them like this can end up making them tougher than non-rib cuts of meat, such as a ribeye or strip steak." He also emphasizes that you have options with dry vs. wet heat. Steamy air conducts heat much better than dry heat does.
10. Use the Texas crutch
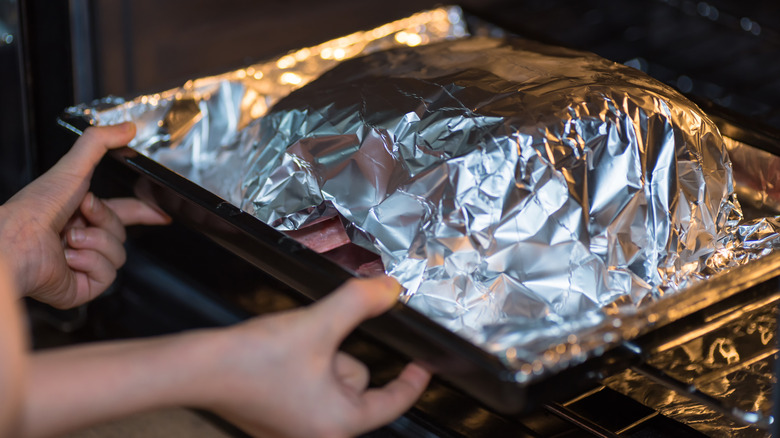
Best known for helping even expert pitmasters navigate the challenging brisket, the "Texas crutch" simply means wrapping your meat in aluminum or butcher paper to trap moisture. This has the twin effects of preserving moisture and overcoming the dreaded stall. In essence, you're switching from grilling to braising for the finish. Stone recommends applying this standby technique to ribs, saying that, after wrapping, "Cook for another 1.5 to 2.5 hours, until meat temperature is 205 F or probes tender." Just don't skip his 30-minute resting stage.
Littley calls the wrapping part of a larger set of techniques used to manage moisture and says you can also baste or braise if you don't want to wrap. "Incorporating liquid ingredients like broth, wine, or vinegar, and covering the ribs with foil or a lid can help lock in juices and prevent them from drying out," he tells us.
Pitmaster Robbie Shoults of Bear Creek Smokehouse has a firm preference in the wrapping technique: "We don't like to wrap ribs in aluminum foil as we think it creates a roast beef-like flavor. Instead, we like to smoke them for around 3 to 4 hours and finish them wrapped in brisket paper."
11. Consider other cooking methods
Ribs make perfect barbecue, but you're not bound to cook them that way. BBQ is a lot of work and planning, but sometimes you want something delicious and easy. Short ribs are great for putting in a slow cooker at breakfast and coming home from work to a perfect meal awaiting you. Ehrlich casts votes on both sides of the question for ceramic. "I like smoking beef short ribs on my Green Egg or braising them in Le Creuset cookware," he says. "What is an inexpensive and tough cut of meat can become fork tender and super flavorful after hours of slow cooking."
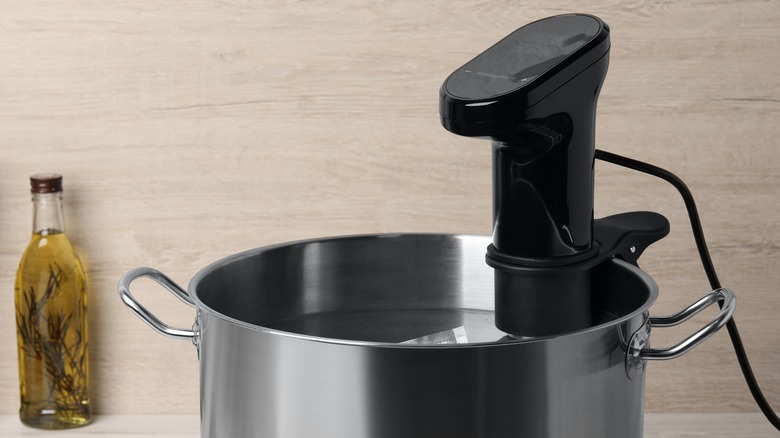
That's certainly true, but you can create a very similar result quickly with a pressure cooker. While it might be anathema to many of the generational pitmasters on this list, it's a viable method. Cooking for one, or just hate cleanup? Slice that rack of ribs into solo servings for the freezer, and then use an immersion circulator to cook it sous vide.
12. Use plenty of liquid when braising
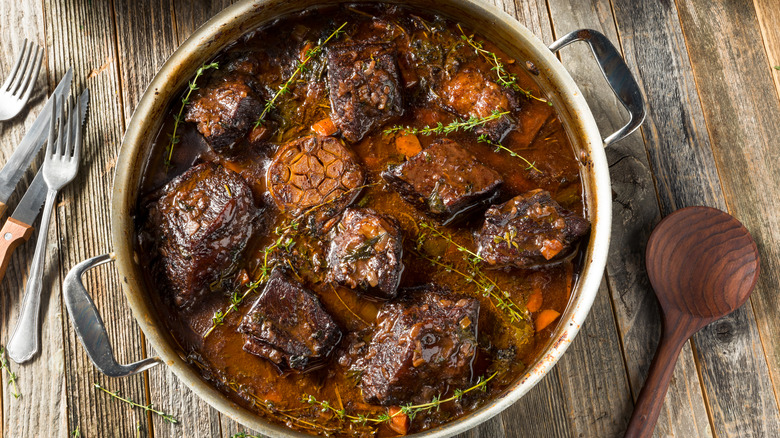
Moisture control isn't just for the dry air of the grill. The amount of liquid used in other cooking methods is quite a separate concern from ensuring the meat stays moist on the grill grates. Beef ribs profit immensely from a warm, wet cooking environment, but even in a covered environment, water can escape. Keep an eye on the liquid levels as ribs braise to prevent unpleasant scorching (and extra elbow grease when cleaning the pot later).
Ehrlich says, "A common mistake when it comes to cooking ribs is when people try to braise them, they don't use enough liquid and they end up burning." Mata also raises this concern, saying, "Whether you're slow roasting, slow cooking, smoking, or braising, make sure you have enough liquid in your pan to avoid drying out your beef ribs." He adds that this is "crucial" to a deliciously tender end product.
If you go the pressure cooker route, you're not worried about evaporation, but you do have to ensure sufficient liquid to cover the pot bottom all the same or risk singeing your ribs. This is an excellent call for a small rack that slides into the pot, ensuring your ribs cook separately from the bottom broth.
13. Beware of over-smoking
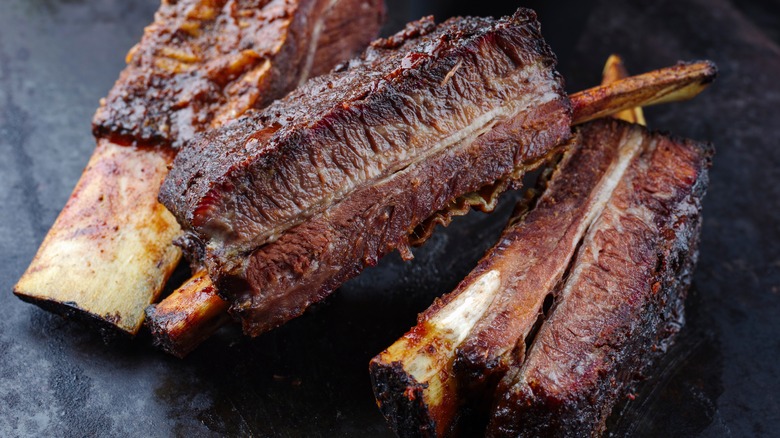
Yes, smoking is a great way to cook ribs — perhaps the greatest. But while even the sauciest of pitmasters would argue smoke is the sine qua non of barbecue, it's equally true that even the biggest barbecue chef on the planet would caution against mistaking the effect for the main event. Jokiniemi says over-smoking is a serious pitfall. "While beef ribs can handle smoke well, there's a fine line between well-smoked and over-smoked," he tells us.
Just as if you had seared the food to a char on direct heat, the smoke ring and bark-like exterior can create a bitter tang that detracts from the delicious flavors of the flesh itself. And that's without even trying to dig into the carcinogen risk of the smoke itself. Be sure to always use wood from a source you can trust. You want smoke of good quality and moderate quantity — meaning, absolutely no industrially treated wood and being temperate in how much smoke you use.
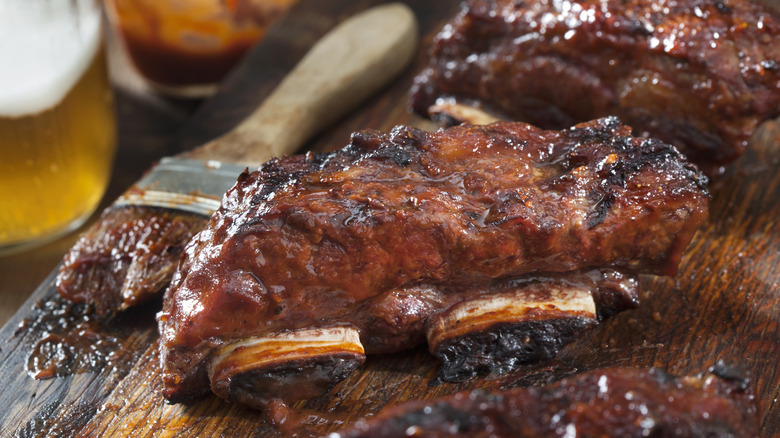
14. Save sauce for the end but not too late
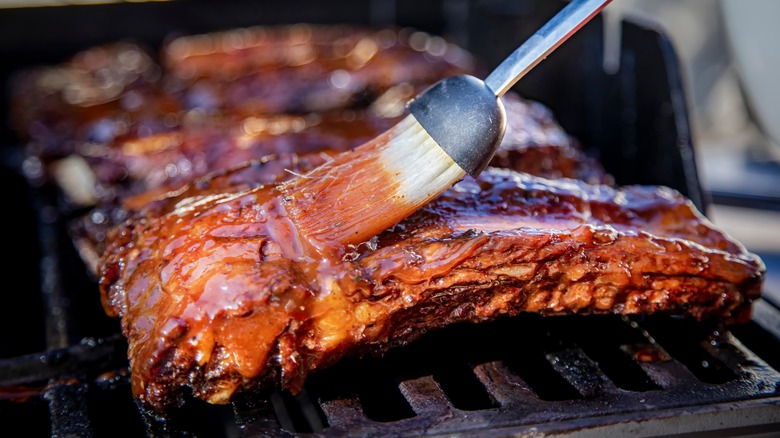
It's commonly known that savvy smoker commandants don't sauce their barbecued meats until the end of the cook. The reason, Shoults says, is, "If you're putting barbecue sauce on your beef ribs, be sure not to apply until about the last 30 minutes of the cooking cycle, because the sugars contained in the sauce will most likely burn."
Even sugary drippings can produce an acrider smoke than we're aiming for, so baste your sauce pretty thin. But note that Shoults doesn't say to wait until the meat is off the grill. After all, the resting period would be a perfect time to do that task (and keep your grill clean), right? Well, yes, and if you want to reduce your sauce separately, go to it. But one reason to mop that meat on the grill itself is you want the sauce to lose some water content even as its sugars caramelize in the heat. The twin effect is sumptuous.
15. Let them rest longer than you'd think
Littley explains the mechanics of letting dinner sit: "Resting beef ribs after cooking allows the juices to redistribute and the meat to relax, resulting in a more tender and flavorful end product." He recommends a rest of at least 10 to 15 minutes prior to serving them. (You can keep them warm in an insulated cooler, aluminum wrap, or a pan if you have one large enough.)
But when to pull them off? Chef Mike Johnson of St. Louis' Sugarfire Smokehouse says, "Smoke beef ribs to 200 to 208 F internal temperature, but pull them off the smoker when the probe is tender, not at the exact temperature." He adds, "If the temperature probe has difficulty sliding in, it doesn't matter what the temperature is — it's not going to be tender."
This was a common two-handed approach among the chefs we consulted: Get scientific data, but ensure it aligns with recognizable signs. Remember, the bone conducts heat to continue cooking the meat after removal, even as external heat disperses inwards.
16. Wring multiple dinners out of beef ribs
Done cooking? Don't overlook tomorrow's dinner. Turns out chefs are just as conscious of budget (and the animal's sacrifice) as you are. Maximizing your purchase can be fun and delicious. Ashley Lonsdale, chef-in-residence at ButcherBox, says you're overlooking the tastiest part of the meal because it cooks off the entree. "My biggest tip for making ribs is to save the fat that gets rendered during the cooking process," she tells us. "Beef fat, or tallow, is a wonderful cooking fat that works at high heat and imparts an intense, meaty flavor to vegetables." If kept in an airtight container, the fat should stay good for three months — plenty of time for you to roast veggies, cook eggs, or any other cooking that calls for savory, flavorful oil.
While you surely know that bones and cartilage make great stock, so does that silver skin membrane. Goldwyn says, "Most people won't eat it because it has an odd texture, but it doesn't have an unpleasant flavor." If you mince it for dumplings or pasta sauce, you might become the person who devises our 17th beef rib tip.