14 Common Omelet Mistakes And How To Avoid Them

There's a lot to love about omelets: They're delicious, filling, and endlessly customizable. They can also be enjoyed at any time of day — breakfast for dinner is awesome, after all. Plus, a simple omelet recipe is fairly easy to make, so long as you avoid the most common omelet mistakes. Many of these mishaps involve the cooking process, but some focus on the actual ingredients and preparation.
But first, it's worth noting that there are many types of omelets. For example, there's a difference between American and French omelets. The U.S.-style omelet looks like a half moon, and it's usually filled with vegetables, meats, and cheese, while the omelets of Paris are known for a creamy and silky texture and are traditionally made with only eggs and butter. There are also Thai omelets, which are wonderfully crispy and puffy, and Taiwanese oyster omelets, a popular street food in Taipei. In Chinese-American cuisine, there's egg foo young, a fluffy omelet made with vegetables, proteins, and stir-fry sauce. These are just a few varieties in the wonderful world of omelets.
In this article, we'll be focusing on American-style omelets, and the errors that people often make while cooking them. For insight, we chatted with Sean Olson, a co-owner of Salt + Stone, a Boston-area restaurant popular for brunch Nathan Lyon, a chef and cookbook author who has appeared multiple times on Food Network; and Chris Damian, the chef behind Civility Social House, another beloved Boston-adjacent eatery specializing in brunch.
Using old eggs for omelets
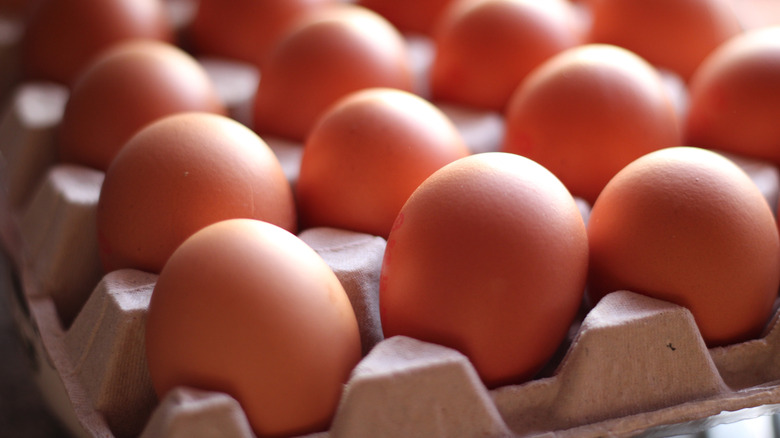
There's no omelet without eggs, so it's best to use the freshest ones you can find. This is key for creating an omelet with a fluffy-yet-sturdy texture that's strong enough to hold your fillings. If you use expired eggs, the omelet will be dry and limp, according to Sean Olson. This is due to the moisture content of eggs, which tends to decrease over time. To check if your eggs are fresh, look for the expiration date on the carton. In general, fresh eggs will last up to five weeks after they're put in the refrigerator. If you're still unsure, try the float test. Place your egg in a bowl filled with four inches of cold water. Fresh eggs will sink, while expired eggs will float.
You can also crack the egg and inspect its color and texture. The yolk in a fresh egg should have a vibrant and deep yellow-orange color, whereas an old one will be dull, says Olson — and that's not the only characteristic to look for. "If you crack a fresh egg and put it on a plate, it'll maintain its shape and be perky. An old egg will spread out and look almost watery on the plate," advises Olson.
Cooking omelets in a large pan
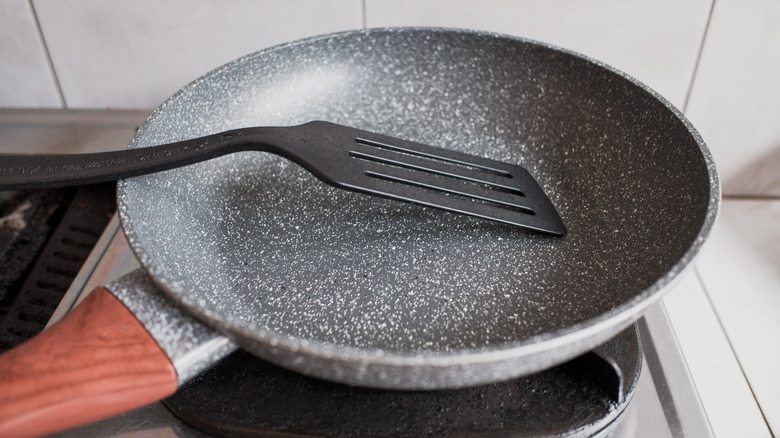
Another common omelet mistake is using an oversized pan. If your frying pan is excessively big, the egg mixture will spread out too much, creating a very thin layer. This will cause the eggs to be too flat, "as opposed to having height and thicker edges of a proper fluffy omelet," says Sean Olson.
"Having too much surface area to cook will also dry out the egg faster, and make it more difficult to achieve a moist omelet," Olson adds. With that in mind, an eight-inch pan is ideal for cooking omelets. It's also best to use a nonstick pan with curved sides, as these features make it easier to handle the omelet.
If you're cooking for multiple people, you might be tempted to make bigger omelets in a larger pan. However, omelets aren't meant to be oversized. It will be difficult to properly fold and plate a big omelet, especially if it's packed with fillings. Instead, use a small pan and make multiple standard-sized omelets instead. Alternatively, if you're determined to save time while cooking eggs for a crowd, consider making a frittata for breakfast rather than omelets.
Not letting eggs reach room temperature
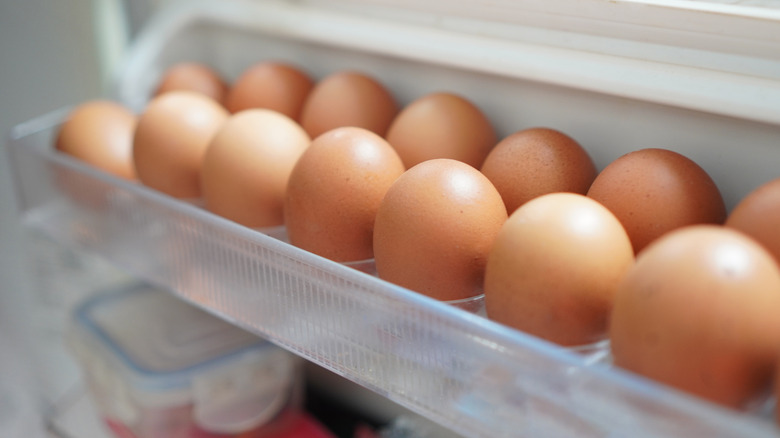
When you've got omelets to make and mouths to feed, it can be tempting to grab eggs from the refrigerator and immediately start cooking. However, using cold eggs is a major mistake, as the yolks and whites will be less likely to combine as you whisk them. Eggs are easier to whisk when they're at room temperature, so be sure to remove them from the fridge before it's time to cook. The trick is to avoid taking them out too early, as eggs should never sit at room temperature for more than two hours (or one hour if the outside temperature is 90 degrees Fahrenheit or higher). Otherwise, the eggshells can sweat, promoting the growth of harmful bacteria.
To quickly bring eggs to room temperature, place them in a bowl of warm water for five to 10 minutes. You can also hold the eggs under warm running water in the sink, though this method can waste a lot of water. Regardless of the technique, avoid using very hot water, as this may accidentally cook the eggs before you crack them.
Using the wrong number of eggs

It's possible to use too many eggs when making an omelet. Not only will the eggs be difficult to manage in the pan, but it will increase the risk of uneven cooking. "Using too many eggs creates a denser product, and therefore a less fluffy [and] airy omelet," says Sean Olson.
To avoid these issues, stick to 2 or 3 large eggs per omelet, as recommended by Chris Damian. If you're concerned that 3 eggs will be too much for your pan, you can also use 2 whole eggs with 1 egg white. Both options provide the perfect amount for a single omelet.
If you use only 1 egg, your omelet won't develop the thick and fluffy layer needed to encase your fillings. This is especially likely if your eggs are on the smaller side. In this case, use three eggs to make sure there's enough mixture to span the pan's cooking surface.
Whisking the eggs incorrectly
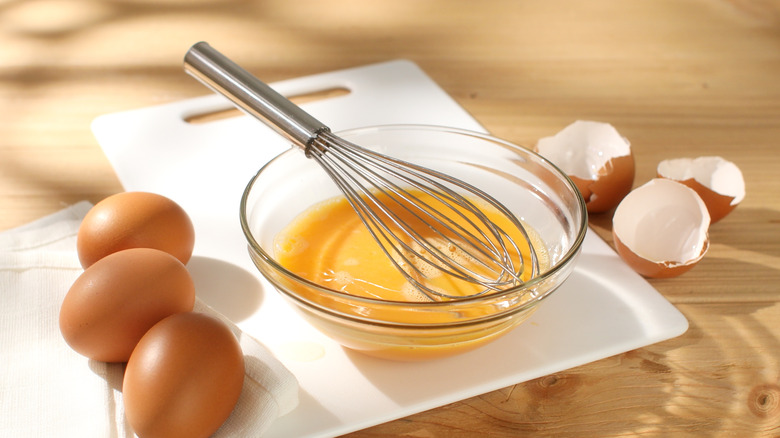
The purpose of whisking eggs is to combine the yolks and whites to create a uniform mixture. This way, the eggs will be able to spread evenly in the pan, creating a perfect layer for your omelet fillings. The first step is to grab a big bowl, which will provide enough space for you to properly whisk the eggs. Once you've cracked the eggs into the bowl, whisk them in a brisk sideways motion for about 30 seconds. This will aerate the eggs, paving the way for a fluffy omelet. You'll know the eggs are ready when a white froth has formed along the top.
Note that it is possible to under- and over-whisk eggs. If you don't whisk the eggs enough, the yolks and whites will remain separated, creating a lumpy omelet. Similarly, if you whisk the eggs too much, this can deflate the air bubbles you just created, resulting in a limp and less fluffy omelet.
Adding too much liquid for your omelet
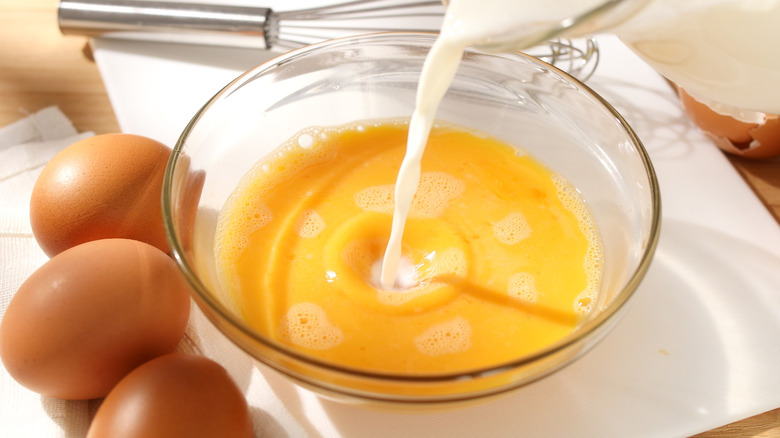
In addition to proper whisking, adding liquid to eggs is the secret to fluffy omelets. Popular options include milk and water, but you can also use half-and-half, cottage cheese, and sour cream. The additional moisture will turn to steam once heated, essentially leavening the eggs and making the omelet fluffier. Dairy products have the effect of providing extra fat, which adds flavor and creaminess. Regardless of the liquid you choose, it's crucial to avoid adding too much. This will incorporate too much moisture to the omelet, resulting in a runny and soggy dish.
To avoid this common omelet mistake, stick to 1 or 2 teaspoons of liquid per egg. This translates to about 2 tablespoons of liquid per omelet, depending on how many eggs you're using. All that said, know that the addition of liquid is optional when making omelets. You're more than welcome to skip it, especially if you want the egg flavor to shine.
Not using enough fat in the pan
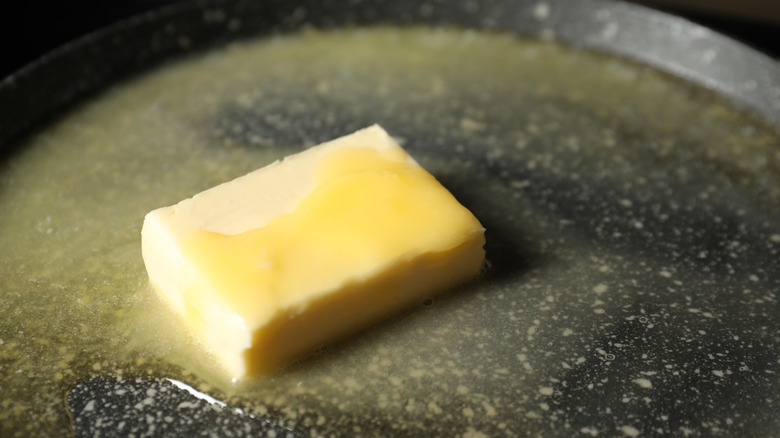
When cooking eggs in a skillet, it's essential to add fat to the pan, even if using nonstick cookware. This will prevent the eggs from sticking to the pan and forming burnt bits, which are a nuisance to clean. More specifically, when you're making an omelet, failing to use enough fat will make it difficult for the whisked eggs to spread into an even layer. The result will be lumpy and stuck scrambled eggs, rather than an even surface of fluffy egg mixture to serve as an omelet foundation.
As a rule of thumb, you'll need 1 or 2 teaspoons of fat per egg. The traditional option is butter, as this will give the omelet its iconic golden surface and rich flavor. Just be sure to use unsalted butter, as this will allow you to season the eggs as you wish.
However, you're not limited to using butter; oils with high smoke points (like canola oil, avocado oil, or safflower oil) work great for eggs. Avoid oils with low smoke points, such as flaxseed oil and walnut oil, as these will burn in the pan.
Using the wrong heat level
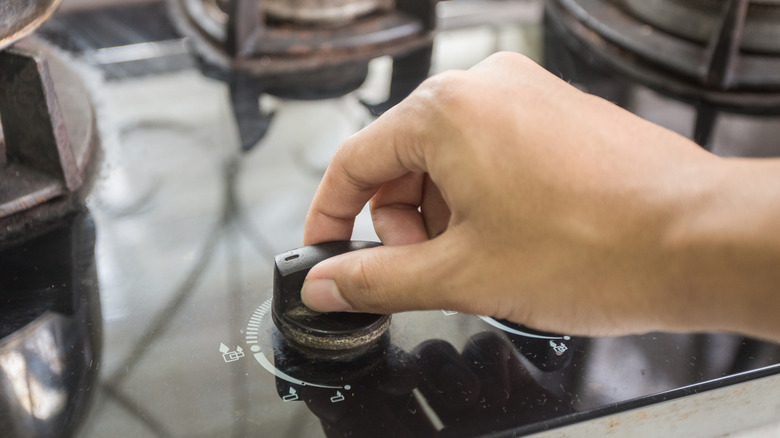
Cooking an omelet isn't possible without heat, so it's important to use the right temperature for the job. This means using a medium-low heat setting, which will ensure the eggs are cooked to the right consistency.
It may be tempting to crank up the heat to speed things up, but that would be a mistake. "If the heat in your pan is too high, your omelet is prone to overcooking, which results in a loss of moisture and an unpleasant, dry, and overly firm texture," says Nathan Lyon. Conversely, if the temperature is too low, the omelet will take a very long time to cook and delay your delicious breakfast.
Every stovetop is different, but there are general guidelines you can follow to ensure that your burner is set to medium-low heat. Start by finding the halfway point on the dial. This is considered medium heat, so you'll want to turn the dial just below this mark. Typically, it will take about two minutes of preheating for your pan to reach the correct temperature before adding the egg mixture.
Not precooking certain omelet fillings
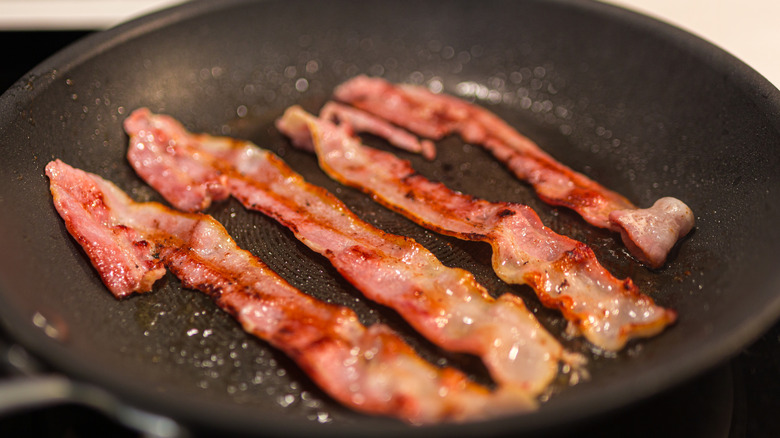
In a frying pan, eggs will cook in a jiffy — about three to four minutes, to be exact. This is shorter than the cooking times required for many omelet fillings, so to get the best results, you'll need to plan ahead and prepare those ingredients first, like vegetables. "If you do not precook your vegetable products," warns Chris Damian, "the water content can seep into the omelet." Even worse, neglecting to precook meat fillings can increase the risk of food-safety issues.
To precook vegetables like onions and bell peppers, briefly sauté them in a frying pan with butter until they've softened. Leafy greens like spinach, arugula, and kale should also be sautéed until wilted. For high-moisture vegetables like mushrooms and tomatoes, you'll want to fry them until their water has evaporated. Slicing them thinly will speed up the process and help them cook quickly.
If you're using raw meat like bacon, precook it until it's safe to eat before adding it to the omelet. Similarly, heat frozen meat products like breakfast sausage according to the package instructions prior to gracing your omelet with them. However, ready-to-eat deli meats are an exception here, as cold cuts like sliced sandwich turkey or ham can be chopped up and added directly to the eggs.
Adding too many omelet fillings
More isn't always better, especially when it comes to omelets. If you add too many fillings, the fold of the omelet will be more likely to break, says Nathan Lyon. Even if the omelet stays intact, "it can become quite difficult to handle," he adds. Overfilling also increases the risk of uneven heating, potentially causing some ingredients to be warmer than others.
To avoid weakening the structure of your omelet, use ⅓ cup of filling for every 2 eggs. You can use this guideline to determine the amount of filling you should precook in advance, but if you have too much, don't try to stuff it all in your omelet. Instead, serve the extra filling as a side dish, or save it for future omelets; like all cooked foods, the fillings should last in the refrigerator for three to four days. While you're at it, stick to only two to three ingredients when choosing omelet fillings. This will ensure that the flavors of each ingredient in the omelet will be allowed to shine.
Handling the eggs incorrectly
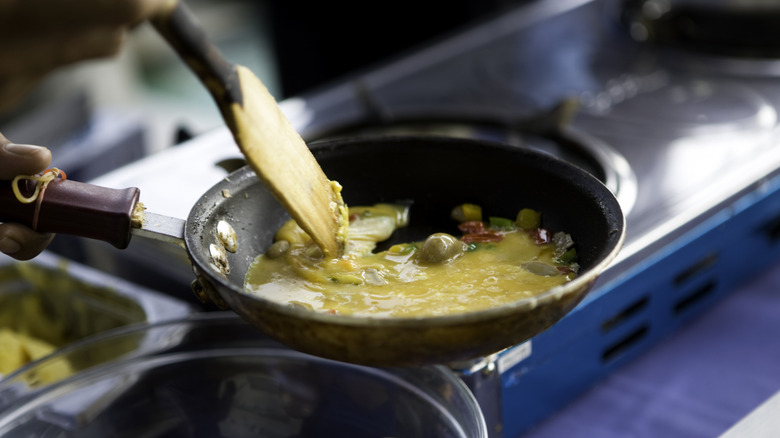
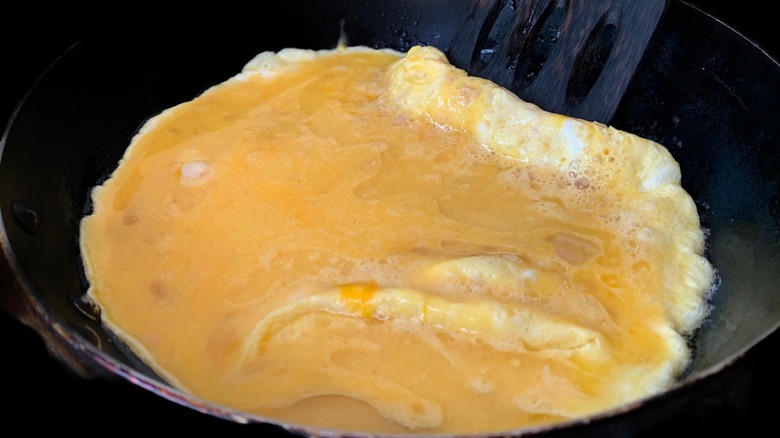
The way you handle eggs in the pan will determine the success of your omelet. After all, if you overmanipulate the eggs, they'll be less likely to spread and heat evenly. At the same time, it's not a good idea to pour the whisked eggs into a hot pan and leave it be, because the cooking process does require some handling.
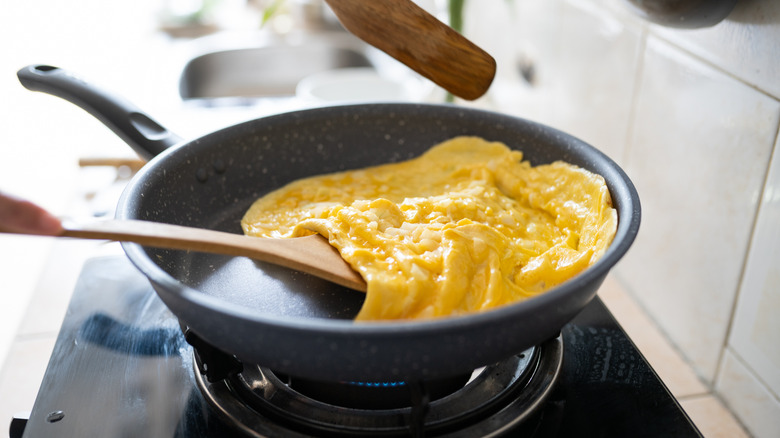
When the eggs first hit the pan, they'll begin to cook at the edges; use a spatula to immediately move these cooked edges toward the center. Next you'll need to move the pan itself, according to Nathan Lyon. "Lifting and tilting the pan frequently, while lifting the edge of the egg with a rubber spatula, allows for any uncooked egg to run under the cooked egg in the pan, so it sets and cooks evenly with minimal stirring," he says.
Once the eggs spread into a softly cooked layer, leave it alone for one or two minutes. If the eggs start to look bumpy, use the spatula to gently press them down. The egg layer doesn't need to be perfectly flat, but it should hold its circular shape and be free of big wrinkles.
Adding fillings to the omelet too early
Filling an omelet might be the best part of making the dish. However, adding the fillings early won't necessarily speed up the cooking process. If you take this step too soon, the eggs might still be undercooked, causing the fillings to displace the egg mixture and be almost directly exposed to the pan's cooking surface. By the time the eggs are cooked, the vegetables and meat will be embedded within the omelet, potentially ruining the structure of this egg dish.
The key to avoiding this omelet mistake is simple: patience. Wait until the eggs are about 75% set, so that the top looks somewhat wet but the edges and bottom are cooked. You can also give the pan a quick shake; if the top does not move, it's time to add the fillings. Spoon the fillings on only one half of the egg circle, leaving space along the rounded edge to help the ingredients stay in the omelet.
Folding the omelet too soon
After adding fillings to an omelet, don't be so quick to fold over the other half. This can make it difficult for the top of the eggs to finish cooking. Plus, if you've used cheese as a filling, it won't have a chance to properly melt if you fold and serve the omelet too quickly.
Instead, leave the omelet open-faced and cover the pan with a lid, letting everything cook for about one minute longer. If possible, use a lid made of glass so that you can easily check the omelet. This step is particularly helpful if you've added cheese to your dish, as the trapped steam will melt it just right.
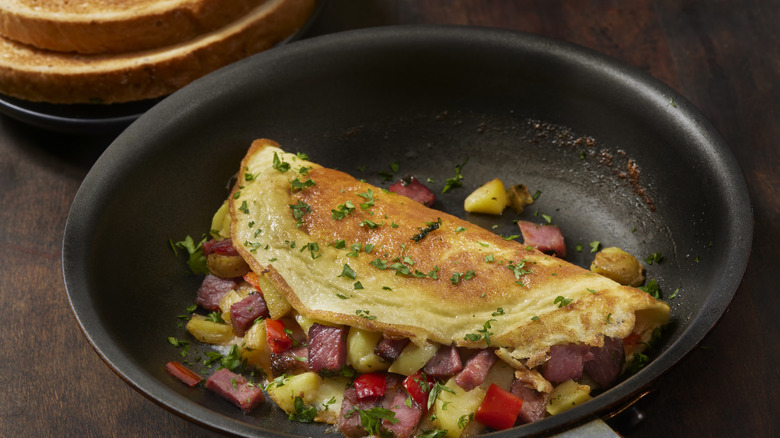
Once the top of the eggs is set and the cheese is melted, remove the lid from the pan. Fold the empty half of the omelet on top of the fillings, gently pressing it closed. Generally, this is easier to do with a wide spatula. After you've folded the omelet, it should look like a half circle.
Cooking the omelet for too long
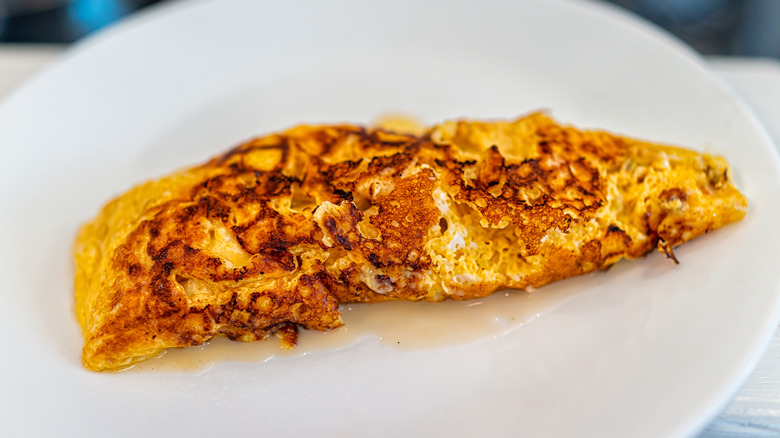
There's nothing worse than following the best omelet tips, only to end up overcooking the dish. This can make the egg portion burnt, rubbery, and unpleasant to eat. Avoid this blunder by looking for telltale signs of a properly cooked omelet. "You can tell an omelet should be removed from the pan when it turns into a nice golden color and is fluffed up along the edges," says Sean Olson. Don't worry if there are still some spots that are only partially cooked, as the omelet will continue to cook after it's taken off the heat, he adds. The omelet should also release itself from the pan, making it easy to scoop out with a spatula.
It's worth noting that many of the aforementioned tips will help prevent ending up with an overcooked omelet. The most important guideline is using medium-low heat to cook the eggs. If you're using high heat, the bottom of the eggs will cook faster than the top — and by the time the top is ready, the bottom will be overcooked. You can also lift the edge of the omelet while it's cooking to check the bottom. If it's starting to stick to the pan or is getting brown, reduce the heat on your stovetop.