The Ultimate Guide To Wallpapering Your Kitchen
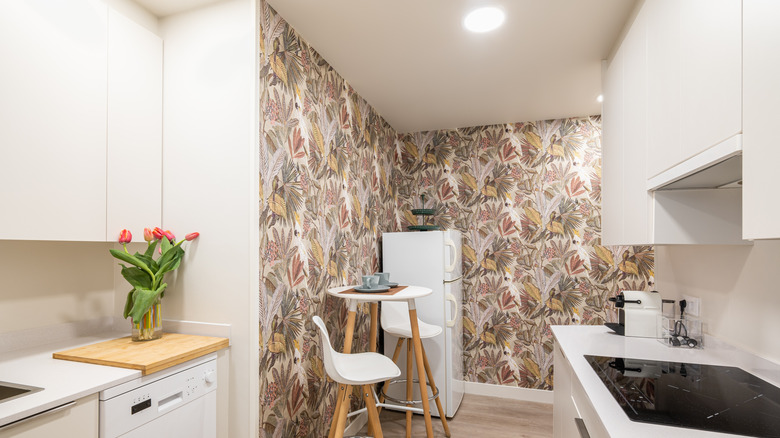
When you hear the word wallpaper, where does your mind drift to? Perhaps a dreamy focal point behind the bed or abstract florals in the powder room? But the virtues of wallpaper don't end there — not when it can transform your kitchen beyond imagination.
The high volume of steam and humidity produced in the average kitchen means that this room is generally not thought of in conjunction with adhesive wallpapers. But with a strategic approach, you'll find durable heat-resistant materials, inspiring designs that can make the smallest of kitchens look airier, and cohesive ways to tie your kitchen decor together in visual harmony. Need proof? Meetu Akali, interior designer and founder of Studio Momo, and Mehek Malhotra, founder of Giggling Monkey Studio, want you to know that there is a bright world of possibilities lying in wait. Together, they have devised an end-to-end kitchen wallpaper guide to help you transform this room into a culinary haven.
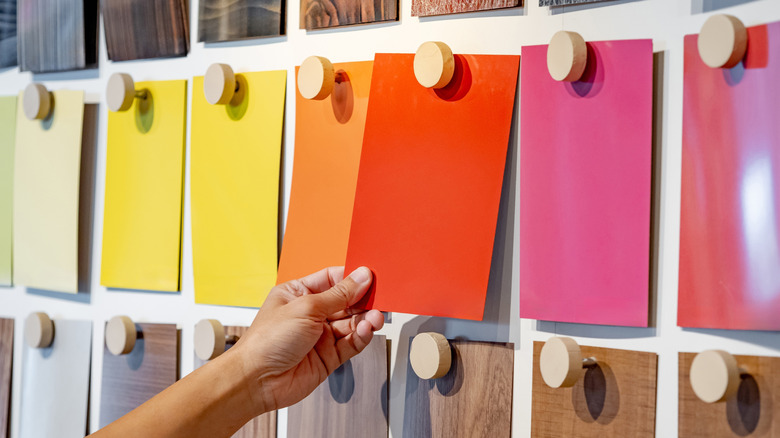
Look for design inspiration to match your personal aesthetic

With endless options to choose from — solids, botanical, geometric, and designer motifs — how do you find the perfect wallpaper design for your kitchen? According to Mehek Malhotra, inspiration can be found anywhere. "Your gut. Or your grandmother's tiffin box. Or the label on that one jam jar you almost bought just for the font," she muses. In her experience, the wallpaper of your dreams can be inspired by the tiniest thing that makes you feel something. "Pick a feeling and design from there," she advises.
Meetu Akali, meanwhile, has found that the kitchen can serve as an intimate sanctuary, thereby making the choice of wallpaper extremely personal. Perhaps you obsessively bookmark colorful kitchen designs or maybe your heart has been lured by the siren song of all-white kitchen designs. She believes that identifying your style is the best place to begin, ideally by choosing something that feels right for you and your family. It is also important to keep the color palette of the entire space in mind — this is especially important in open-plan kitchens to ensure that the wallpaper works together with the furniture and the decor of the dining and living areas.
Choose the right location
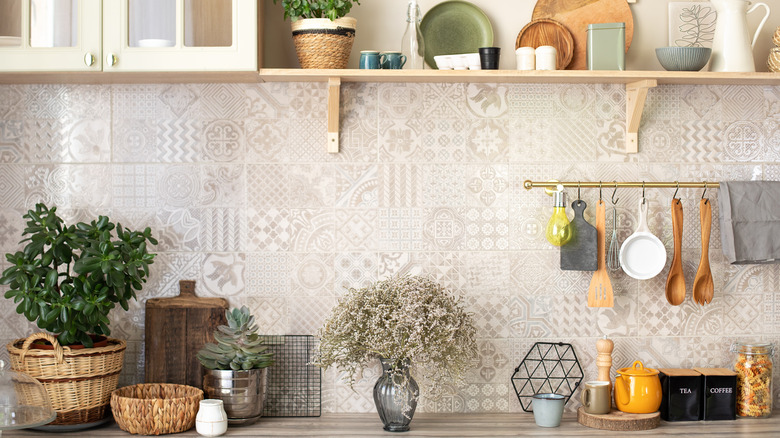
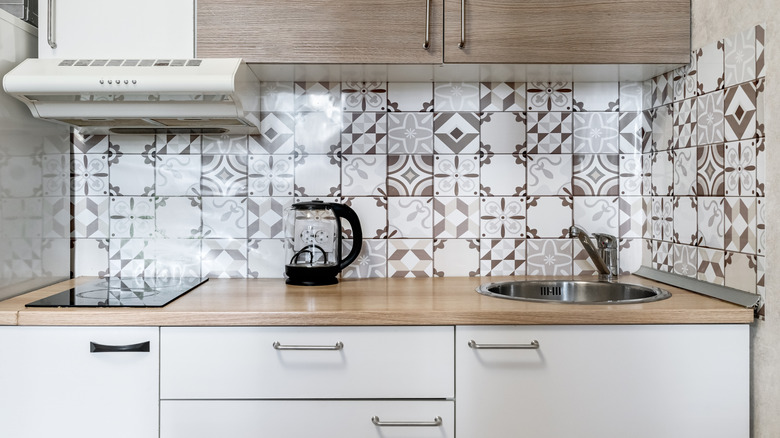
Once you have a design reference in mind, there are endless ways to get experimental. "You can create a focal point by creating an accent wall or use a softer pattern that covers the entire kitchen," Meetu Akali says. With a host of moisture-resistant, washable wallpapers available on the market, you can also choose to get creative with your backsplash.
And your options don't end there, either. Any patch of space that is out of the line of fire of direct cooking is fair game. The area behind open shelves and in the space above the cabinets till the ceiling can be easily refreshed with wallpaper. The inside area behind cabinetry also makes for a worthy candidate. However, it helps to proceed with caution in certain areas of the kitchen. "Unless the wallpaper is expressly classified as heat- and fire-resistant, avoid placing it directly over cooktops or next to open flames," Akali says.
Choose lighter colors for small kitchens
In the quest for the ideal wallpaper, it helps to bear in mind that smaller kitchens require special care. You'll want to opt for colors that can make a cramped space feel airy and light, creating the illusion of space — bonus points for arming yourself with expert-approved tips for small kitchens. "If your kitchen is tiny, don't trap it in dark, moody prints unless you're going for 'Parisian jazz bar at 2 AM'," Mehek Malhotra intones. In her book, muted greens, stripes, or hand-drawn fruits are the best choice. "Avoid patterns that feel like they're yelling. You want your wallpaper to whisper, giggle, maybe hum; not scream over your blender," she says.
So, what's on the no-no list for smaller kitchens? Meetu Akali's kitchen wallpaper guide rules out darker colors — this would include brown, deep red, and black. Instead, she finds that a smaller kitchen can come to life with neutral colors or a lively and fun color selection. "Small, delicate prints work best for a small space, making it more warm and inviting," she surmises.
Tie your kitchen decor together with wallpaper
Kitchen decor is where you can truly let your imagination run free — especially once you find out that countertop decorations can be beautiful and functional. But with wallpaper entering the chat, you need to rethink and consider whether it works together in harmony with your kitchen decor. "Think of your wallpaper as the host of the party. Your decor? The guests. They don't all need to match, but they should get along," Mehek Malhotra. She believes that you can work towards one cohesive goal by coordinating colors from the wallpaper across the kitchen, including some common items like kitchen towels or salt and pepper shakers.
For Meetu Akali, there is endless creativity in playing with different hues of the same color. The method involves picking the color of the kitchen cabinets and then finding a lighter or darker hue of the same shade for the wallpaper. This will help all the elements come together.
Choose lighting that complements your wallpaper
Restaurants use lighting to influence diners by creating a specific ambiance, and why should your kitchen be any different? But even a showstopper wallpaper can fall short of its intended impact if it is not backed up by a crucial player. In this case, the key is sufficient light that will bring out its colors. "Lighting plays a huge role in how wallpaper looks and feels, especially in a kitchen where natural light can be limited," Meetu Akali observes.
If the natural lighting is dim, you will want to consider other forms of ceiling lighting to give your wallpaper the spotlight that it truly deserves. "In dim kitchens, the goal is to amplify existing light," Akali explains. In these cases, she finds that it helps to opt for brighter colors. Ideally, soft whites, warm-toned creamy shades, pale grays, or pastels. However, it is imperative to steer clear of dark wallpapers with a matte finish. If the kitchen is poorly lit, these wallpapers will make it feel smaller or congested. "If you love bold or dark tones, use them as an accent wall paired with lighter surrounding walls or cabinetry," she advises.
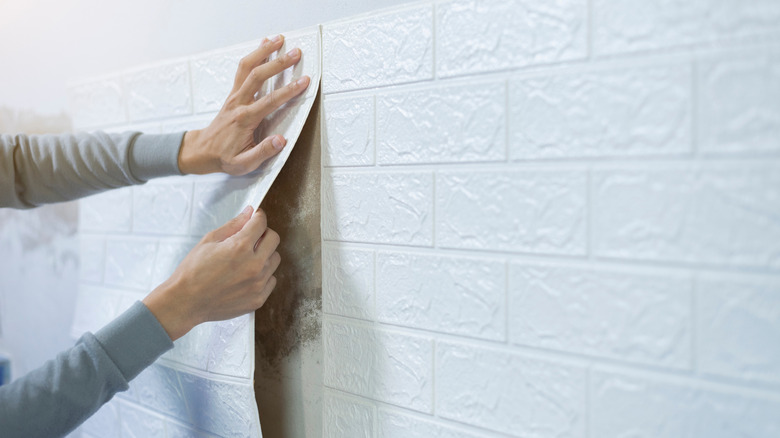
Opt for durable materials
You may have the design of your dreams locked and loaded, but it helps to pause and carefully consider the material you are working with. Paper wallpaper is popular but given the typical dampness and steam in the kitchen, they are more prone to damage, according to Meetu Akali. "Additionally, fabric wallpapers are not recommended for such high-moisture locations, unless they are specifically treated. Materials that are washable and made especially for bathrooms and kitchens should always come first," she advises.
According to Akali, you should first think about durability and resistance to grease and heat. "Vinyl is a great option for kitchens as it is easy to clean, water-resistant, and resistant to heat and moisture," she says. Non-woven wallpaper is also suitable as it's durable and easy to maintain. Made from a mix of natural and industrial fibers, non-woven varieties are produced with different treatments and are made to last. This type of wallpaper is also known not to crease or tear easily, leading to easier application.
Prep the walls
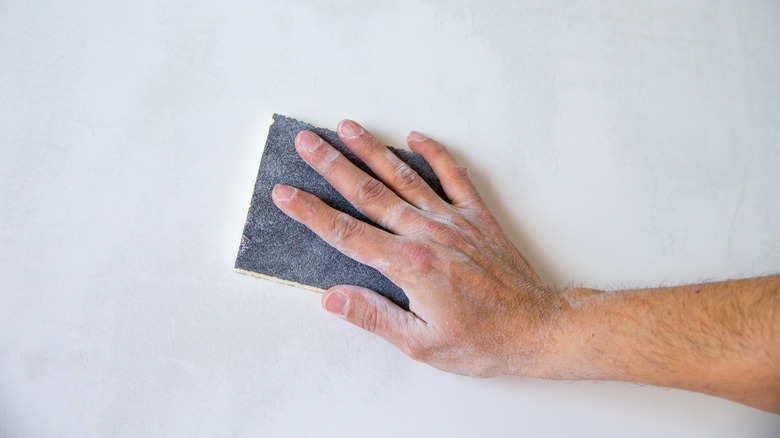
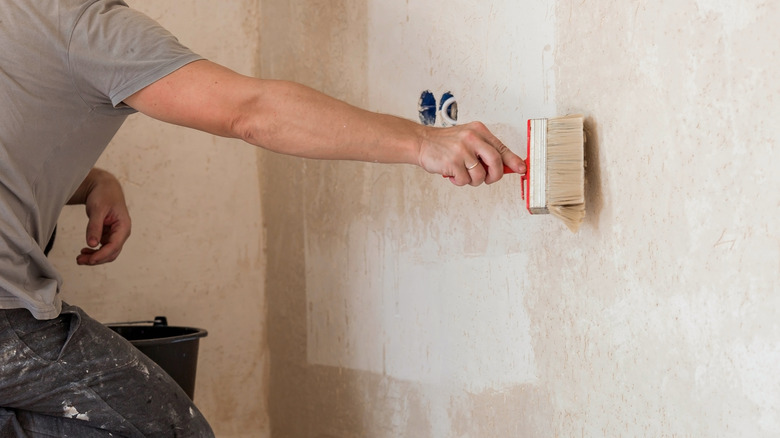
You'll be hard-pressed to come across any kitchen wallpaper guide that doesn't extol the importance of prepping the walls beforehand in bold, screechy font. After all, adequate wall preparation is key for maintaining the longevity of wallpaper. For Meetu Akali, starting with a clean wall is paramount. Any dirt, dust, or sediments need to be removed as they can prevent proper adhesion. "Sand down any rough spots and use a primer designed for wallpaper application for best results. This is particularly crucial in humid areas like kitchens," she advises.
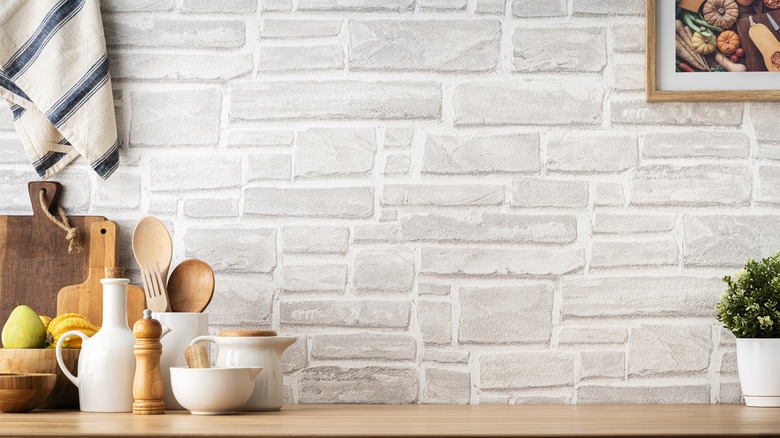
It also helps to consider whether your chosen spot is a good candidate for the wallpaper. Akali has found that rough or porous walls — think plaster, stucco, or brick –are not the right choice as they can potentially result in peeling. Beyond aesthetics, you need to think about high humidity. Given the steam that is usually generated in this room, any gaps in adhesion between the wallpaper and textured walls can serve as a handy pocket for mold and fungus to call home.
Address any unevenness in the walls beforehand
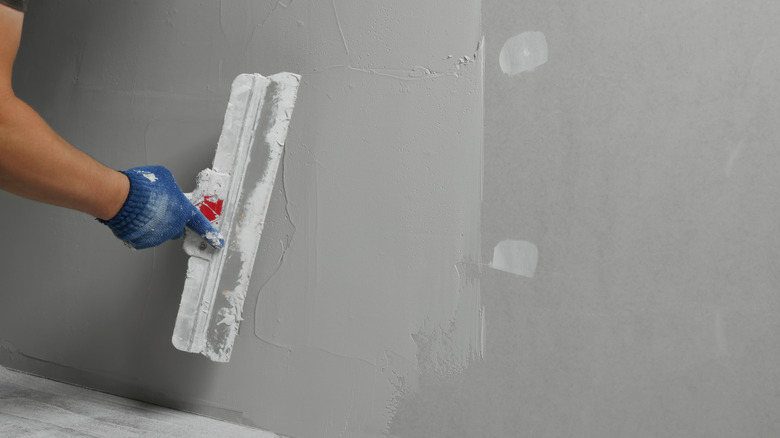
If you are working with uneven walls, do not lose heart — there are ways to salvage the situation and bring your kitchen alive with a cheery, mood-enhancing wallpaper. To create a smoother base, Meetu Akali has found that it helps to use a filler or skim coat. Fillers are commonly available at hardware stores and are used to fill cracks and gaps in the wall, while a thin layer of skim plaster will help smoothen the surface. "This will allow for stronger adhesion and a neater finish," she says.
If you aren't able to flatten the walls, Akali believes that it is still possible to produce a beautiful result using the right type of wallpaper. In these situations, you want to use wallpapers that can easily hide imperfections, such as those that have a certain texture or wallpapers with uneven prints. "These designs shift attention away from the unevenness and also lend character to the room," she says. However, you'll want to bear in mind that not all types of wallpaper may be equally forgiving. "Do not use wallpapers with gloss or detailed finishes, because they tend to accentuate flaws instead of concealing them," she cautions.
Maintain a vigilant eye for any remnants of old wallpaper
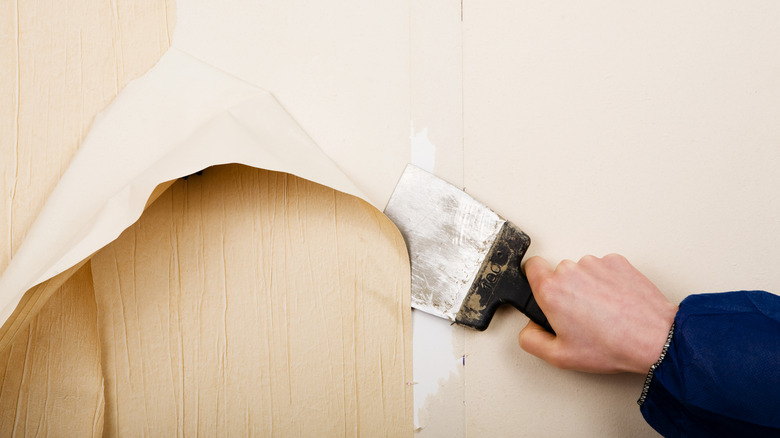
While low-quality adhesives can peel off the wall with little resistance, some leftover remnants can be stubborn. Fortunately, help is at hand. Meetu Akali suggests: "Make tiny holes in the paper using a wallpaper scoring tool, which is a small, handheld roller with spikes. This improves the effectiveness of whatever solution you apply, which is particularly helpful for waterproof or vinyl wallpaper."
Akali also recommends reaching for a removal liquid. You can either choose to pick one off the rack or opt for a DIY version by combining fabric softener or vinegar with hot water. To effectively loosen the adhesive, it is recommended to let it soak for around 20 minutes. Then, remove the wallpaper with a scraper, but make sure not to damage the wall. If you have a particularity difficult residue, Akali recommends baking soda solution or just sponge with some soap and warm water.
Calculate the amount of wallpaper you need accurately
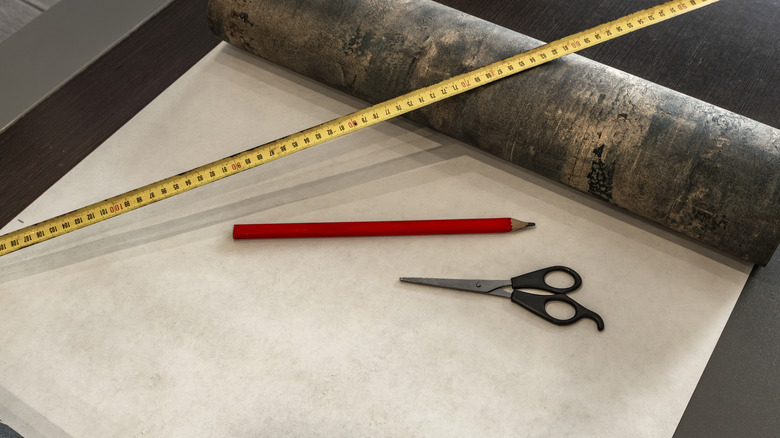
With the wallpaper design of your dreams added to cart and the prep work behind you, there is just one crucial step that stands between you and your kitchen wallpaper, and that is to ensure you are working with the appropriate amount of wallpaper. "Miscalculating wallpaper can either leave you short mid-project (frustrating!) or with expensive leftovers." Meetu Akali cautions. For accurately calculating your wallpaper needs, she has an easy formula to help: Multiply the height and width of the wall to find the total square footage of wallpaper needed for each wall.
Looking for a helping hand? You'll find a host of online wallpaper calculators to take the guesswork out of the estimate. Simply measure your walls from corner to corner and fill in the numbers in the designated areas. Beyond calculating the rolls of wallpaper you will need to get the job done, some online options also draw up an estimate of the required hours you'll need to cover the area you have in mind.
Have the necessary tools at hand
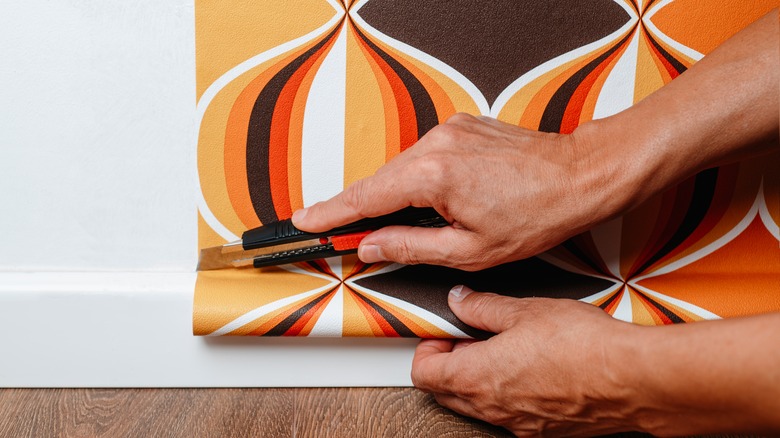
Even the most accomplished handyman is handicapped without the right tools, and your kitchen makeover project is no different. Before you change into gray overalls and get down to wallpapering business, you'll want to quickly pop by the hardware store to stock up on any essential tools you are missing.
For starters, you will need a roller brush to evenly apply adhesive to the wall. To effectively cover the entire surface that you have in mind, you will want to opt for the correct nap length — or the thickness of the roller. Thicker nap lengths can hold more adhesive at a time, but you will find that the standard 3/8-inch nap works well for the task at hand. "A sharp wallpaper cutter or utility knife is important for cutting edges cleanly around corners, ceilings, and baseboards," Meetu Akali says. To really drill down on any excess left hanging in wall corners, you will want to have a triangular cutting edge at hand. Despite appearing as a regular cutting edge, this version comes with an additional protruding side that will allow sufficient grip as you efficiently trim away any excess with a cutting knife.
Ensure proper alignment
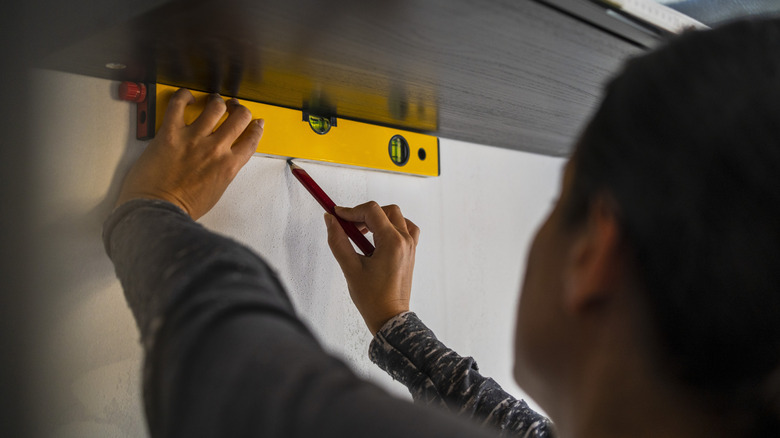
Vertical alignment can make or break your wallpaper, but certain types of wallpaper can be more demanding. Meetu Akali believes that special care is required with repetitive or intricate patterns as they demand very precise placement so you can attain the right flow.
If you are working with patterned wallpaper that will need to be repeated to fill the surface of the wall, it is essential to draw a straight line that will ensure perfect vertical alignment. For this purpose, it's best to use spirit levels. Spirit levels resemble a ruler and have an encased bubble that indicates whether the alignment you adjusted is dead straight.
Once you have the reference point for the first strip, Akali recommends arranging each piece by choosing a recognizable element and using it as a guide. "I strongly advise completing some dry runs before gluing, so that you may make any necessary tweaks and get the perfect alignment without having to worry about the glue hardening," she adds.
Ensure optimal adhesion with a primer
Once you have ensured your chosen walls have been prepped and you have the correct amount of wallpaper at hand, the last stumbling block that needs to be conquered is ensuring that it adheres adequately to the wall. For stronger adhesion, Meetu Akali believes that it is essential to use quality primer on the wall — especially in sweltering parts of the kitchen, such as the area around the sink and next to the stove.
Just like how the wall soaks the first coat of paint and leaves behind just a light shade, primers ensure that a raw wall doesn't absorb all the water from the adhesive. When applied adequately, the wallpaper glues to the primer rather than the wall. This also means it can be easily removed when you are in the mood for a design refresh – especially if you are looking to steer clear of these outdated kitchen design trends.
Prevent bubbles from popping up
You finish sealing in the last corner of the wallpaper and step back to admire your handiwork — only to find a host of unsightly bubbles derailing the smooth finish you were hoping for. While air bubbles can easily get trapped behind the adhesive backing of wallpaper, there are ways to work smarter by following Meetu Akali's golden rule for applying wallpaper. "Begin by pressing the wallpaper in the center of the sheet and move outward toward the edges. By doing this, any trapped air or extra glue is forced toward the seams for release," she says.
It is also crucial to use long, smooth strokes. "Consider it similar to using a squeegee to push out water or smoothing icing on a cake. Consistent, smooth strokes are more effective than scrubbing or quick, jagged motions," she adds. You will also want to resist the temptation to flatten the wallpaper over the wall all at once — instead, opt for precise and doable sections of 1 to 2 feet at a time. The angle is important as well. "While working, keep the brush or smoother at a 45-degree angle to the wall. This makes it easier to apply pressure consistently without causing the wallpaper to scratch or wrinkle," she says.
Opt for regular maintenance
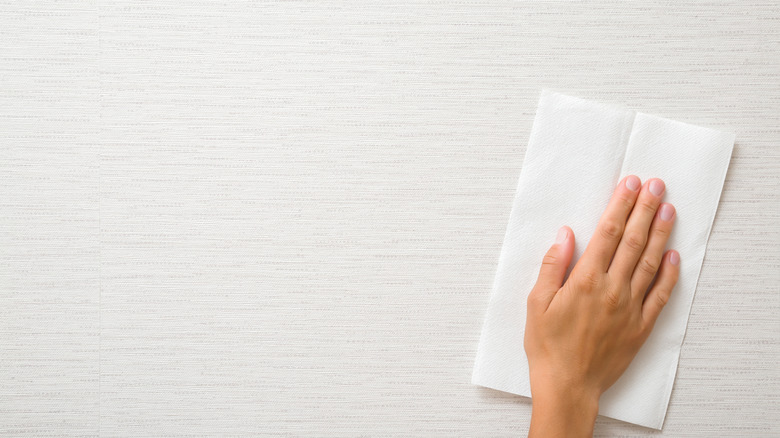
Kitchen maintenance is never perched on the top of anyone's to-do list, but it does help to know how to make the worst kitchen items easier to clean. With your wallpaper sealed in for the long haul, the last piece to be slotted into the jigsaw puzzle is the appropriate maintenance. "Use as little water as possible at all times, because water can be harmful to the adhesive and trigger the wallpaper to peel," Meetu Akali cautions. Instead, she prefers using a vacuum cleaner with a soft brush that easily cleans dust. Alternatively, use a sponge dipped in a mix of water and detergent and wipe gently. "The sponge must not be soaking wet, but only slightly damp," she adds.
Bleach or abrasive cleaners should never come near your wallpaper as they can remove color, ruin the finish, and destroy the wallpaper. As a rule of thumb, you will find that mild cleaning will maintain the longevity of your wallpaper and keep the design shining bright for years to come.