Hard Vs Soft Caramel: What's The Actual Difference?
Every sweets lover has their own opinion on caramel — beyond whether you pronounce it as "care-a-mel" or "car-mel," you might prefer it in a soft and chewy form or as a crunchy hard candy. Wondering what allows it to take on these different forms? The difference between hard and soft caramels mainly has to do with the temperature they're cooked to, as well as optional extra ingredients.
All types of caramel, from salted caramel sauce to solid candies, start with white sugar heated in a pot until it melts at 320 degrees Fahrenheit. This can be done using a "wet" or "dry" method. The latter involves heating sugar by itself, while the wet method combines it with water, which helps to prevent burning — one of the most infamous mistakes to avoid when making caramel. Around 340 degrees F, the sugar starts to brown and caramelize, taking on a light amber color.
From there, you can cook the syrup darker and darker, giving it a progressively richer, more toasted flavor to match, until it reaches a deep brown color with slightly bitter notes. Whether you prefer a lighter taste or think dark-colored caramel is worth the risk, the stage you cook it to also changes its texture. Hard caramels are cooked for longer to drive off moisture and produce a brittle crunch, while soft ones are cooked to a cooler final temp and contain dairy to further soften them.
Gentler cooking and added dairy make softer caramels
A caramel's texture partially relies on the different stages of candy-making. Candies, from lollipops to fudge to our good friend caramel, all start with sugar boiled to a certain temperature. The longer the sugar syrup cooks, the more water is driven off, resulting in a progressively more solid texture.
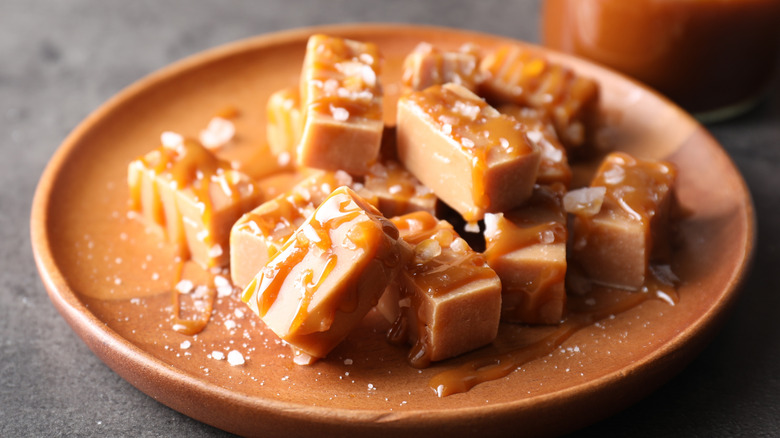
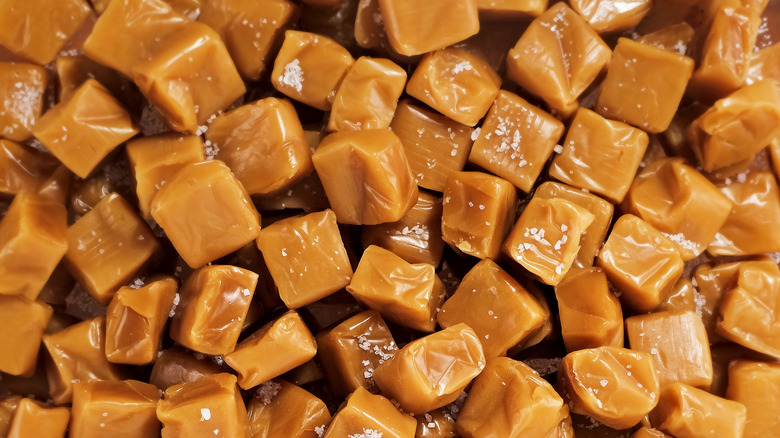
Soft caramels are usually made using the wet method, and cooked to the "firm-ball" stage at 245 to 249 degrees Fahrenheit. You can guess that this gives the candy a soft yet firm bite with a chewy quality. "But wait," you might say, "I thought sugar had to be heated to 320 degrees to caramelize." Right you are — to cool the hot syrup down after it reaches your preferred color, it's combined with room-temperature or slightly warm dairy ingredients.
Adding milk, cream, and/or butter is a tip to make the perfect caramel sauce or soft candies. It halts the cooking process, preventing the syrup from darkening further or burning, and the fat and milk proteins make the taste and texture richer. You'll see the candy transform from a runny syrup into a thick, gooey sauce. To take it from flowing to firm, monitor the temp using an analog or digital candy thermometer and take it off the heat the second it hits the firm-ball stage. Pour it into a pan, let it cool until set, and cut into pieces, and you've got meltingly soft homemade chews.
Hard caramels need hotter temperatures and less added fat
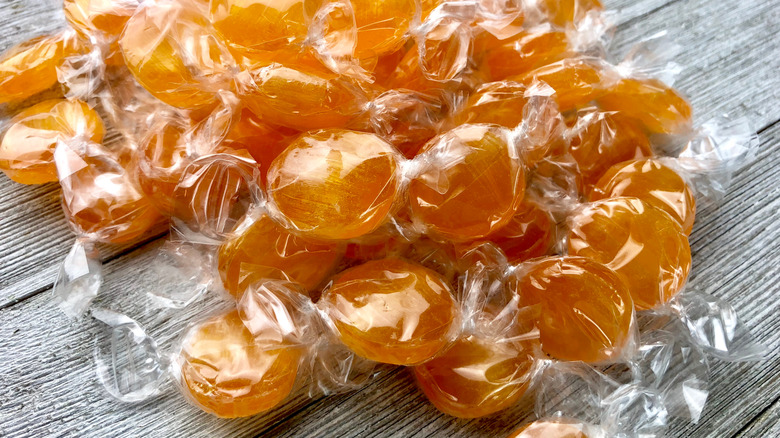
In contrast to their soft counterparts, hard caramel candies are cooked to the "hard-crack" stage at 300 to 310 degrees Fahrenheit. This evaporates most of the syrup's water content, and when cooled, the candy turns hard, crunchy, and breaks under pressure.
This type of caramel also uses way less dairy, or even none at all, so the syrup solidifies quicker and becomes brittle rather than bendable. Since hard caramel needs to be cooked hotter, there's no need to significantly cool it down with extra ingredients, though you certainly can add a splash of cream. Using zero dairy, you can create thin, glass-like caramel shards, while a dairy-enriched mixture makes for hard yet creamy and opaque candies — the kind your grandparents might give to you in individual wrappers.
Both the wet and dry methods work for hard caramel, and since it can be made with just sugar (and you easily reach the hard-crack stage just by caramelizing it), it could be argued that it's simpler to make than soft caramel. However, without dairy to cool the mixture, you need to monitor the temperature of hard caramel even more closely than with the soft kind (though both require a watchful eye). To prevent burning, you might even dunk the bottom of the pot in ice water as soon as the syrup darkens to your desired color.