10 Mistakes You're Making With Homemade Coffee Creamer
Coffee is a universally loved beverage with over 2.25 billion cups consumed on a daily basis around the world. There are many ways to enjoy your daily cup of coffee, but a favorite among many is with some sort of creamer. In fact, only 18% of people prefer drinking black coffee. And while you can certainly find a variety of coffee creamer brands offering a wide selection of flavors, making your own coffee creamer opens up a world of possibilities. From holiday favorites to botanical-inspired, there's no shortage of flavor combinations you can experiment with. Making your own coffee creamer also allows for complete personalization, so you can customize your creamer in line with any sort of dietary restrictions or preferences you may have.
You can scour the internet to find the best tips for making homemade coffee creamer, but it's just as important to know what not to do in order to successfully make a delicious batch of coffee creamer. Even though a recipe may seem simple at first glance, there are so many factors that play a role in how your recipe turns out. After a handful of years as a barista and someone who regularly makes their own creamer at home for health reasons, I've learned a thing or two about what can go wrong with homemade coffee creamer. Between using the wrong kind of milk to not heating your creamer, these are the 10 biggest mistakes to avoid the next time you make a batch of creamer.
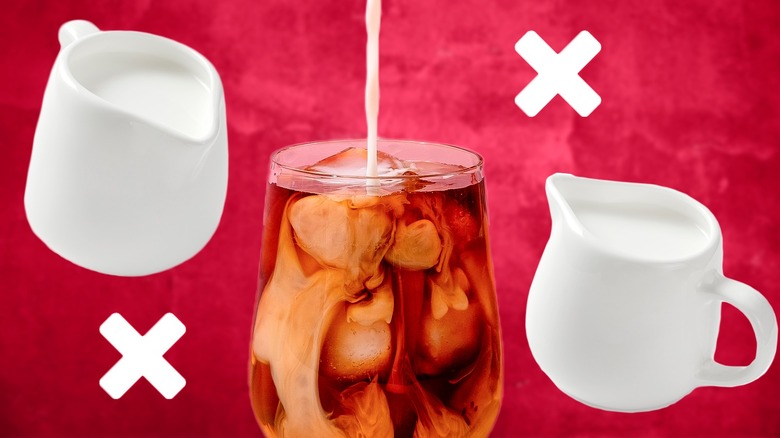
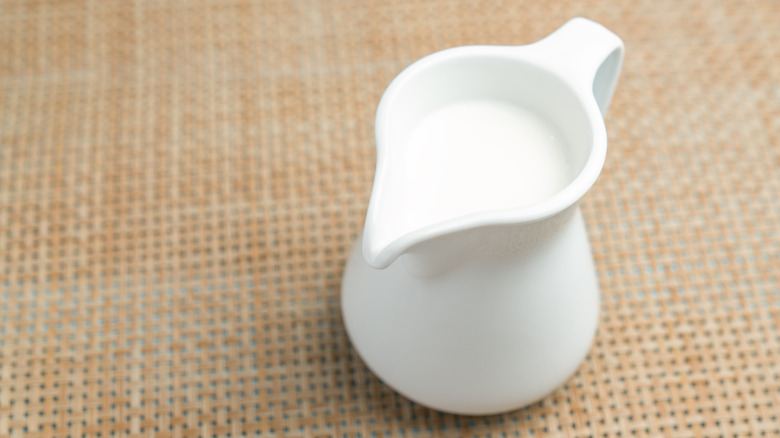
Using the wrong milk
One of the biggest mistakes when making homemade coffee creamer is choosing the wrong type of milk — both dairy and non-dairy. Since this is going to be the foundation of your creamer, choosing the wrong milk will greatly impact the consistency of your creamer. When it comes to dairy-based coffee creamers, regular milk can be okay on its own, but it will likely lack the thick, creamy consistency that is often synonymous with store-bought coffee creamer. That's why many recipes for making coffee creamer at home utilize a combination of regular or evaporated milk and condensed milk. This is due to the fact that during processing, all of the extra water in the milk is removed, leaving you with a finished product that is perfectly creamy.
However, for those who choose not to have dairy due to intolerances or personal preferences, it can be difficult to mimic the consistency of store-bought creamer with just any type of non-dairy milk. Certain brands of healthier plant-based options opt to leave out the additives like gums and vegetable oil that act as thickeners. Using these types of products as the sole foundation for your creamer can result in separated ingredients and a watery consistency that doesn't fully combine when added to your coffee or froth well. Instead, plant-based brands like Oatly and Planet Oat offer versions of their popular oat milks that are labeled as "barista quality" or "barista approved" and are typically formulated with these types of factors in mind.
Not making your own milk
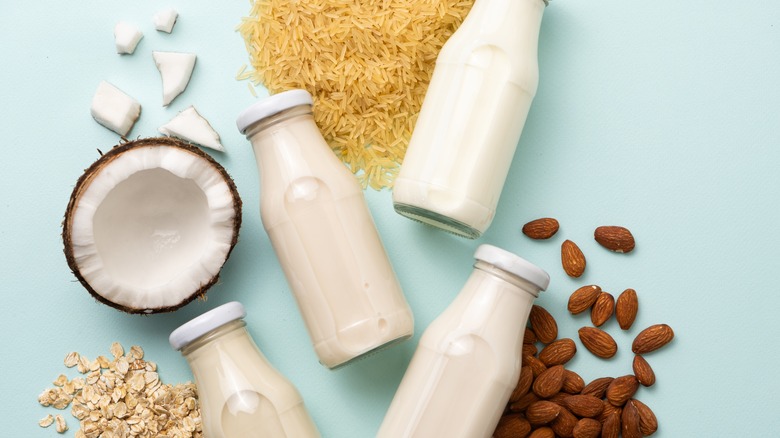
While not everyone wants to or can make their own milk, it may be an essential part of the process you are overlooking, particularly if you like to use plant-based milks. If one of the reasons you are making your own coffee creamer is to save money, making your own milk tends to be more cost-effective on average, as you can buy nuts and oats in bulk. But the biggest benefit is that it gives you greater control of what kinds of ingredients you are putting into your body. Since a lot of brands utilize vegetable and seed oils as a way to mimic a more milk-like consistency, making your own lets you skip these ingredients in favor of something else.
Making your own milk also helps you control the outcome of how your creamer tastes by choosing to add sweeteners and other ingredients to the milk itself. By doing this you may even be able to use fewer sweeteners in your creamer recipe if your milk is sweet enough as is. The consistency of your milk can also be adjusted by changing the ratio of water in your recipe. By adding less water and more nuts or oats, you'll be able to create a thicker milk with a deeper flavor profile of whatever you choose as your main ingredient. And if you avoid some of the biggest mistakes when making homemade plant milk, you'll be on your way to your perfect batch of coffee creamer in no time.
Not using a thickener
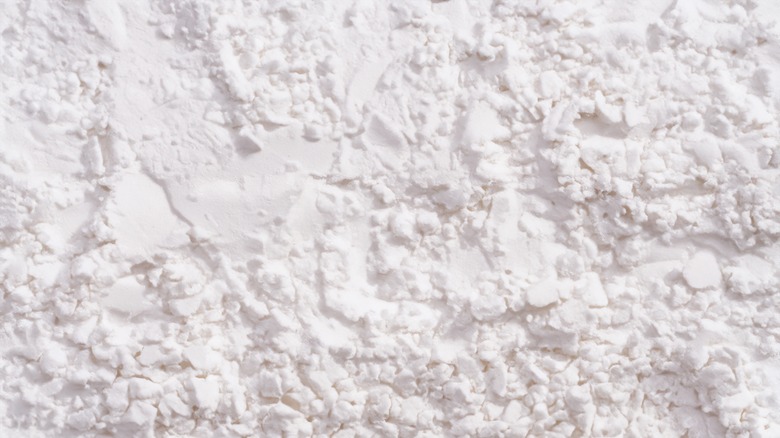
A huge, often overlooked secret to making thick and creamy homemade coffee creamer is to include a thickener like cornstarch. If you are using homemade or additive-free plant-based milk or choosing to use regular milk by itself without any condensed milk, cornstarch is the secret hack that will take your creamer to the next level. The amount you add depends on your specific recipe, but as a general rule, start small and slowly incorporate more into your milk, stirring until you get your desired consistency. Cornstarch is the key, though, as its flavor is minimal, whereas other thickeners like flour can leave a distinct aftertaste.
Another option is to use coconut cream in place of condensed milk if you are plant-based. Similar to coconut milk, just made with less water, coconut cream can be purchased in a can by itself and makes a great alternative for dairy and non-dairy lovers alike since it gives your coffee creamer a subtle coconut flavor. You can even make your own coconut cream if you are extra ambitious with a can of refrigerated coconut milk.
Adding the wrong kind of sweeteners at the wrong time
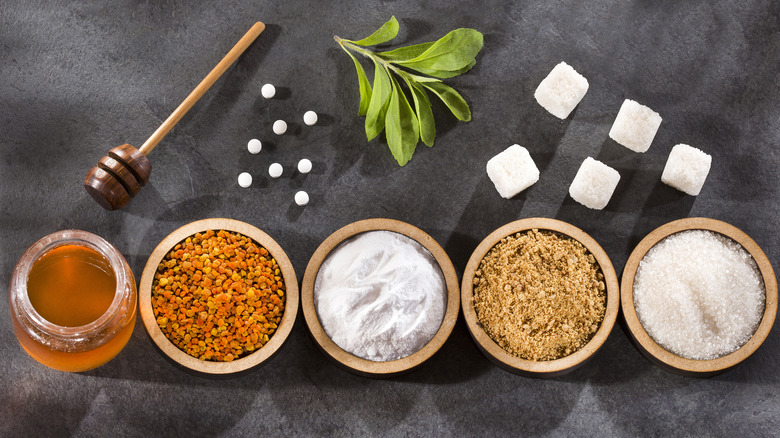
With endless possibilities for customization, making your own coffee creamer allows you to use any sort of sweetener you want, depending on your taste preferences and dietary needs. But with that said, there is a level of strategy that comes with using certain sweeteners in your recipes. Choosing the wrong time in your recipe to add in your desired sweeter will determine whether or not it fully dissolves.
Powdered sweeteners like granulated sugar or stevia and thicker sweeteners like honey, maple syrup, and mocha sauce should be added before you start heating your creamer or right after when it is still hot. Otherwise, you'll be left with sweetener sitting at the bottom of your container that will never dissolve, no matter how much you stir it. If you are using liquid cane sugar or flavored syrups, you do have a little more leniency when you add these since they easily dissolve in both hot and cold liquid.
Adding too much sweetener
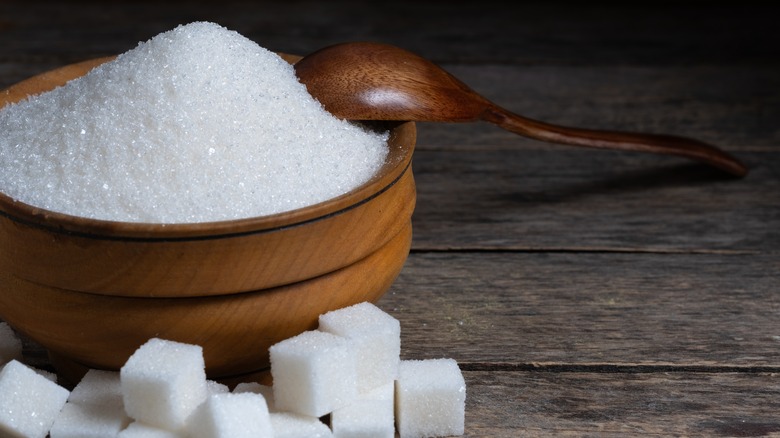
There's nothing worse than taking a sip of your coffee only to find that it is way too bitter. Except for maybe having the opposite problem and finding that it is so sweet you can't keep drinking it. Following a recipe to a tee has its place, but when it comes to sweetener, it is better to start with less than you think you'll want or what the recipe calls for. The truth is, you can always add more sweetener as you go, but you can't take any away.
Since there are many factors that can impact just how sweet your creamer actually is, there's no one-size-fits-all for the ideal amount. Everything from the milk you are using (whether it is sweetened or not already) to the strength of your specific sweetener (sugar vs. honey) can impact just how sweet your creamer actually is. That's because every sweetener has a different potency, even when comparing the same unit of measurement. Even steaming your dairy-based creamer makes it sweeter! This is because lactose — a sugar found in dairy products — breaks down when heated. So, in the case of sweeteners, less is more, at least at the beginning.
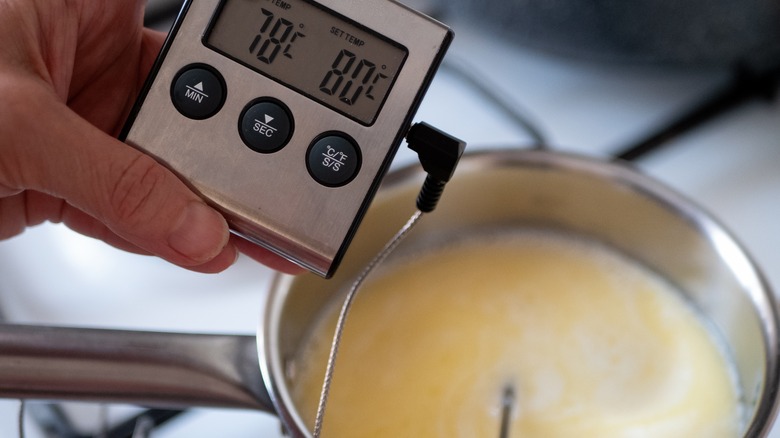
Overheating your milk
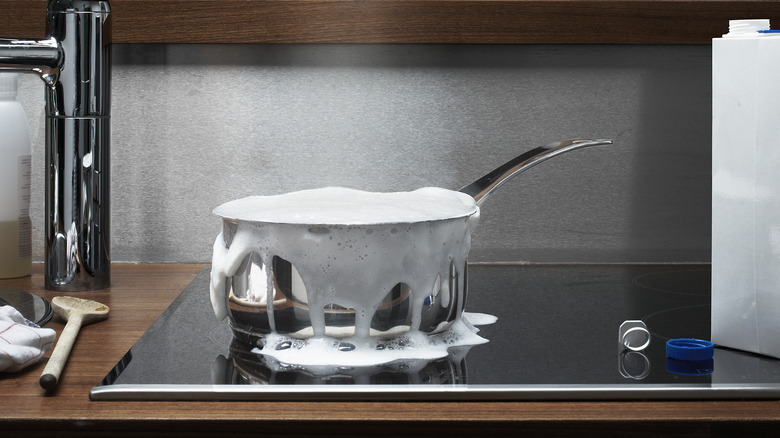
Most recipes for homemade coffee creamer require you to heat up your ingredients — including your milk — over the stove. While this is an essential step so that your ingredients can dissolve and properly combine, it also leaves room for error and can significantly impact the end result of how your creamer tastes. You'll want to be especially mindful of the temperature you heat your mixture to since overheating can break down the milk proteins past the point of no return, which puts it at risk of curdling and changes the flavor profile. When this happens, instead of getting sweeter, your milk will likely have a burnt taste that, unfortunately, doesn't go away even after it finally cools down. Overheating can also impact other ingredients in your recipe, including vanilla or peppermint extracts, since higher temperatures burn off the alcohol, diminishing the potency and further altering the final taste of your creamer.
The ideal temperature for heating milk is anywhere between 155-165 degrees Fahrenheit. Anything beyond starts to get iffy since you can start to see tiny bubbles start to form and an increase in steam, even if it hasn't quite yet reached boiling temperatures. But once you see that, it's a little too late. To avoid this, a milk thermometer that you can stick right on your pot will take the guesswork out of the entire process.
Not heating your creamer
You may be tempted to add all your ingredients to a bowl, stir, and move on instead of messing around with heating your creamer at all. However, heating your ingredients is worth the effort and watchful eye as it's a crucial step in the process for both flavor and consistency. Not only does it help specific ingredients dissolve and combine, giving your creamer an even flavor throughout, heating your creamer gives any additions like cornstarch an opportunity to thicken your creamer to your desired level of creaminess.
Now, you might be wondering whether or not you have to heat up your homemade creamer every time you use it. While you certainly can, a good homemade creamer shouldn't need more than a little shake before using to distribute any mild separation that may occur. After all, store-bought creamers are usually either shelf-stable or kept in the fridge and meant to be used as-is. In fact, using cold cream doesn't affect the temperature of your coffee and may even keep hot coffee warmer than if you steamed it!
Not letting your creamer cool
You may have heard mixed messages on whether or not you should put hot food directly into the fridge before letting it cool. While experts say that it's perfectly fine to skip the cooling process for most foods, you should let your creamer cool between the stovetop and the fridge. Otherwise, it can impact the taste of your creamer and its consistency.
This is due to the fact that every minute it is still hot, your creamer's ingredients continue to mix together, creating more depth in its flavor. Plus, if you're using a plastic container made with BPA, pouring hot liquid directly into the container can potentially cause harmful chemicals to leach into your creamer. So how long is long enough? Since you'll want to wait until it reaches at least room temperature (it doesn't have to be cold), approximately 10-15 minutes is a good rule of thumb, but that might differ depending on the weather and the temperature of your house.
Skipping blending
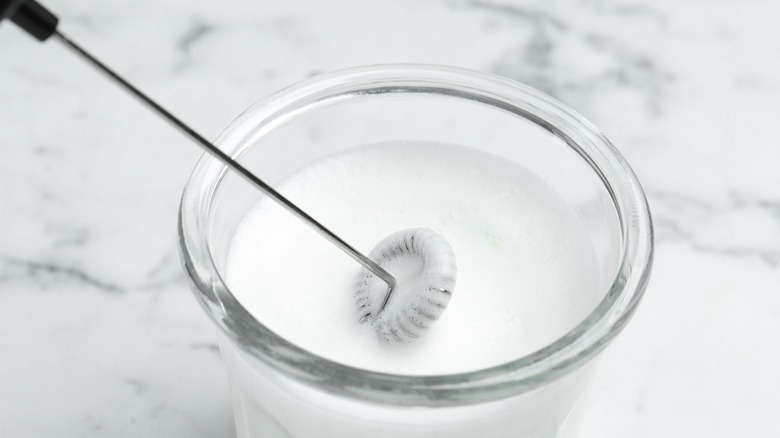
Although you can just pour your creamer directly into your container, mixing your creamer with a tabletop or immersion blender right beforehand can help create a thicker, creamier consistency. Then, once you put it into the fridge, the cooler temperatures help set the consistency, giving you the ideal level of creaminess the next time you pour it.
Even if you don't opt to blend the entire batch of coffee creamer before putting it in the fridge, you can blend it each time you use your creamer — either before or after you add it to your coffee. A simple milk frother is best if you are using it for individual use as you can better control your consistency and type of foam with each cup. While a lot of people have heard of using a milk frother for plain milk, frothing your creamer elevates your cup to one worthy of a coffee shop. If you are considering going this route, familiarize yourself with the best types so that you know all the different tips and tricks for using a milk frother before you make a purchase.
Storing your creamer wrong
You could follow the recipe perfectly and avoid all of these mistakes, but if you don't store your creamer properly, it won't make much of a difference. Always store your creamer in an air-tight container in the fridge. Not all containers (especially the more aesthetic ones) contain a vacuum-tight seal, which is necessary for keeping your creamer fresher for longer and the flavor just as strong as the day you made it. Plus, storing it in a container with a proper seal makes it easier for you to shake up your creamer before using it, as ingredients in homemade creamer can still have the tendency to settle at the bottom.
Just remember, the temperature of your fridge only slows the process of bacteria growth, it does not stop it completely. Even when stored in the right container, homemade creamer only lasts around seven days in the fridge. However, if you accidentally make more than you know you'll use, you can freeze the excess. This is also great if you like to make your creamer in bulk so you don't have to do it on a weekly basis. There are many ways that you can freeze your creamer, but one easy way is to do so in individual serving sizes by freezing in ice cube trays. To use, simply place a cube inside of your mug and let it thaw in the fridge or put it directly into your coffee.