Avoid This Prep Mistake At All Costs To Keep Your Baked Ham Juicy

If you're one to celebrate special occasions with a ham, then you're probably already calculating how much ham you'll need to buy this Easter holiday. Once you've figured out the amount, the next thing is ensuring you produce a perfectly baked glazed ham that will wow all your guests, the key markers being flavor and juiciness. However, achieving this feat is easier said than done. Simple mistakes can make that succulent finished dish elusive, with one of the most common blunders being scoring the ham too deep.
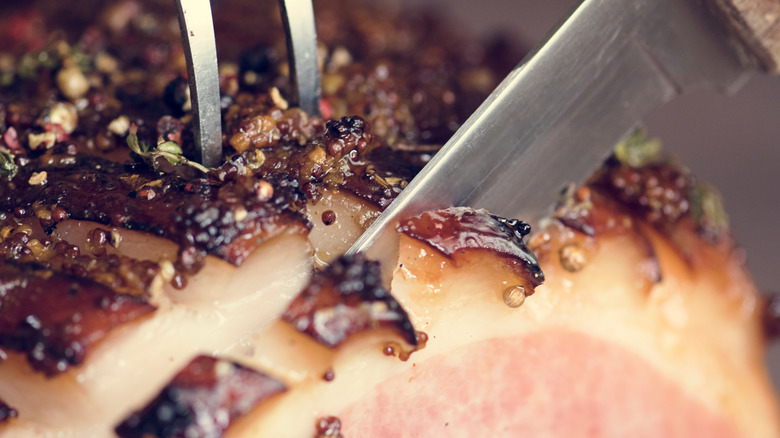
Scoring is the process of making shallow grooves on the ham surface, usually in a crisscross pattern. These cuts are the secret to a flavorful and juicy ham first because they allow the glaze to seep into the meat instead of just staying on the surface. Secondly, slicing through the fat exposes more surface area for rendering. And since fat is known to carry flavor, getting more of it to infiltrate the meat means a more delicious finished dish.
Apart from enhancing flavor, scoring creates a delightful texture variation. The edges of the lattice-like pattern crisp up and caramelize during baking, which contrasts wonderfully with the succulent meat interior. Therefore, to experience all these benefits of scoring, you must do it correctly — cut too deep and you risk your ham drying out when cooking.
How to properly score ham
Begin by gathering the necessary tools. Get a sharp, small knife for easy slicing and better control. Next, prepare a clean cutting board and position it on a flat surface like your countertop to ensure stability when cutting. Now place your ham on the board and at this point, some cooks may remove the skin (also called the rind), however, we recommend leaving it intact as it helps preserve moisture in the ham.
To score the ham, cut parallel diagonal lines from one end of the ham to the opposite end. These slices should be about ¼ or ⅓ of an inch deep and about one inch apart. For visual confirmation, just make sure you're not cutting into the meat but only through the rind and partway through the white fat covering of the ham. Next, turn the ham and repeat the slicing process, this time the lines run perpendicular to the first set of lines to create that signature cross-hatch pattern. Lastly, pierce in whole cloves at the line intersects for added flavor and aesthetics.
Pop the scored ham into the oven to start baking while you prepare your ham glaze. The best time to add the glaze is towards the end when you have about 30 minutes remaining on the timer. Remove the ham from the oven and use a pastry brush to ensure the sweet liquid gets into every corner and groove. Return to the oven and complete the baking process.