12 Mistakes To Avoid At All Cost When Cooking Duck
Many home cooks are too intimidated by duck to cook it themselves and perhaps see it as out of their reach. However, it's easier to cook duck than you think as long as you keep a few things in mind. Duck has darker meat than chicken and is higher in fat. The fat is almost entirely under the skin, making it a relatively lean piece of meat covered in a thick layer of fat. In truth, unless you live in France or China, for example, duck is a little bit less commonly eaten. That makes it harder to find in your grocery store or butcher shop, and when you do, it will be more expensive than chicken. Due to its richness and price, duck meat is reserved for special occasions like Thanksgiving or Christmas, which is unfortunate, as it's truly versatile poultry.
As a classically trained cook living in France (where eating duck is really common, popular, and more affordable), I've prepared and eaten duck countless times and have made all the mistakes in the book. Now that I know what things to do and what to avoid, I find making duck a straightforward task, and it's part of my regular cooking schedule.
Not paying attention to the cut of duck
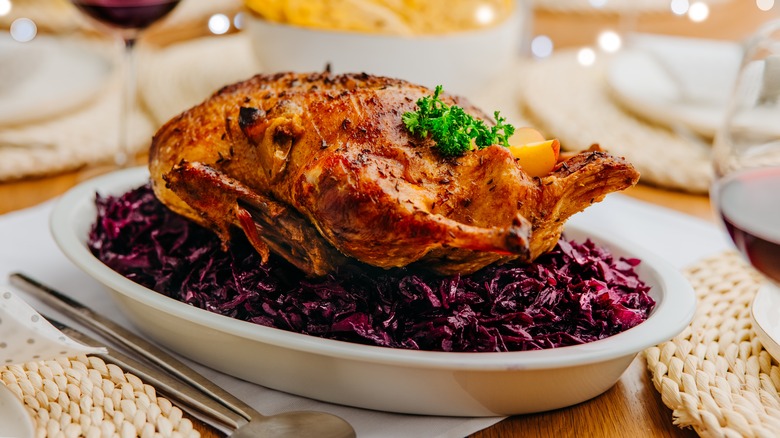
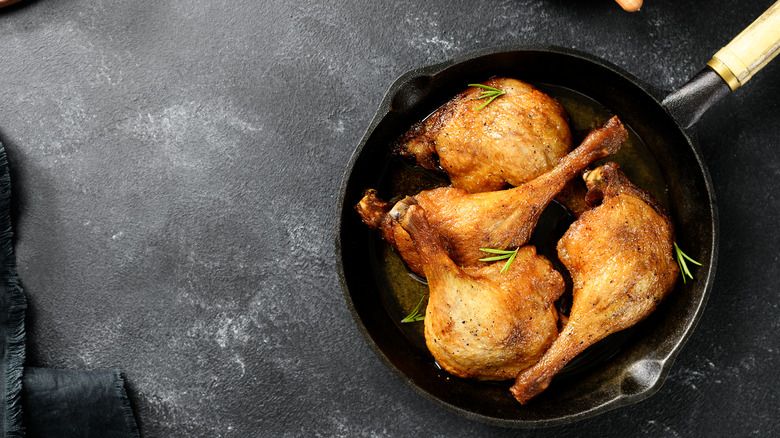
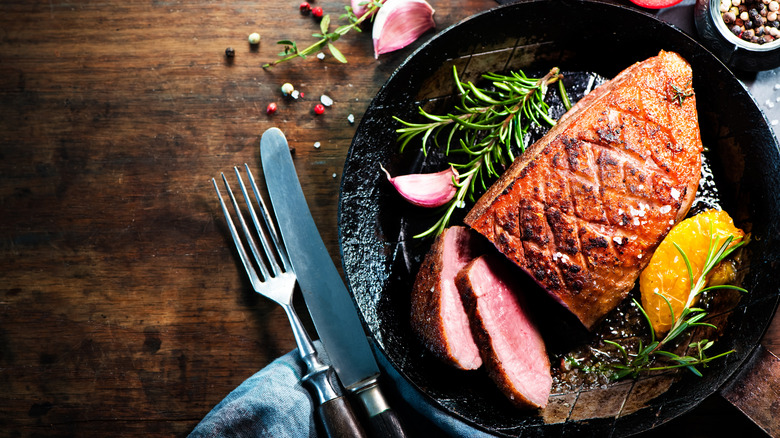
The most important thing to bear in mind when cooking duck is that different parts of the bird cook uniquely. For instance, the legs, which are darker than the breast, take longer to cook. That's why when you cook a whole duck, it's possible that the breast might overcook and dry out. This makes cooking whole duck tricky. What's more, the breast can be eaten pink, unlike chicken, which is considered a health hazard. Duck breast can, of course, be cooked well done and be tasty enough. However, preparing the breast separately allows you to cook it until pink, which results in juicier meat that's tender and succulent.
Duck legs need to be cooked fully to be enjoyable, and as they need more time on the fire, it's a lot easier to cook just the legs. You can roast them until golden and crispy, or you can try the French technique of confit, where you slow cook the whole leg in fat or oil. Of course, if you want to make whole roast duck, you can still have a juicy bird by knowing these differences and taking care not to overcook it. However, if you're nervous about cooking whole duck, cooking either the legs or breast will help you build confidence, as they're more forgiving.
Using duck that's not fresh
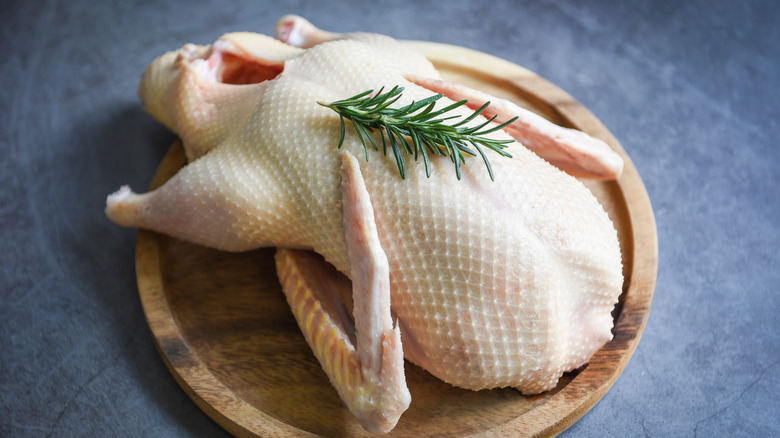
The tips you need when cooking whole duck (or a piece of the bird) start at the time of purchase. You want to get a piece of quality meat, and it's imperative that it's fresh. Because of the high-fat content of duck, it expires much faster, as the fat tends to go rancid more quickly than the rest of the meat. That said, it's not uncommon to buy a frozen duck, which can be just as great if you have the knowledge of how long it's been preserved and you defrost it and use it in a timely fashion. The safest method of defrosting is overnight in the fridge.
If you're buying a wild variety, you must cook it within three days of hunting, as this is when the duck is at its freshest. However, you can get advice from your butcher about this. The positive side of not being able to source duck at your regular grocery stores is that you can have more face-to-face dialogue with an expert, as you'll likely have to visit a butcher, specialty shop, or farmer's market to get some. Don't be shy to ask questions or seek advice about cooking or cutting techniques, for example, as the professionals know what they're talking about. This will also help you get better quality duck, which will contribute to a more successful meal.
Thinking you need to use oil when cooking duck
The most common mistake people make with duck is treating it like chicken. When you roast a whole chicken or cook chicken pieces, adding fat through oil or butter is essential for moist and delicious meat. The difference with duck is that it has so much more fat than chicken, and it doesn't need any more help in that area. You don't need to add any oil when cooking the bird, and you should check out why you don't need to add any oil before roasting duck. The thick, fatty layer under the skin is going to render and melt as the duck cooks, basting itself throughout. Adding extra oil isn't going to do any harm (so if you're willing to die on this hill, go ahead as you please), but it's unnecessary.
Whether you're roasting duck whole or pan-searing a breast, you can completely forgo oil and make use of the natural fat that the duck will provide. Obviously, if you plan on making confit duck, it's a different story altogether, but since that cooking method is all about fat, one can say that it's the exception. Additionally, even when making confit duck, you're ideally using rendered duck fat and not oil anyway, so perhaps it's debatable whether it's actually an exception.
Cooking duck without scoring or piercing it
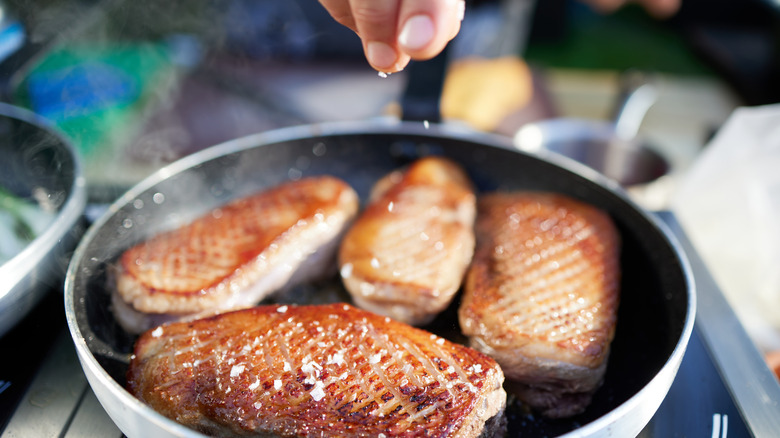
As there's no need to use any extra oil, the point is to ensure the fat on your duck renders properly. When heat is applied to it, it's going to melt for sure, but it needs pathways to escape in order to drip down onto the meat and beyond. This is why it's important to score or pierce the skin. If you don't, the fat will get trapped in the skin, making it greasy and not crispy, while your duck meat dries out because it's not getting basted enough. Making these little cuts creates air holes and a way for the fat to come out successfully.
In order to score your duck the right way before roasting it, you need to use a sharp paring knife. The sharper your knife, the easier it will be to cut precise lines into the tough skin while still keeping control so as not to cut too deep. A good rule is that you never want to reach the actual meat with your cut. Scoring is mostly used on duck breasts where the fat is the thickest (needing more surface area to escape), while the other parts of the body can be pierced. Piercing entails using a toothpick or the point of a sharp knife to make little pricks all around the duck. This helps you reach parts you may not be able to score and make space for even fat rendering on your duck.
Going straight from the fridge to the heat
We all know what it's like when mealtime is approaching, and you've psyched yourself up to get in the kitchen to start cooking. You open the fridge, take out the ingredients, grab some utensils, and immediately get to it. This is a completely natural routine; however, if you want to help yourself cook a better piece of duck, you've got to pull the brakes a little bit. Like with any piece of meat that you want to cook to perfection, it's not a good idea to go straight from a cold fridge to a hot pan or oven. Your duck needs to get to room temperature first; otherwise, the meat could cook unevenly and ultimately become tougher.
To get the best texture and flavor and make your life easier, it's best to take your duck out of the fridge about 30 minutes before you start cooking. Let it sit on the counter covered (to avoid attracting any flies), and ignore it for that time or until the meat doesn't feel cold to the touch anymore. You'll thank yourself later.
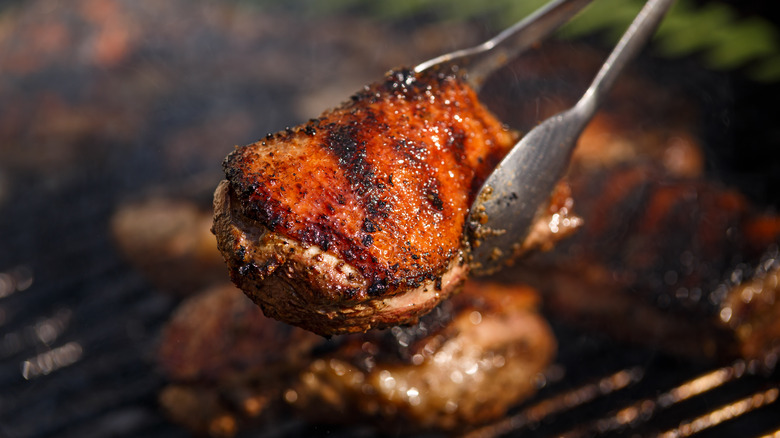
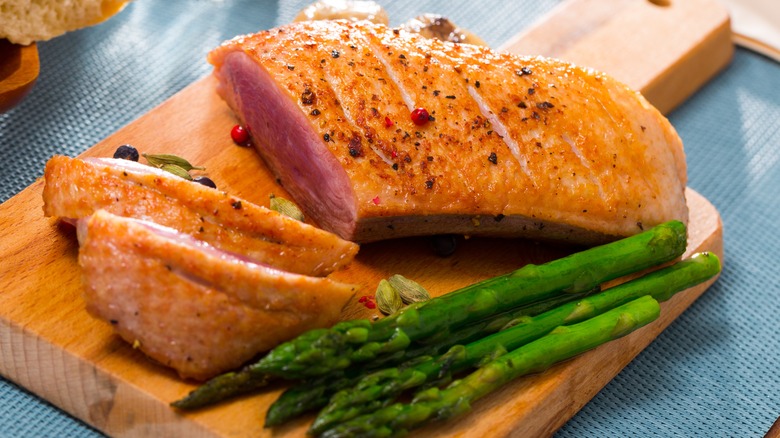
Starting with a hot pan when pan searing duck breast
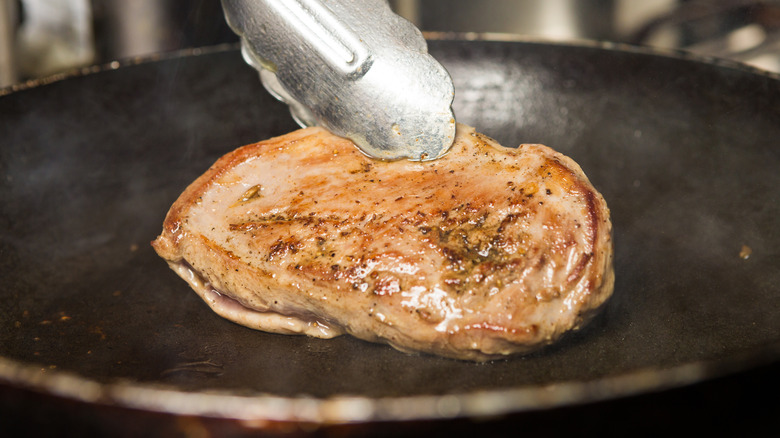
Pan-searing duck breast is one of the best ways to practice cooking duck and build your confidence. It feels incredibly fancy and sophisticated while being quite easy to make. You've probably watched a quick tutorial or read about cooking it, and you'll find that the technique is always the same. Skin side down first, letting the fat render slowly before turning it over for a brief sear on the other side and finishing in the oven for a couple of minutes. However, a common mistake is that people often start with a warm pan. Even if you have it on the lowest heat setting before placing your duck breast in the pan, it will be less than ideal.
You must start with a cold pan. Because of how thick the layer of fat is on the breast, it needs a lot of time and the slowest warming up to adequately melt enough of it. After scoring your breasts, place them (skin side down) in your pan, and then turn on the heat to a low setting. Don't at any point be tempted to turn up the heat if you think nothing is happening. It takes a little time, but you'll start to see the liquified fat gloss at the bottom of your pan. It may start with one tablespoon after about five minutes, but that's the right pace. You can pour out the excess fat as it starts increasing.
Moving your duck breast too much while cooking
There's one thing that many cooks do while standing over a pan, and that's fiddle. We get impatient or curious, and we keep picking up the piece of meat and checking or turning it over, etc. You have to resist this urge with duck breast because to get a nice, even seared breast means you have to leave it alone. The biggest mistake you're making when searing duck breast is moving and prodding it unnecessarily.
This is especially key in the beginning when the duck is still skin-side down. The rendering needs time and the skin tends to stick in the beginning until it's formed a nice crust. The risk of moving it before it's done means potentially tearing the skin or separating it from the breast because of its adhesion to the pan. This ruins the whole experience of seared duck breast. So hang tight and try to move it very little and aim for only once when you're turning it over to finally sear the other side.
Not letting the duck rest
If you've taken all the steps to make a beautifully pan-fried duck breast, roasted duck legs, or even a whole roast duck, this next step is really worth it. You've put in all the effort to do things the right way, and it would be a shame to let it all go in the final hour. You have to be patient for one last time and let your duck rest. If you cut straight into it, all the wonderful juices that will keep your duck moist and tender are going to run out immediately. Resting your duck gives those juices a chance to settle first.
The easy rule for letting your duck rest comes down to the type of cut you've cooked. With a duck breast, around 10 minutes should be perfectly fine. With a whole roast duck, around 15 minutes should do the trick. So hold on just a tiny bit longer and savor every last bite.
Discarding the duck drippings
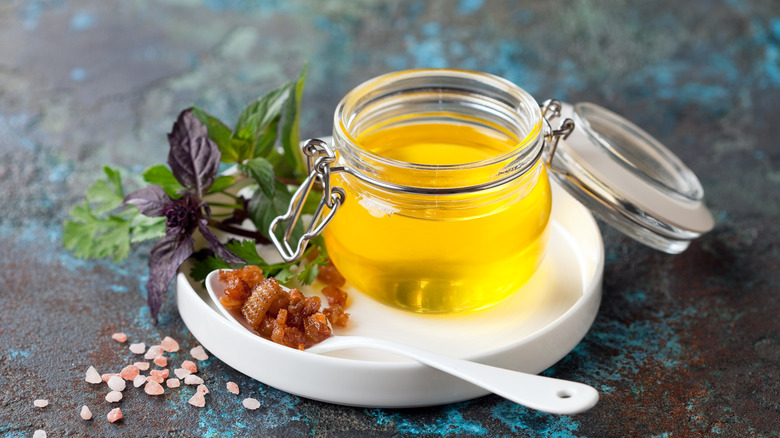
Whether you're pan-searing duck breast or roasting the whole bird in the oven, it's going to produce an immense amount of duck drippings. The fat all around your duck is going to melt and render as it cooks (especially if you've properly pierced or scored the skin), and if you check the bottom of your pan, you'll find glossy, rich duck fat. The biggest mistake you can make is discarding those drippings. You'd be throwing away liquid gold. Other than basting your duck with that fat, you can pour those drippings into a jar and keep them in your fridge for other exciting uses.
An easy and popular way to use it is to make duck fat roasted potatoes, but you can also use the unexpected fat to make a more flavorful fried chicken. Another option is to fry latkes in duck fat for a richer umami-forward flavor. It's even the unlikely ingredient that pairs with chocolate desserts. Its decadent flavor adds more complexity and richness to many dishes, and there are countless possibilities.
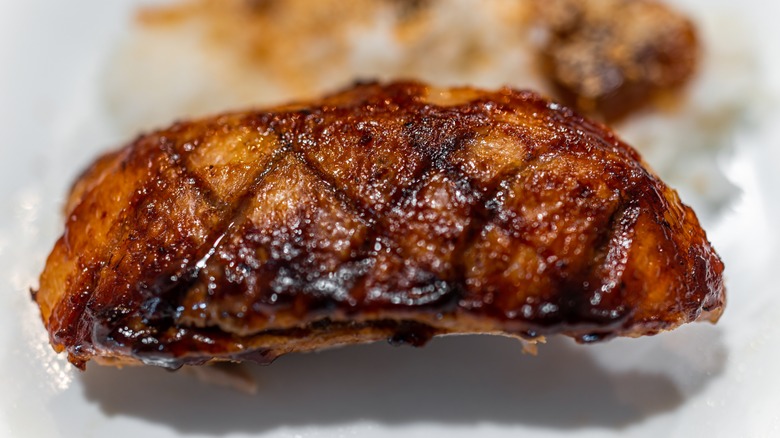
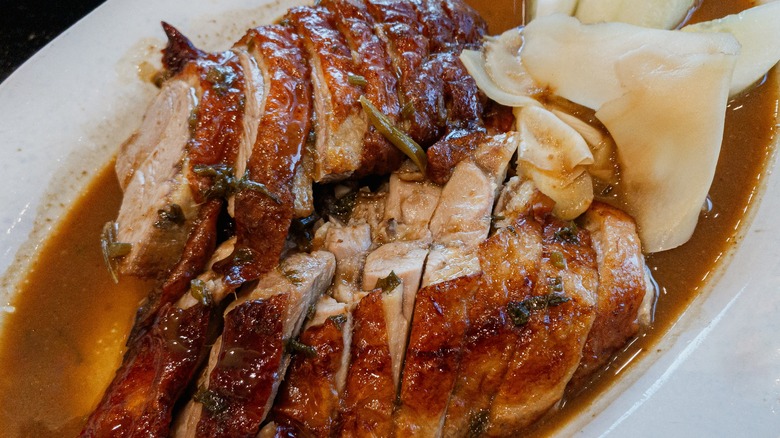
Serving duck breast skin-side down
How you serve your duck breast is also something to consider, and while it's not the be-all and end of how good your duck is going to taste, it can affect the crispiness of the skin. You know that you have to start your cooking with the skin side down, but when it's time to serve, you've got to place it with the skin facing upwards. This will help keep its integrity the way you've cooked it. Even while resting the breast, the skin should not be on the bottom. This is because all the juices are running downward, and you don't want that nicely browned skin to get soggy.
As an additional tip to keep the skin dry and crispy, it's also better to serve sauce at the bottom of the breast rather than drizzling it on top of the skin. The sauce can further moisten the skin and soften it when that's not what you want. Pour your sauce on an empty plate, and lay your duck breast (whole or slices) on top of it, with the skin facing upwards.
Thinking you don't need to add flavor to roast duck
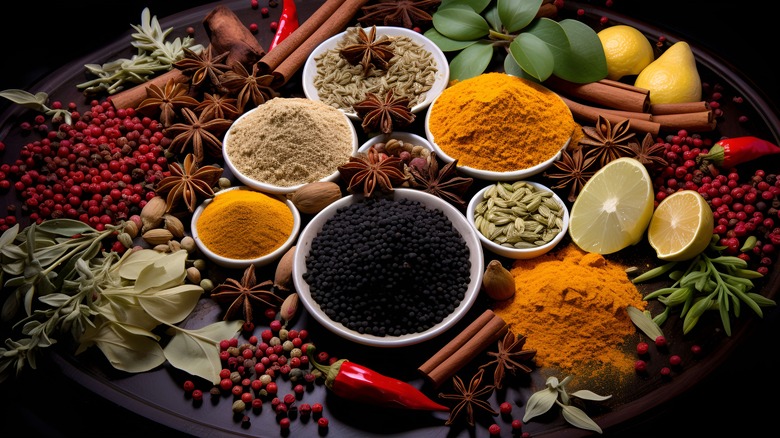
Duck is an incredibly flavorful type of poultry, and you wouldn't be blamed for thinking you don't need much to make it taste great. But there are so many ways to add flavor to duck, whether roast or pan-fried, that it would be a shame to serve your duck plain. Whether it's by making a luxurious jus using the duck drippings or by seasoning your duck with various spices and herbs, you can get creative and work with what you've got in your kitchen.
The absolute essential is to at least season your duck (regardless of your preferred cooking method) with salt and pepper. Then, you can start to build flavor by adding herbs, onion, garlic, or other aromatics under the skin or inside the cavity. With breasts, a simple spice seasoning is sufficient, and you can build a sauce around your pan drippings by caramelizing some onions, a splash of red wine, and some Chinese five spice. It's all up to your taste preferences, but there are so many wonderful flavor combinations to be made.
Chucking the giblets

If you've purchased a whole duck before, it's likely that you've come across the innards of the duck. Sometimes, these are pre-prepared in a little bag inside the duck's cavity, and at other times, they're left in there for you to take care of. Whatever you do, don't get rid of them. Even if you're squeamish and don't like eating these parts, they do wonders in terms of adding richness and flavor in multiple ways.
These giblets usually include parts like the heart, liver, gizzards, and, in some cases, the neck. You can use these to make an incredible stock or broth to use as a base for soups, stews, and sauces, or even use it to cook your rice or other starches. Or, you can roast them alongside your duck for added flavor. Perhaps you'll even enjoy them if you give them a try. They're a wonderful flavor and mineral resource, and it would be a shame to chuck them.