13 Expert Tips For Making The Perfect Hummus

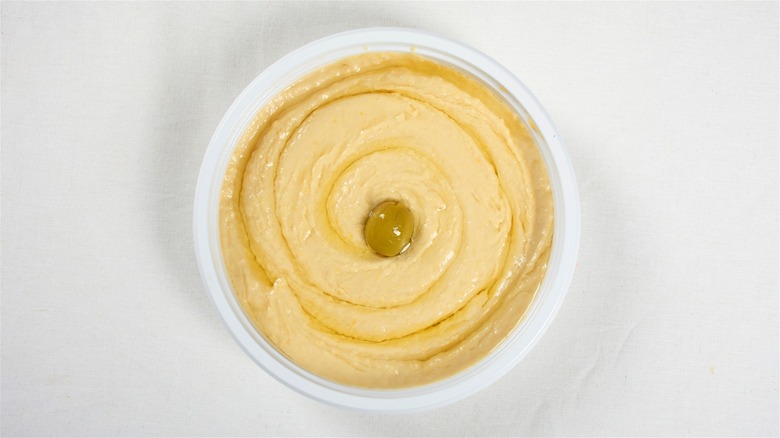
Whenever you find yourself browsing the shelves of the refrigerated section at a supermarket, and your hand reaches toward that familiar tub of off-white dip, stop and ask yourself: Could I do better than that? Because the answer is yes, you can. While the convenience of store-bought hummus is its undeniable advantage, especially if you're traveling and need a nutritious snack, its ingredient list and flavor are often less than ideal. Hummus is one of those foods you should be making from scratch, as it's more cost-effective and easier to adapt to your taste. So, whenever you visit your local store, pick up chickpeas, garlic, lemon, and tahini, and you'll be in for a treat.
As straightforward as making hummus at home may seem, it may still lead to disappointing, grainy, bland results. To get the lowdown on the perfect execution of the legendary dip, I talked to Waseem Hijazi, the founder of Plant Based Arab, who made it his mission to showcase naturally plant-forward Arabic dishes and veganize those that aren't. As a Jordanian-born Palestinian, he has lots of experience with homemade hummus under his belt and has graciously shared his best tips so that you, too, can master the crave-worthy, silky-smooth dip and embrace its heritage.
Cook chickpeas properly to soften them
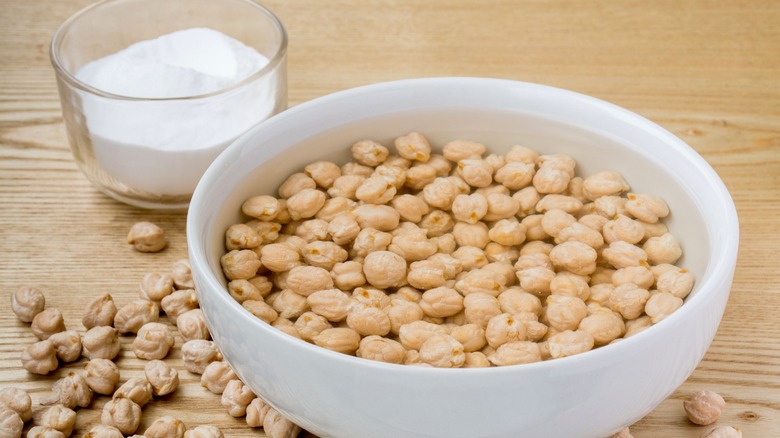
Making perfect hummus from scratch starts with correctly prepping its titular ingredient: chickpeas. To avoid lumpy, grainy hummus, you'll need to be patient when cooking the beans. Start by soaking them overnight, then give them a long, slow boil, to the point where you can effortlessly mush them between your fingers. According to Waseem Hijazi, this can take 60 minutes for canned chickpeas, and 90 for dried. "Make sure to cook until the skin automatically separates from the chickpeas," he adds, assuring that if you use this method, "it will blend and still be creamy!" Breaking down the skins by prolonged cooking will save you the effort of peeling each chickpea, which would otherwise be required for creamier hummus.
However, there's also a simple trick to speed things up and make peeling easier: baking soda. You could add a teaspoon of it to the vessel where you soak dried beans, or straight to the pot of soaked or precooked chickpeas. This will raise the pH of the cooking liquid, breaking cell-wall hemicelluloses down in the process. The result? Slightly overcooked beans ideally suited for blending even in the meekest of kitchen processors, and ready in half the time it would take you without the miracle powder.
If using canned chickpeas, give them an extra boil

If the task of cooking chickpeas from scratch seems too time-consuming when an urgent hummus craving strikes, you can always rely on that can of garbanzo beans in your pantry for help. While you could technically plop them out of the can straight into the blender with the rest of the ingredients, the results probably wouldn't be ideal. For extra creamy homemade hummus, you'll need to cook your canned chickpeas. But before you start boiling, you'll need to drain and rinse the chickpeas. The liquid they come in — also known as aquafaba — could actually be an important asset in the hummus-making process, so reserve some of it.
Cooking something that's already pre-cooked might seem counterintuitive, but since we're going for the easy-to-mash, slightly overcooked texture, this extra step will go a long way. Boiling them to Waseem Hijazi's recommended point of automatic skin separation can take anywhere between 20 and 60 minutes. Whether you're working with dried or canned chickpeas, Hijazi advises to "let them cool down to room temperature before blending. Otherwise, it could get clumpy due to the heat."
Peel chickpeas for creamier, more uniform texture
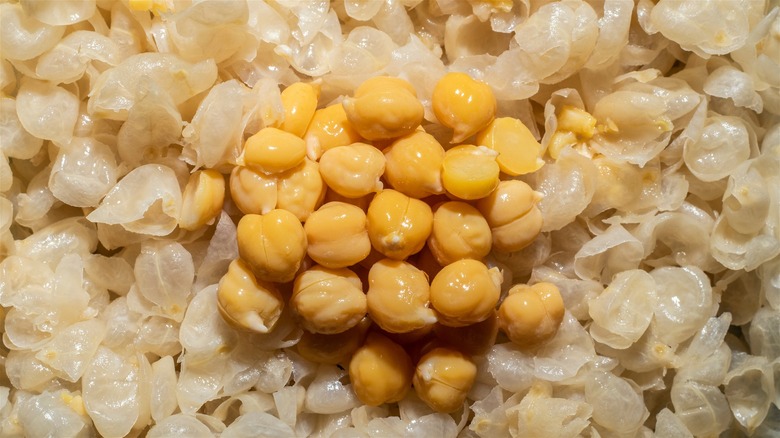
So, now that you've got your cooked chickpeas, how do you turn them into a perfectly creamy hummus? Another "absolute must," according to Waseem Hijazi, is removing as much skin as you can, especially if you're working with the canned variety without cooking them. If you leave the skins on, the hummus might turn out grittier than you expect. To avoid this, you could simply pop the chickpeas out of their skins (a 15-ounce can should be done in less than 10 minutes). But if that prospect seems daunting, or if you're working with larger quantities, there are a couple more hacks to try.
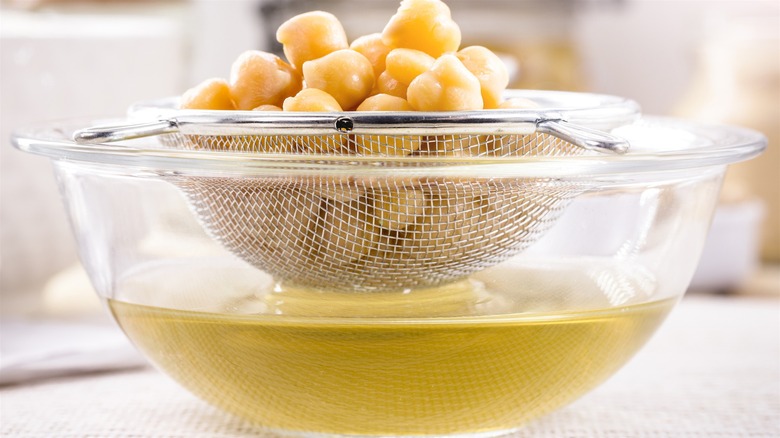
Hijazi suggests draining the chickpeas and running them under tap water, mixing with your hands against the mesh of the strainer. All that's left now is to remove the loosened skins manually or place the contents of the colander in a water-filled bowl, where they will float above the chickpeas. You can continue massaging them in the water, if necessary. Alternatively, you could go for pre-peeled dried garbanzo beans, which are available online, sold with a promise of perfectly creamy hummus.
Whip tahini with other liquids first
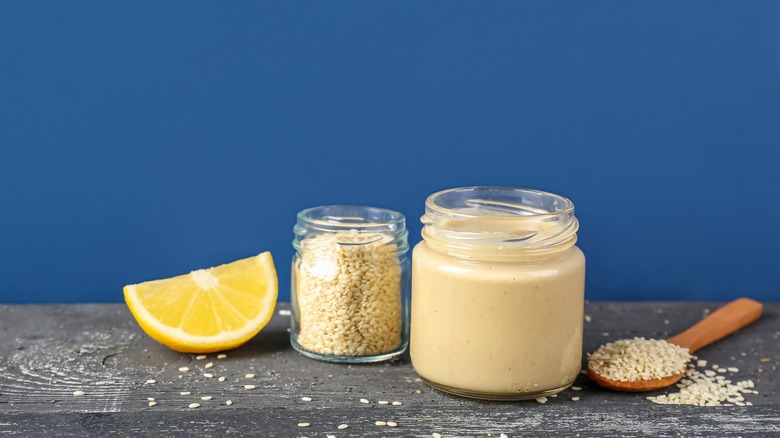
Hummus has been around for thousands of years, taking lots of time and manual labor to make. Fortunately, with the conveniences of the modern world, you can make hummus in minutes, using canned chickpeas and a food processor. While you could blend all the ingredients simultaneously, whipping tahini with water or lemon juice (or both) for about a minute before adding other ingredients is a game-changer. You'll notice it becomes more voluminous and lighter in color, turning into sesame cream. Following this loading order will also make the process easier on your blender, as the blades will be able to move freely through the liquid mass. This clever technique propels ingredients towards the blades, ensuring a velvety consistency.
But before you even begin to whip, Waseem Hijazi emphasizes the importance of using high-quality tahini. How can you tell if it's good? Watch its texture. According to Hijazi, "runny and liquidy, not thick and chunky" is what you want for perfectly smooth results. However, a powerful enough kitchen processor and other tips on this list could help you work with the tahini you have on hand, and still achieve a nice, creamy dip. Still, good-quality sesame paste is a worthy purchase – tahini has so many uses outside of hummus.
Mellow the garlic before blending
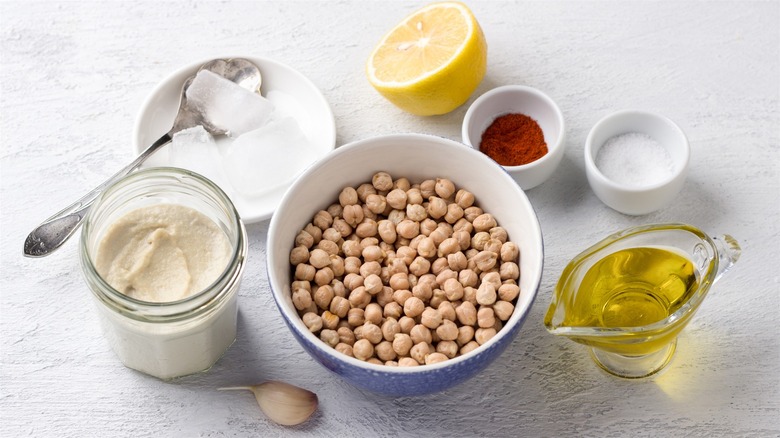
At its core, hummus is a fairly simple dip. Approaching it from a traditional point of view, as Waseem Hijazi does, you will only need five ingredients to achieve an authentic flavor: chickpeas, tahini, lemon juice, garlic, and salt. Chickpeas are obvious non-negotiables: Hijazi emphasizes that "any creamy bean dip that is not made with chickpeas is not hummus." Tahini is integral, too, although you could technically substitute tahini with sesame oil in a pinch without giving up the sesame flavor. Salt and lemon are there to highlight and contrast the light sweetness of chickpeas and the bitterness of tahini. But what about the garlic?
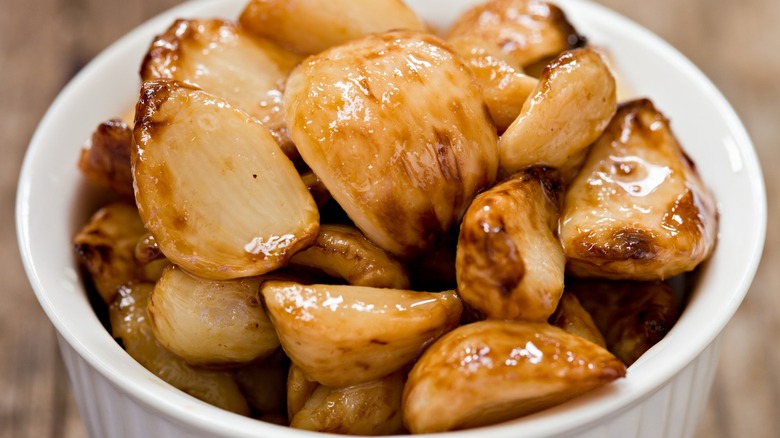
You could, of course, skip the garlic altogether, if you're not a fan of its bold flavor. But you could also use a bit of kitchen science to minimize garlic's flavor while keeping your hummus ingredient list authentic. Allicin, the compound responsible for garlic's pungent, sulfurous aroma, can be toned down when garlic is immersed in an acidic liquid. Thus, briefly soaking the garlic in lemon juice beforehand or blitzing them together before you add chickpeas should do the trick. Additionally, Hijazi notes that "some people like to add roasted garlic to give it a kick." Doing so will cut down the sharpness while bringing its nutty and sweet undertones to center stage.
Use aquafaba or club soda as a water substitute
Before you begin blending the chickpeas, you'll need a bit of liquid to get those blades going, and while ice cubes or cold water are ideal, there are alternatives that could add some nutritional value and enhance flavor and texture. Remember that liquid we recommended to reserve after draining canned chickpeas? That starchy fluid known as aquafaba? While it's more famous as a vegan egg replacer, according to Waseem Hijazi, it "does a great job of making the hummus silkier." It is most likely due to the same characteristics that make it an ideal base for vegan meringue: aquafaba is rich in proteins and starches that help it foam easily, so adding it to hummus will create a fluffier texture. Hijazi goes on by saying, "If available, use the slow-strainer in the food processor to gradually add it while the hummus is blending. Don't add too much."
Another unexpected ingredient for perfectly whipped hummus is club soda. Adding any liquid will make hummus more creamy and spreadable, but using carbonated water can also make it airier. Moreover, club soda is usually mildly salty, which can help enhance the overall flavor of the dip. If you go down this route, remember to study the sodium content on the packaging and adjust the seasoning accordingly.
Add ice cubes in the final blend stage
Now that you've got all your ingredients in the blender, and the blades are grinding away, you might notice that it still isn't as creamy as you would like it to be. This is when Waseem Hijazi recommends incorporating ice cubes into the mix. He notes, "It's usually done in small amounts to adjust the texture for creamier, fluffier hummus." The ice cube trick serves a double purpose. First, as Hijazi says, it helps the emulsification process, while preventing hummus from becoming too thick or pasty. The blades will disperse the air bubbles trapped in the cubes throughout the mixture, resulting in a lighter texture.
Additionally, the cold temperature of the ice cubes keeps the ingredients from overheating during blending, resulting in a smoother and more velvety dip. This technique is especially useful when using a food processor or blender, as the high-speed blades can generate heat that alters the texture and flavor of the hummus. Make sure to add the ice gradually, after you've blended the rest of the ingredients, pulsing after every addition, and let the machine run for a minute until you reach the desired effect. Be careful to not overdo it, unless you're aiming for a dressing rather than a dip.
Keep olive oil out of the blender
If you search Google for "hummus recipe" right now, many of the recipes that come out on top will require adding some olive oil into the blender alongside other liquids. But that's not how it should be. According to Waseem Hijazi, "traditionally, the olive oil is not added directly into the hummus mixture to blend. Only drizzled on top when serving on a plate." The recipe developers who recommend using olive oil attest to its ability to make hummus more cohesive and luxuriously smooth. However, Hijazi believes you can achieve this sought-after texture without steering away from tradition. "If the mixture is too clumpy and feels like it needs more liquid, add a bit more tahini and some lemon juice (be mindful not to overpower the taste), or ice if it just needs tweaking," he states.
The reason you should wait to add olive oil to hummus goes beyond tradition. Since you're likely to use a food processor instead of mortar and pestle, you run the risk of accidentally turning your hummus rancid. As the blades work their magic for a few continuous minutes, they heat up, which might cause a reaction with the oil, making it bitter. Hijazi recommends to save it for serving.
Experiment with flavorings mindfully

Not every creamy bean dip can be called hummus — it must be made with chickpeas. But what about adding a little extra flavor? After all, doesn't garlic Parmesan sound like an enticing hummus flavoring? Not everybody thinks so. "From a cultural perspective, it wouldn't be accurate to call it hummus if it completely changes its flavor (like pumpkin, chocolate, or avocado hummus, for example)," says Waseem Hijazi. It might seem like a technicality for hummus purists, but respecting it means respecting the food culture that gave us the beloved dish. He adds, "There's a history of cultural appropriation that is tied to the issue of different "hummus" flavors that aren't representative of the taste or heritage, so we tend to advise not to call it "hummus" if someone adds completely different flavors."
With all that said, you could still use hummus as a base for creatively flavored dips. You could go with the classics, like roasted red peppers or a bit of cilantro, or take it to sweet-and-savory territory with caramelized onions and sweet potatoes. You could even go all-out sweet and mix it with cocoa powder, maple syrup, vanilla, and chocolate chips — just don't call it "chocolate hummus" when you can appropriately name it "chocolate bean dip."
Refrigerate hummus overnight for better flavor
Hummus is often prized for its convenience — what other healthy, protein-packed dish can be effortlessly whipped in mere minutes? Yet, a properly made hummus requires time and patience, even if you have all the modern tools and expert tricks at your disposal. Of course, when you need a quick lunch in the middle of a busy day, or the doorbell announces unexpected guests, blending canned chickpeas with tahini, garlic, and lemon juice, then eating the resulting mix straight away is perfectly fine. But is it perfect? Probably not.
If you're not in a rush, there is a simple step that will elevate your homemade hummus flavor, and it requires no extra effort on your part. After everything's blended, simply transfer the mix to an airtight container and give it an overnight rest in the fridge. Its cool confines allow the various ingredients to mingle and get cozy with each other over time. Garlic becomes less sharp, lemon juice mellows out, and the tahini's nuttiness spreads its arms wide, embracing all the other flavors. So next time you whip up a batch of homemade hummus, resist the urge to dig in right away — good things come to those who wait (and refrigerate).
Serve with toppings
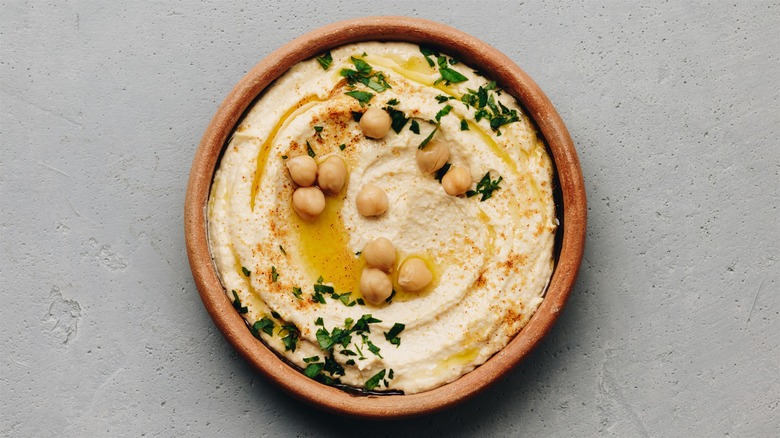
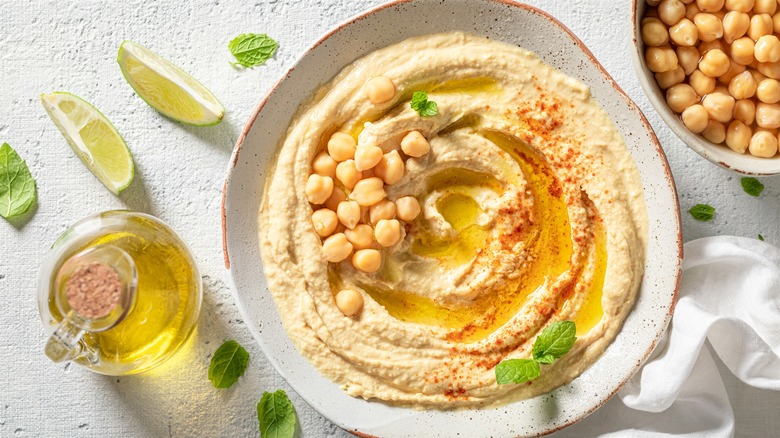
Now, after all the time and effort it took you to make perfectly smooth, creamy hummus, serving it naked, straight out of the tub, would be doing it a disservice. Plating hummus is a fairly uncomplicated affair, so while it is coming to room temperature, pick an appropriate plate and prep the toppings. First, you can make dents and swirls on the hummus surface with a back of a spoon, and use a drizzle of olive oil to fill in those crevices. Other traditional toppings Waseem Hijazi recommends include whole chickpeas and a sprinkle of sumac. But if you want to take it one step further, try daggah. Also known as tatbeeleh, it's a liquid condiment made from green chili peppers, garlic, lemon juice, and salt. According to Hijazi, its name is a reference to its traditional cooking method: a diligent pounding of the ingredients with a mortar and pestle. However, you could make it in a manner of salsa by chopping the ingredients with a knife.
Want more authentic topping ideas? Look no further than za'atar, paprika, coriander, pine nuts, and, of course, hot, fluffy pita bread. Slightly less traditional — though no less delicious — hummus toppings include harissa, preserved lemons, fried onions, mushrooms, eggplants, pomegranate seeds olives, jalapeños, cooked fava beans, and, of course, crudité on the side.
Store it properly so it lasts longer
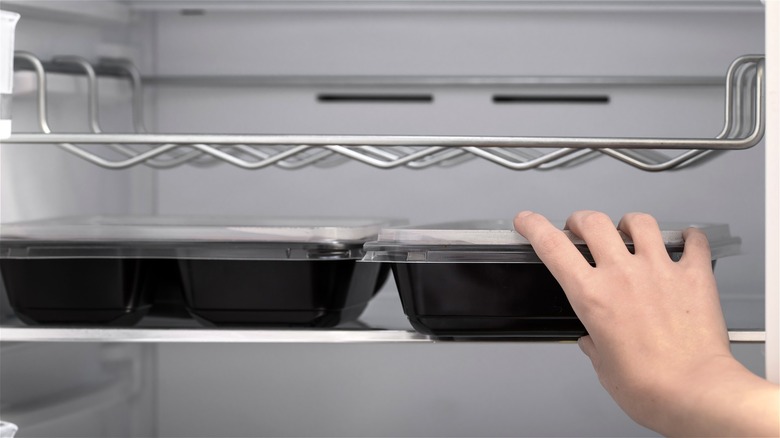
If you compare the shelf lives of store-bought and homemade hummus, the commercial one, unsurprisingly, comes out on top. Not only has it been pasteurized, but it also usually has some added preservatives, which help it last up to three months sealed away in the fridge, or up to a week after opening. Homemade hummus, unfortunately, is fairly short-lived and is best consumed within three to five days. But that doesn't mean you should let it hang out willy-nilly in the fridge — mastering proper storage etiquette is always useful. "Air-tight containers are the best," says Waseem Hijazi, adding, "When storing leftovers, add a drizzle of olive oil on top to help preserve it from drying out."
You could also extend the life of your hummus by freezing it in small batches. Make sure to not keep it frozen longer than four months, if you want to keep any semblance of the original flavor and texture. Regardless of whether you decide to refrigerate or freeze the dip, it is best enjoyed at between 68 and 74 degrees Fahrenheit. Temperature alters our flavor perception, and the tangy, nutty, garlicky notes are subdued when you serve hummus straight out of the fridge, so make sure to bring it to room temperature first to lets its flavors shine.
Repurpose hummus for other dishes

Michael Scott of "The Office" once said: "I can't tell you how much leftover guacamole I've eaten over the years. I don't know why I make it in such great quantities." He might be fictional, but the problem of leftover dips is real for those who use them as their go-to party dish. While you could freeze the excess hummus or give it away as party favors, you could also let your culinary imagination roam free, and turn those leftovers into new, exciting dishes. It might not be strictly authentic, but at least it prevents food waste.
Running short of ideas? Here are a few ways to repurpose leftover hummus, courtesy of the Tasting Table team: Thin it out with lemon juice, olive oil, or hot sauce, and turn it into a dressing, or use it to thicken your favorite creamy soup or mashed potatoes. Plus, it's a great base for a low-maintenance pasta sauce – you'll just need to mix it with a little hot pasta water and toss the noodles in the resulting creaminess. Naturally, adding hummus to various dishes will effortlessly boost your protein intake, which is especially valuable in salads or roasted veggies. And if your hummus is garlic-free, you could even dare turn it into a chocolate pudding.