Andes-Stuffed Elevated Cream Cheese Mints Recipe

If you've been to a wedding, baby shower, or holiday gathering in certain parts of the United States, you've probably had the pleasure of trying cream cheese mints. While the exact origin of these candies is unclear, they likely became popular in the mid-20th century, particularly due to their ease of preparation and short ingredient list. Cream cheese became widely available in the 1950s, and began to be used in a myriad of sweet and savory recipes, including as the base of these mints. The tangy addition of cream cheese gives these luscious bites a balanced flavor, helping to cement their status as a beloved treat.
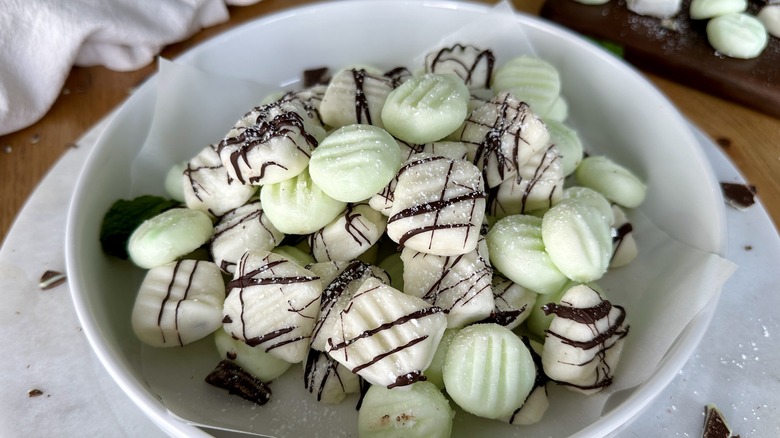
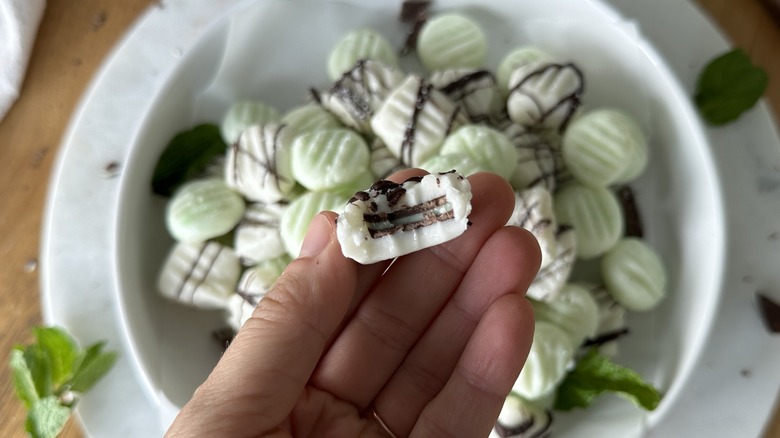
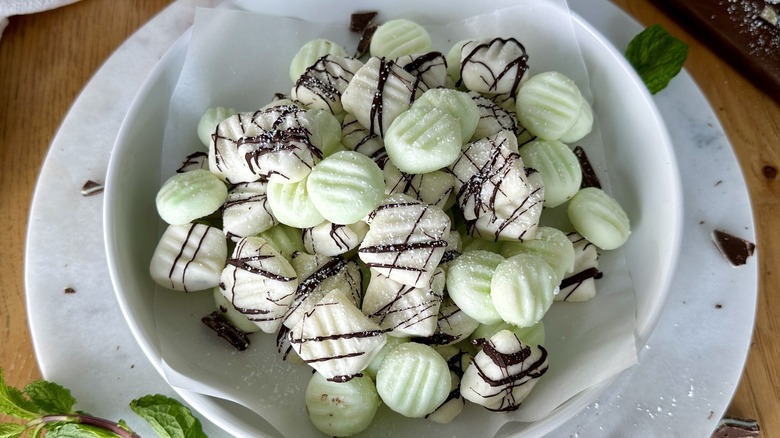
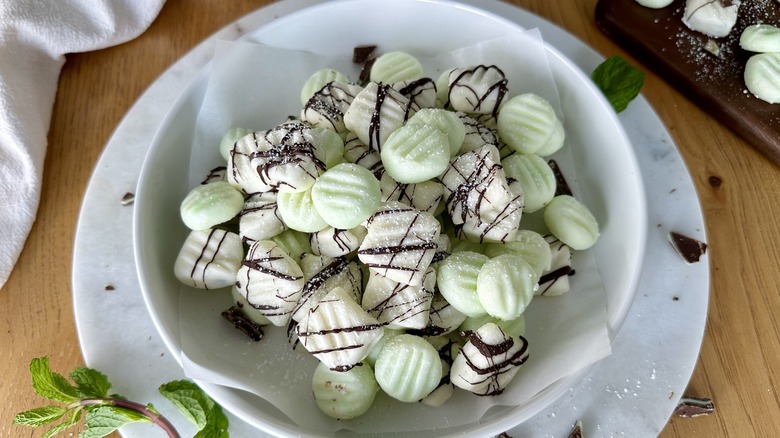
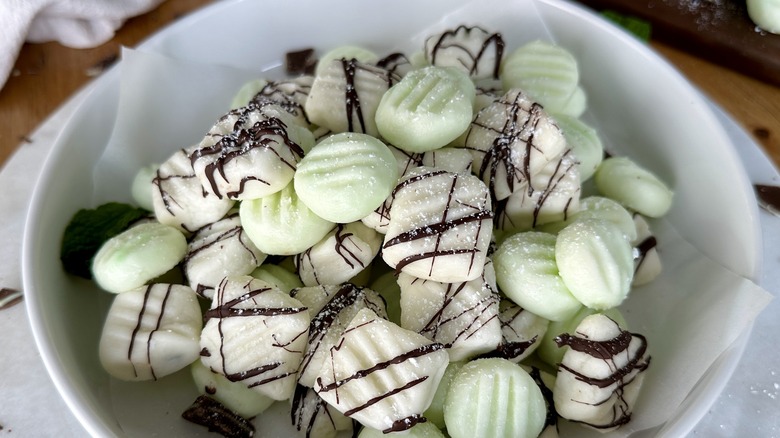
Traditionally, cream cheese and butter are combined with powdered sugar and peppermint extract, then rolled into balls and flattened with the tines of a fork for a classic presentation. But we aren't only here to make these mints the classic way. We've taken this nostalgic treat up a notch by rolling and filling tiny squares with halved Andes mints, for a chocolatey surprise and double dose of minty flavor. Make a batch of these, and your guests are certain to be impressed by your candy-making prowess. (Little will they know how easy they were to whip up.)
Gather the ingredients for Andes-stuffed elevated cream cheese mints
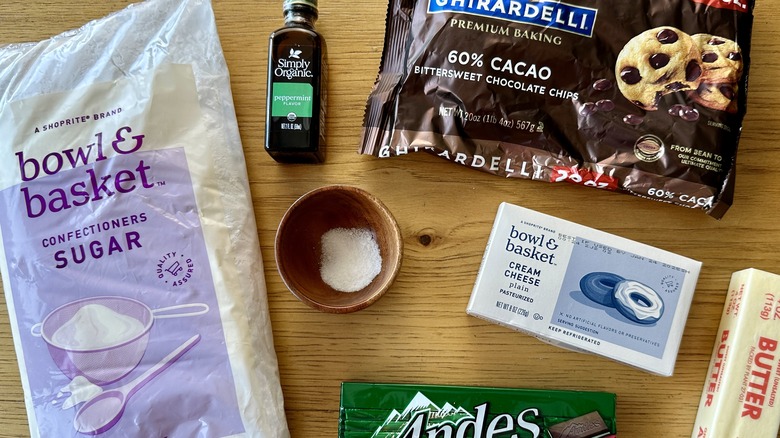
The base of these creamy mints is made with just a handful of ingredients, with packaged Andes mints added in for a surprising twist. To start, a simple dough is prepared with a combination of cream cheese, butter, peppermint extract, kosher salt, and confectioners' sugar. The sugar helps stabilize and thicken the mixture, while cream cheese adds a mild tanginess and moisture. Salt enhances the overall flavor, and peppermint extract creates the minty flavor profile. You'll find a halved Andes Crème de Menthe Thin tucked inside each mint square. These candies add a pop of color for visual appeal, as well as a chocolatey touch that complements the overall minty flavor. Optional ingredients include green food coloring, for dying the mints a pleasantly pastel hue, and melted chocolate chips for drizzling over the top, to give your guests some idea there may be chocolate in the mix.
Recipe developer Katie Rosenhouse tells us, "You can really have fun with these mints, particularly when deciding how to color and shape the second half of the dough. The mints can be shaped using molds, rolled into balls, or rolled and cut out using small cookie cutters. It's a great activity to get the whole family involved with."
Step 1: Cream butter and cream cheese
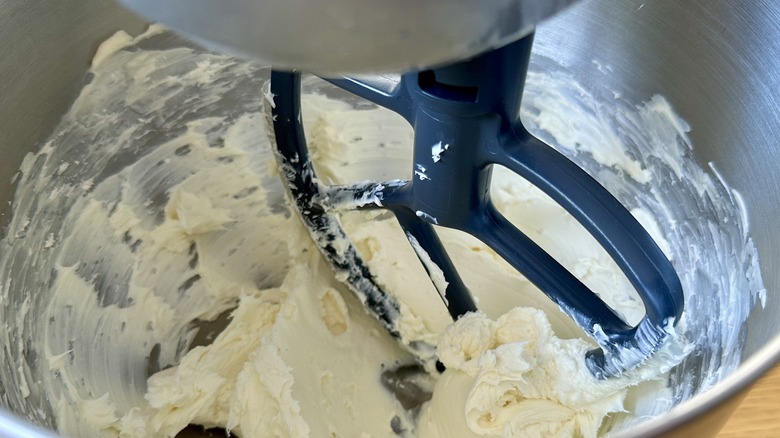
In the bowl of a stand mixer fitted with a paddle attachment, beat the butter, cream cheese, peppermint extract, and salt until light and fluffy.
Step 2: Beat in confectioners' sugar
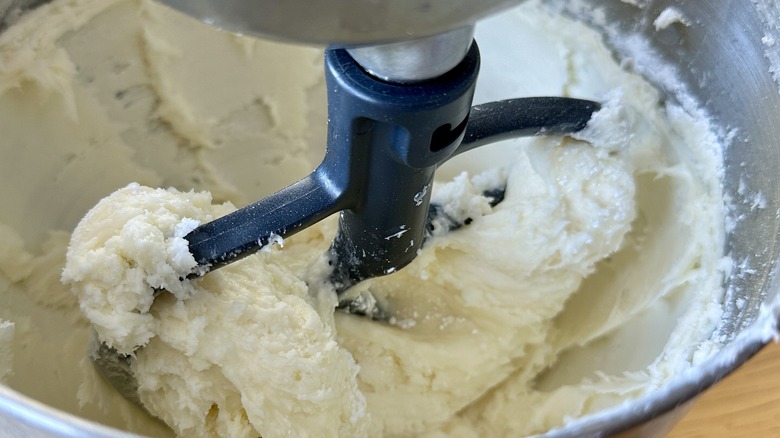
Reserve 1 cup confectioners' sugar for rolling, and slowly beat in the remaining sugar on low speed, until the dough is thick but combined. If your mixer is struggling, knead with gloved hands until smooth.
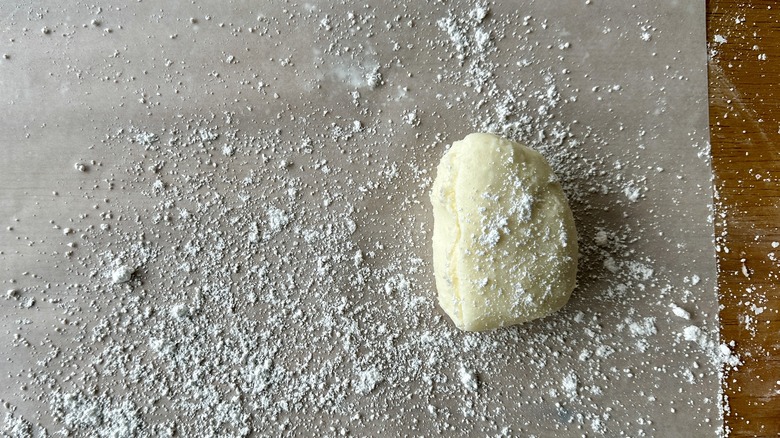
Step 3: Wrap and chill
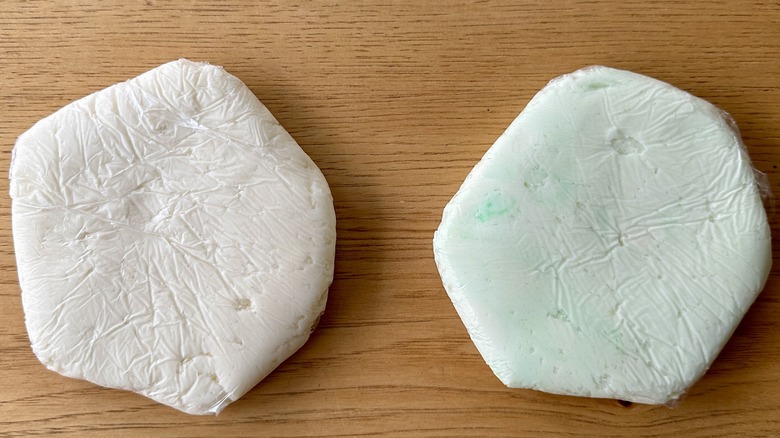
Divide the dough into two sections, and color one section with green food coloring, if desired. Form the dough into disks, wrap them, and refrigerate for at least 1 hour.
Step 4: Line baking sheets
Line two baking sheets with parchment paper and grab one additional sheet for rolling.
Step 5: Dust surface
Dust a clean surface lightly with some of the reserved confectioners' sugar.
Step 6: Divide the dough
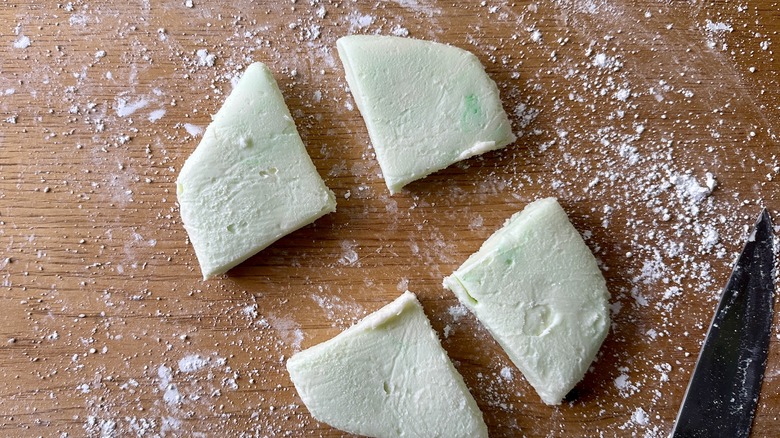
Unwrap one disk of dough (the green, if applicable), and divide it into four sections.
Step 7: Roll it into a log
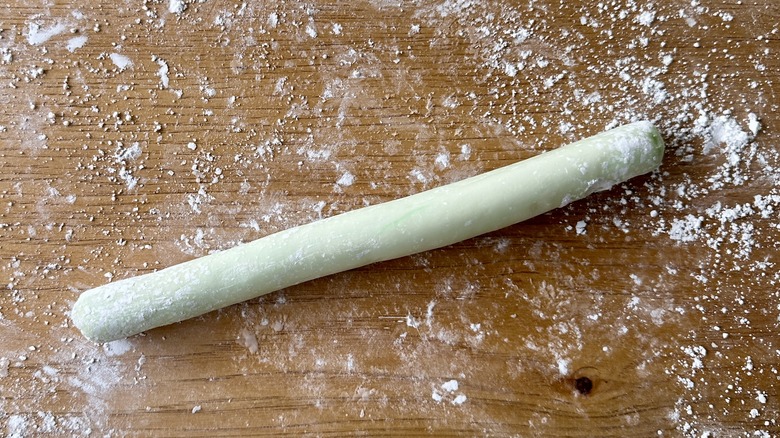
Roll one section of dough to a 10-inch log, about ¾-inch wide.
Step 8: Cut it into pieces
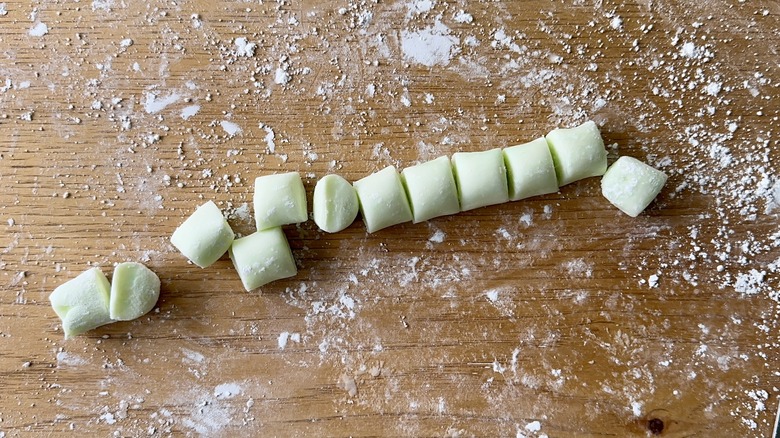
Cut it into 12 even pieces.
Step 9: Roll into balls
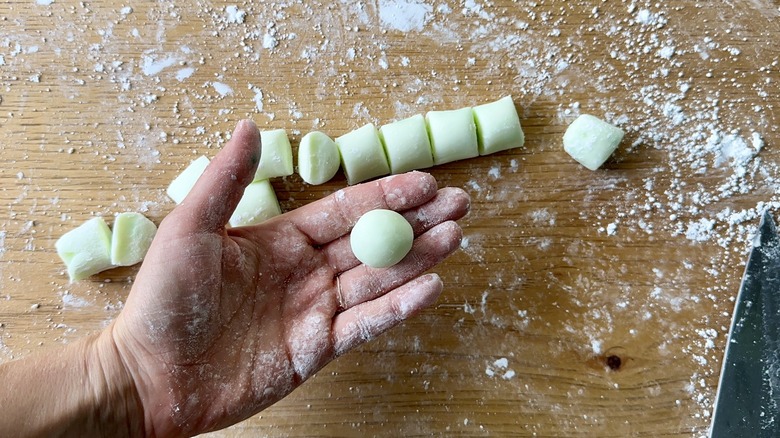
Roll each piece to a smooth ball and transfer to a lined baking sheet.
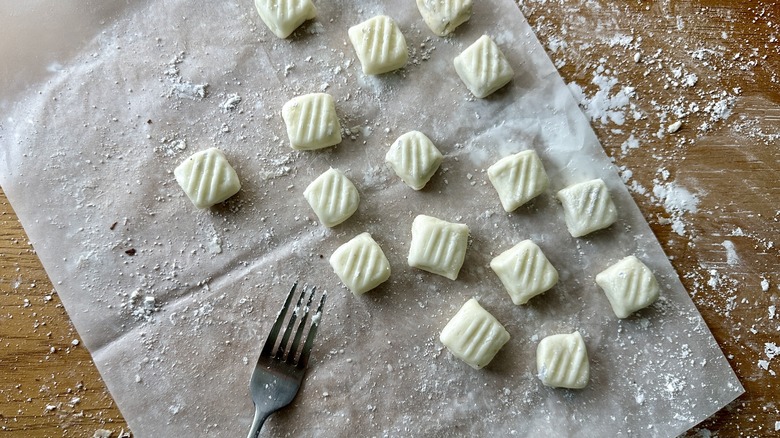
Step 10: Flatten with a fork
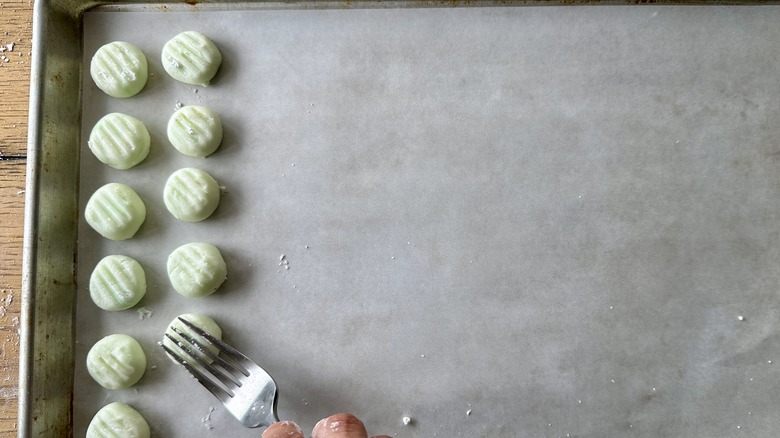
Use a fork dipped into confectioners' sugar to press the balls to create candy rounds.
Step 11: Repeat
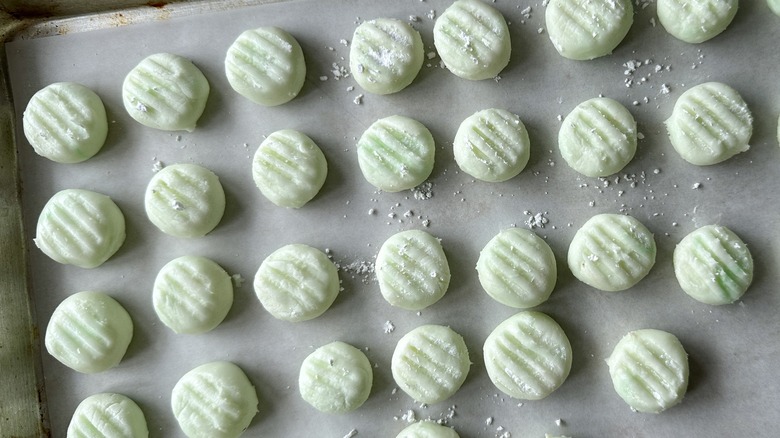
Repeat with the remaining dough; set aside.
Step 12: Halve Andes mints
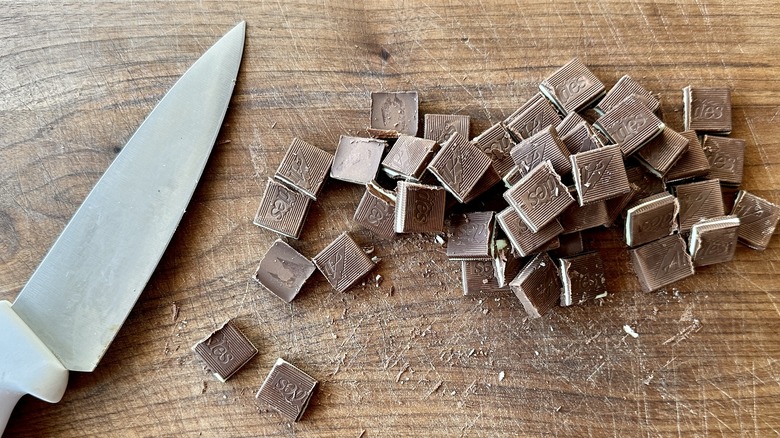
Unwrap the Andes mints and cut each in half. Set aside.
Step 13: Unwrap the remaining dough
Unwrap the remaining section of chilled dough and divide it in half. Place half onto a confectioners' sugar-dusted sheet of parchment paper.
Step 14: Cover with parchment
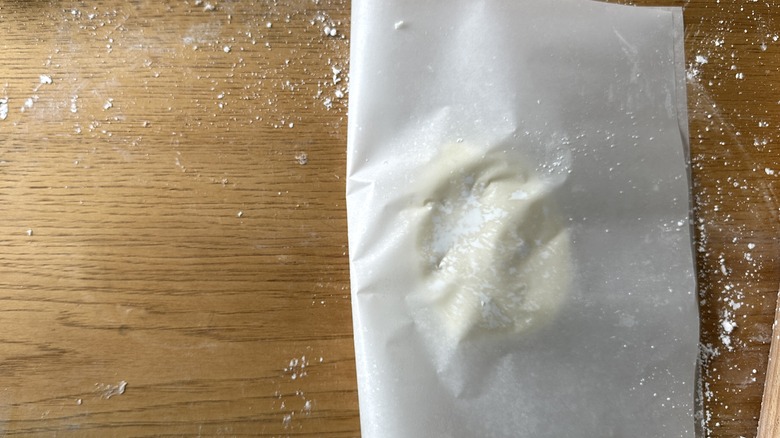
Fold the parchment over to cover the dough.
Step 15: Roll the dough
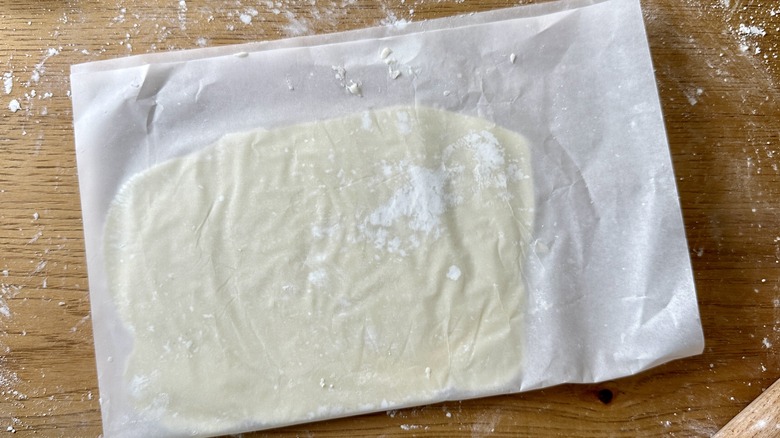
Roll the dough between parchment to create a ¼-inch thick rectangle.
Step 16: Dust with sugar
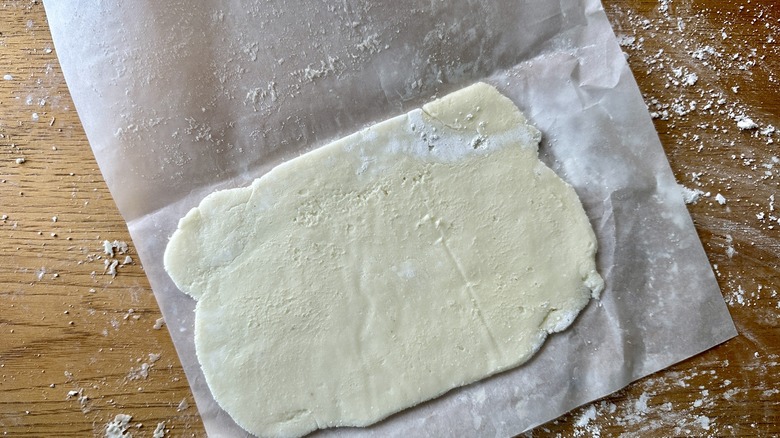
Uncover and dust with confectioners' sugar to release the dough from the parchment on both sides, if needed.
Step 17: Cut into strips
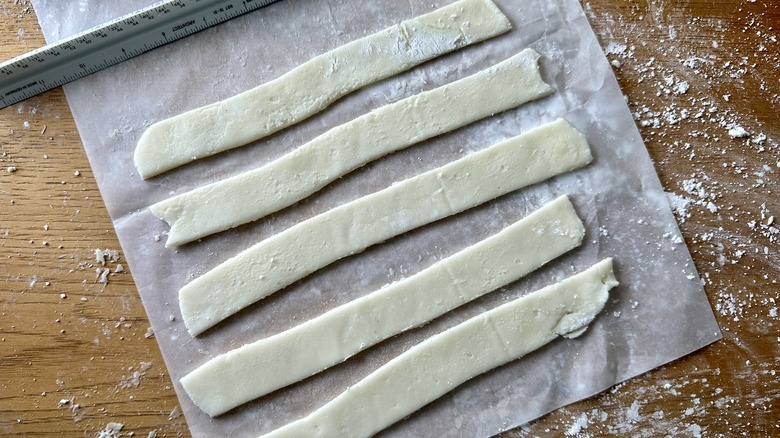
Use a sharp knife or pizza cutter to cut the dough into 1-inch strips.
Step 18: Cut into sections
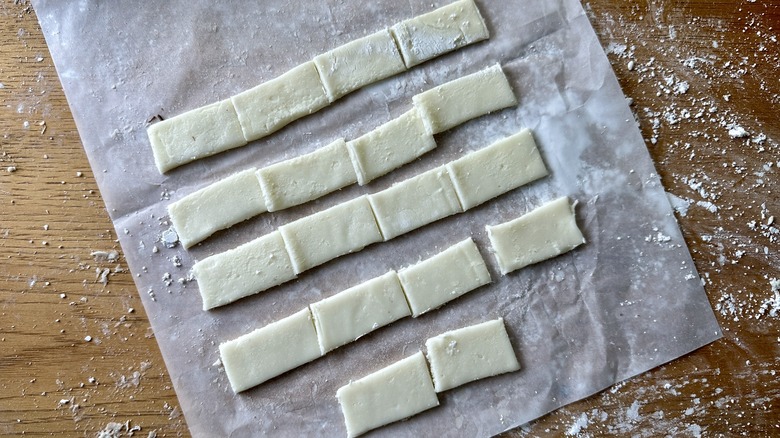
Cut each strip into 2-inch sections.
Step 19: Top with mints
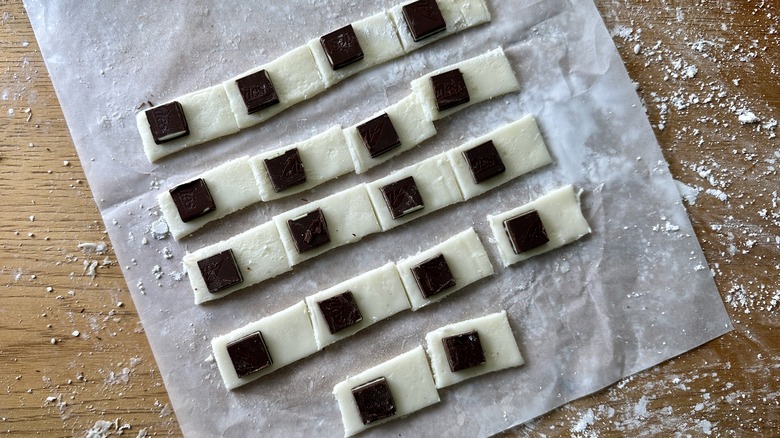
Place a mint onto one end of each rectangle.
Step 20: Fold and seal
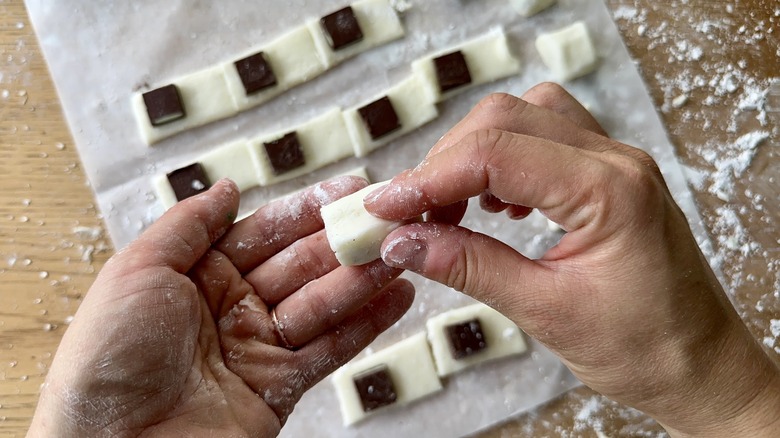
Use your hands to fold the dough over the mint, pinching the edges to seal.
Step 21: Decorate the candies
Use a fork dipped in confectioners' sugar to add a decorative top to each.
Step 22: Repeat
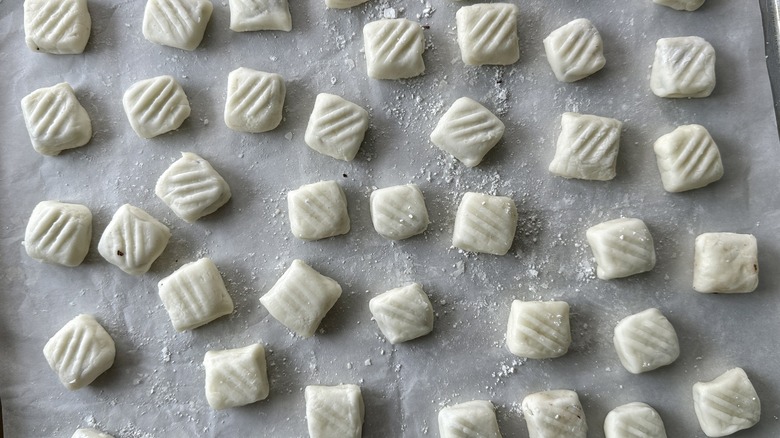
Transfer to the remaining lined baking sheet and repeat with the remaining dough and mints.
Step 23: Drizzle with chocolate
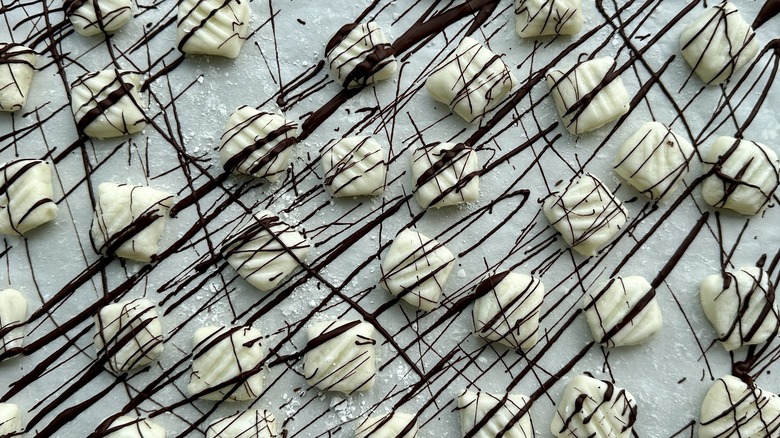
Drizzle with melted dark chocolate, if desired.
Step 24: Chill until firm
Refrigerate the mints until firm, at least 1 hour, and transfer to a serving dish.
Step 25: Serve the mints
Serve chilled, dusted with confectioners' sugar, if desired.
Andes-Stuffed Elevated Cream Cheese Mints Recipe
Sweet and tangy cream cheese mints hide a delightful surprise: a delicious chocolatey andes mint. These candies are perfect for a wedding or baby shower.
Ingredients
- 1 (8-ounce) package cream cheese, softened
- ¼ cup unsalted butter, at room temperature
- 1 teaspoon peppermint extract
- ¾ teaspoon kosher salt
- 1 (2-pound) bag confectioners' sugar, divided
- 1 (4.67-ounce) package Andes Crème de Menthe Thins
Optional Ingredients
- Green food coloring, as desired
- ¼ cup chocolate chips, melted
Directions
- In the bowl of a stand mixer fitted with a paddle attachment, beat the butter, cream cheese, peppermint extract, and salt until light and fluffy.
- Reserve 1 cup confectioners' sugar for rolling, and slowly beat in the remaining sugar on low speed, until the dough is thick but combined. If your mixer is struggling, knead with gloved hands until smooth.
- Divide the dough into two sections, and color one section with green food coloring, if desired. Form the dough into disks, wrap them, and refrigerate for at least 1 hour.
- Line two baking sheets with parchment paper and grab one additional sheet for rolling.
- Dust a clean surface lightly with some of the reserved confectioners' sugar.
- Unwrap one disk of dough (the green, if applicable), and divide it into four sections.
- Roll one section of dough to a 10-inch log, about ¾-inch wide.
- Cut it into 12 even pieces.
- Roll each piece to a smooth ball and transfer to a lined baking sheet.
- Use a fork dipped into confectioners' sugar to press the balls to create candy rounds.
- Repeat with the remaining dough; set aside.
- Unwrap the Andes mints and cut each in half. Set aside.
- Unwrap the remaining section of chilled dough and divide it in half. Place half onto a confectioners' sugar-dusted sheet of parchment paper.
- Fold the parchment over to cover the dough.
- Roll the dough between parchment to create a ¼-inch thick rectangle.
- Uncover and dust with sugar to release the dough from the parchment on both sides, if needed.
- Use a sharp knife or pizza cutter to cut the dough into 1-inch strips.
- Cut each strip into 2-inch sections.
- Place a mint onto one end of each rectangle.
- Use your hands to fold the dough over the mint, pinching the edges to seal.
- Use a fork dipped in confectioners' sugar to add a decorative top to each.
- Transfer to the remaining lined baking sheet and repeat with the remaining dough and mints.
- Drizzle with melted dark chocolate, if desired.
- Refrigerate the mints until firm, at least 1 hour, and transfer to a serving dish.
- Serve chilled, dusted with confectioners' sugar, if desired.
How to store cream cheese mints
While cream cheese mints can be kept out at room temperature for up to two hours, it's best to refrigerate past that point. The candies will begin to soften and dry out as they sit. For longer storage, prepared cream cheese mints can be stored in an airtight container in the refrigerator for up to two weeks. Stack the mints between layers of parchment paper, if needed, to prevent them from sticking together. If making the mints ahead, drizzle with dark chocolate or sprinkle with confectioners' sugar right before serving for the freshest presentation.
These mints can also be frozen for up to three months, and having them on hand in the freezer for easy grabbing (particularly in the lead-up to the holiday season) is a definite bonus. To freeze the mints, place them onto a lined baking sheet in a single layer and freeze until firm before transferring to a freezer-safe airtight container or zip-top bag. Thaw in the refrigerator for an hour or two before serving.
What other flavors can I use for cream cheese mints?
While flavoring with peppermint is a classic choice when it comes to cream cheese mints, you can also swap the peppermint extract with just about any extract you please for a seasonal treat you can enjoy year-round. Vanilla, almond, lemon, orange, coconut, maple, and other favorite extracts can all be used instead of peppermint, as well as spices like cardamom or pumpkin pie spice, citrus zests, rum, cocoa powder, or dried lavender.
When choosing a flavoring, it can also be nice to pair your food coloring accordingly, if using. You can shape the mints in any way you prefer, whether by using your hands to roll them into balls, or by pressing them into molds in the shape of flowers, fruits, or any other forms that fit the flavor. You can also experiment with filling the mints with other types of candies, mini cookies, and more, for a unique touch.