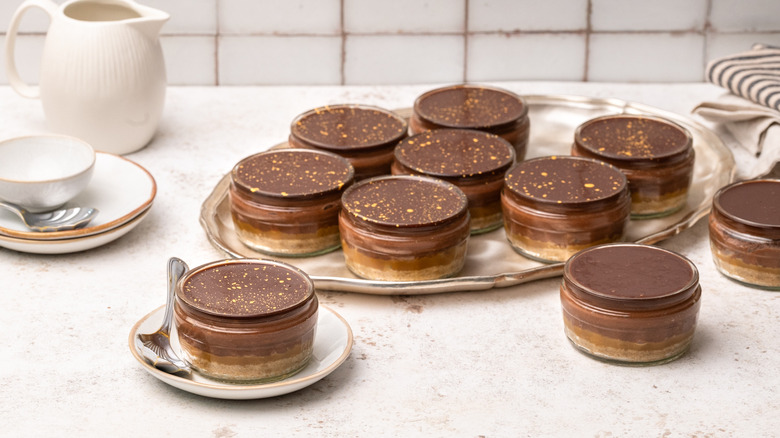
Chocolate And Salted Caramel Gluten-Free Cheesecake Pots Recipe
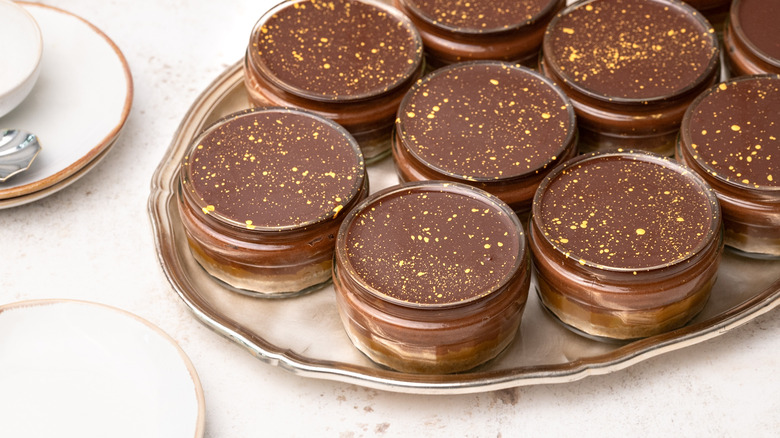
Gluten-free desserts have long been considered lesser than their gluten-filled counterparts, with an expectation that they will be dry and tasteless affairs that are best left far away from your tastebuds. The truth, though, is that this myth is largely unfounded in today's world — gluten-free desserts can be as delightful and as delicious as any other type of sweet treat. These chocolate and salted caramel gluten-free cheesecake pots from the kitchen of recipe developer Jennine Rye is one great example.
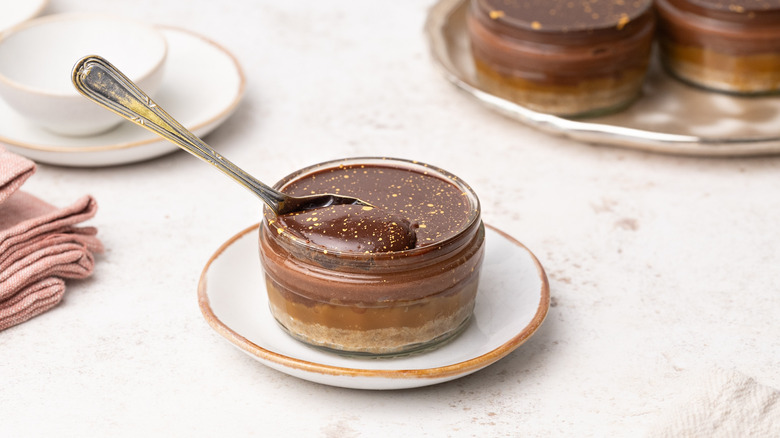
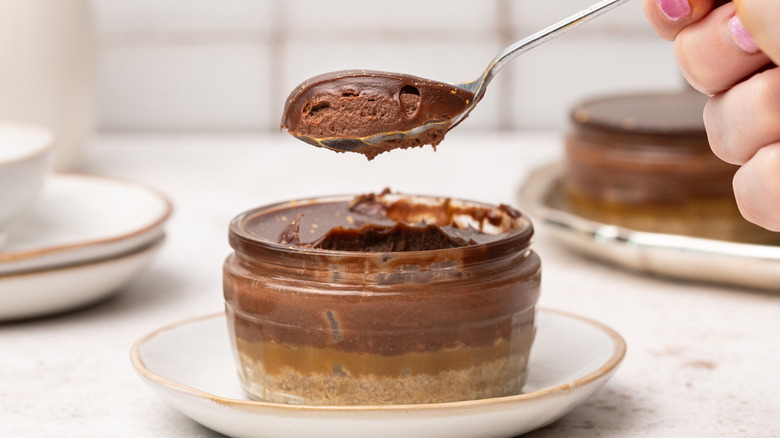
Well versed in gluten-free baking and desserts, Rye has spent many years following a gluten-free diet herself and developing go-to recipes that you'd never even know were free from gluten. These homemade chocolate and salted caramel cheesecake pots are one of her regular recipes for when she's choosing a dessert option that's suitable for regular and gluten-free diners alike. A luxurious salted caramel sauce tops a gluten-free crumb base before you layer on a creamy, no-bake dark chocolate cheesecake mixture and finish it off with a smooth milk chocolate ganache. These cheesecake pots are rich, thick, and creamy; they're perfect for when you want a suitably impressive finish to your meal.
Gather the ingredients for this chocolate and salted caramel gluten-free cheesecake pots recipe
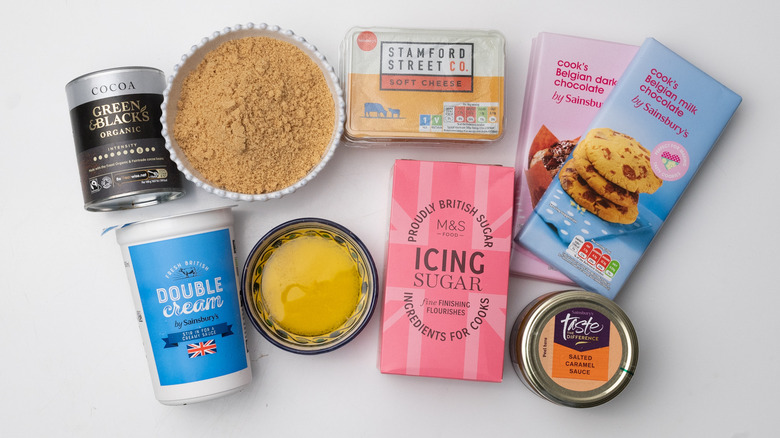
To begin this chocolate and salted caramel gluten-free cheesecake pots recipe, you will first need to gather the ingredients. For the base, you will want gluten-free graham cracker crumbs, butter, and salted caramel sauce. For the cheesecake layer, you will need semi-sweet dark chocolate, cream cheese, confectioners' sugar, cocoa powder, and heavy cream. To make the ganache topping, you will want more heavy cream and semi-sweet milk chocolate. You may also wish for ingredients to decorate your cheesecake pots.
Step 1: Begin the base
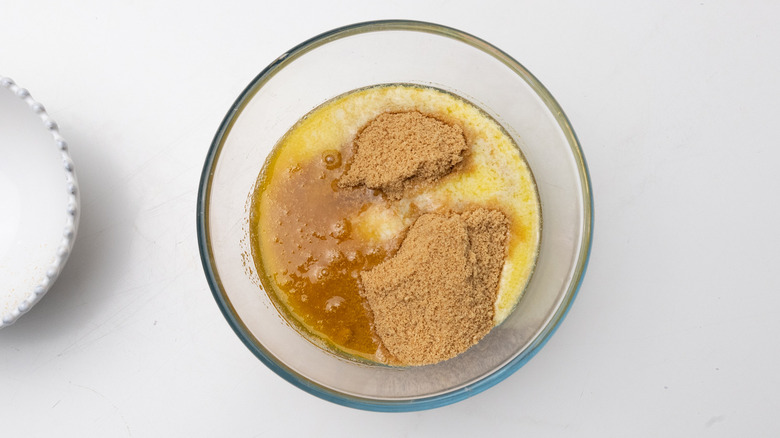
Combine the graham cracker crumbs and melted butter in a bowl.
Step 2: Mix thoroughly
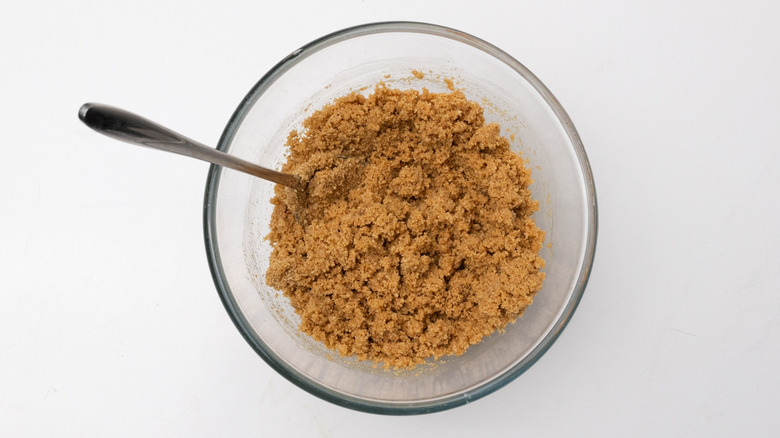
Stir until the mixture resembles wet sand.
Step 3: Form the bases
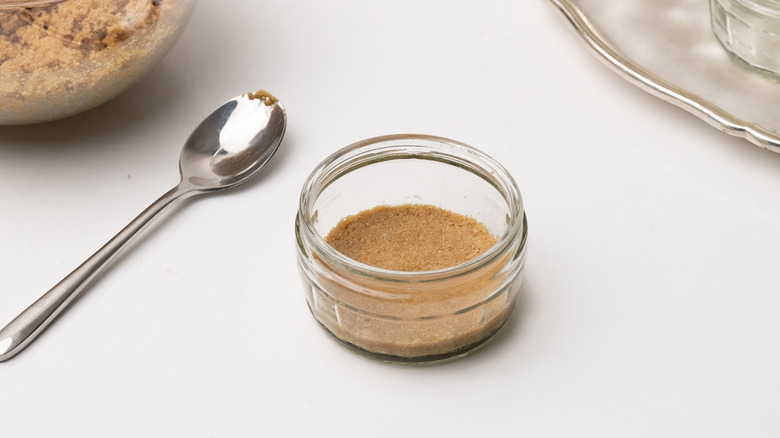
Using roughly 1 tablespoon of the mixture for each pot, press the mixture down into a small glass jar to form your cheesecake base.
Step 4: Refrigerate
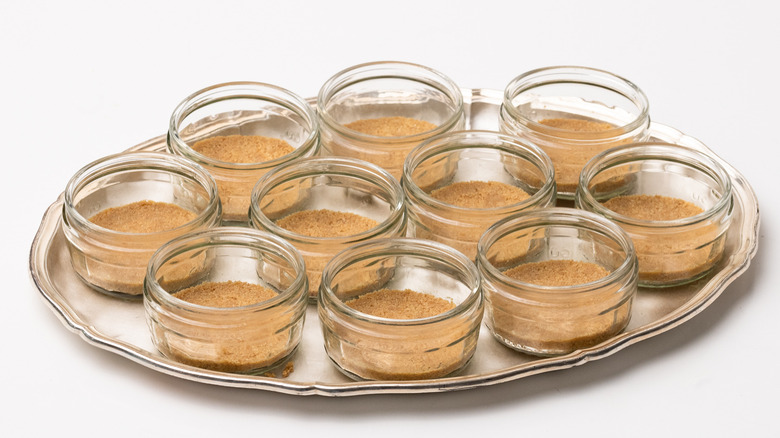
Repeat the procedure to make 10 total pots. Place the pots in the fridge for 15 minutes for the base to harden.
Step 5: Add the salted caramel
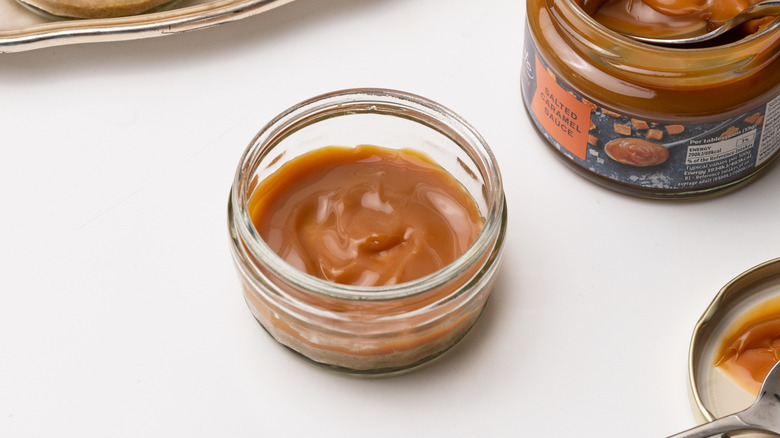
Remove the pots from the fridge and add roughly 1 tablespoon salted caramel sauce to each pot, spreading it out so that it covers the biscuit base.
Step 6: Refrigerate again
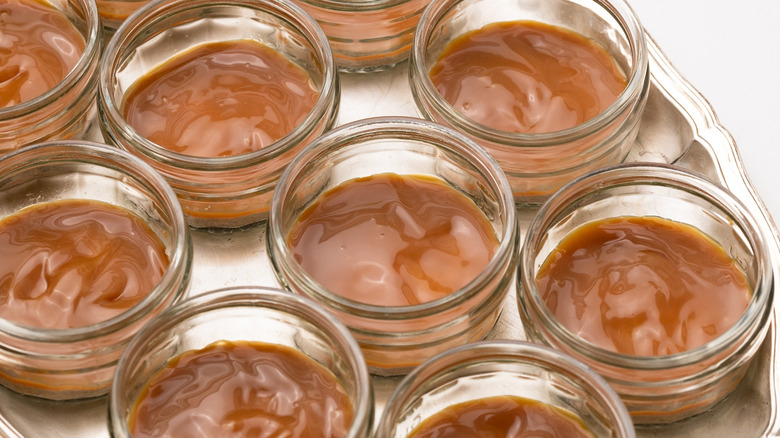
Place the pots back into the fridge for a further 15 minutes.
Step 7: Prepare the chocolate
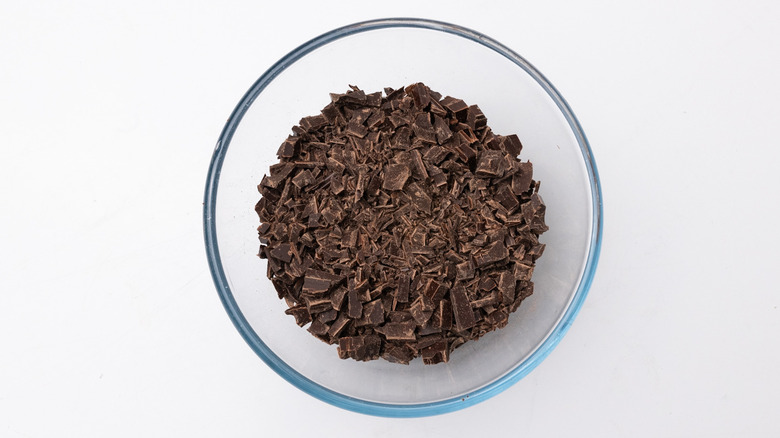
Meanwhile, place the chopped dark chocolate into a microwave-safe bowl.
Step 8: Melt the chocolate
Microwave the chocolate on medium power in 20-second intervals until the chocolate is melted.
Step 9: Begin the cheesecake mixture
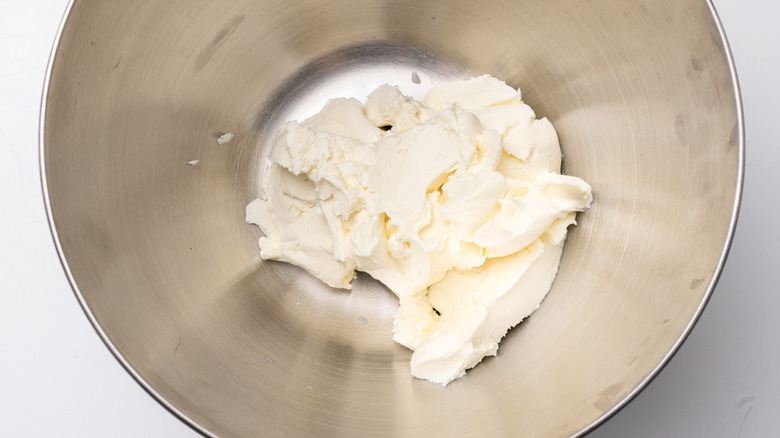
To a stand mixer, add the cream cheese.
Step 10: Beat the cream cheese
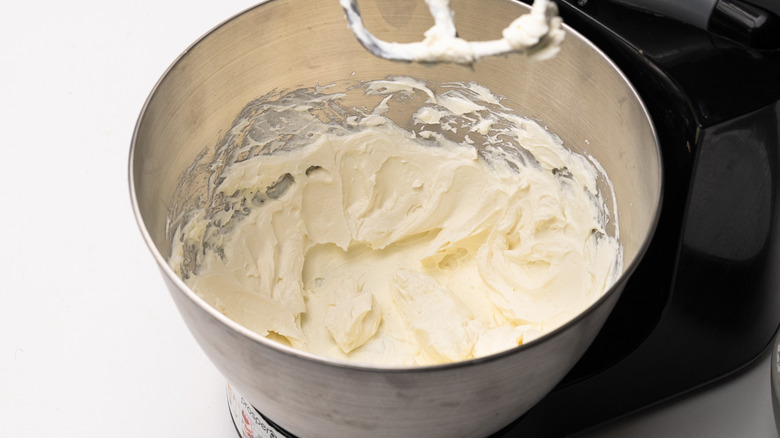
Beat on medium-high for 30 seconds.
Step 11: Sift in cocoa powder and sugar
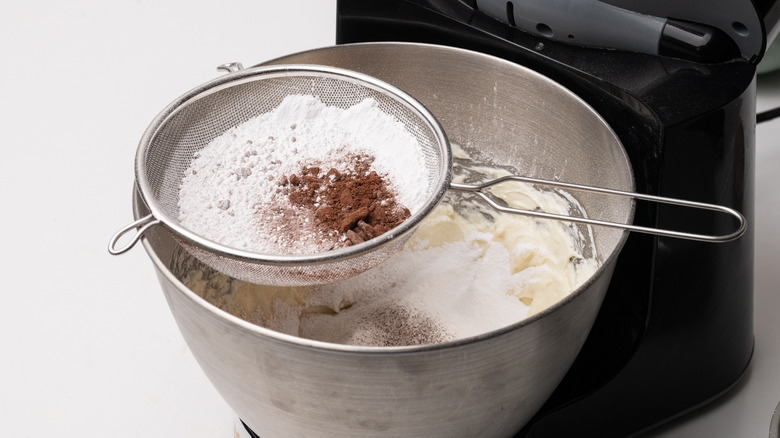
Sift in the confectioners' sugar and cocoa powder, and beat again until combined.
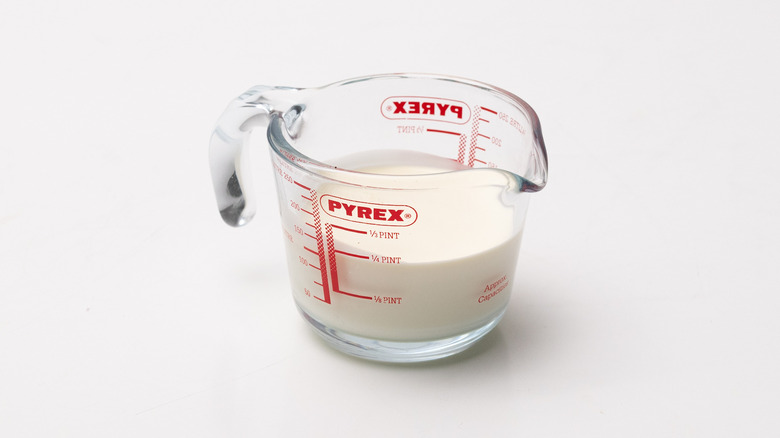
Step 12: Add cream
Pour in 1 cup heavy cream and mix until just incorporated.
Step 13: Add the melted chocolate
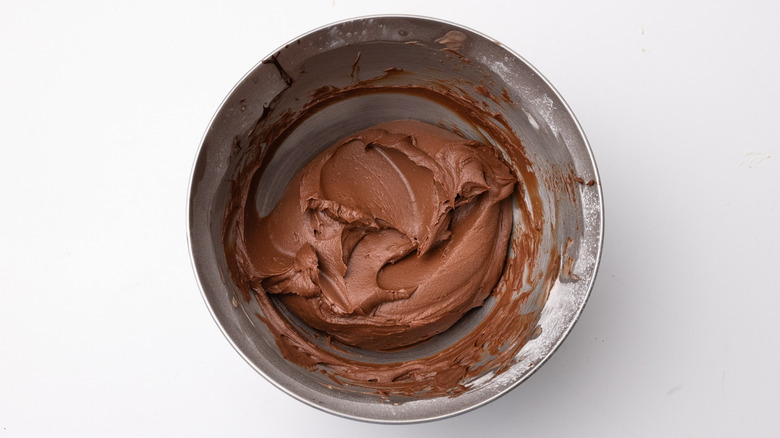
With the mixer still on, slowly pour in the now-cooled melted chocolate and keep mixing until the cheesecake batter is smooth.
Step 14: Fill the pots
Remove the pots from the fridge and fill each pot with roughly ½ cup of the cheesecake mixture.
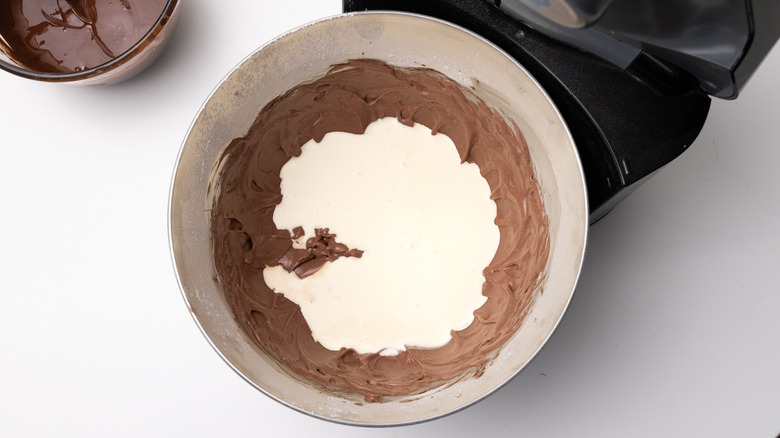
Step 15: Heat more cream
Heat the remaining ½ cup heavy cream in a microwave for 45 seconds, until hot but not boiling.
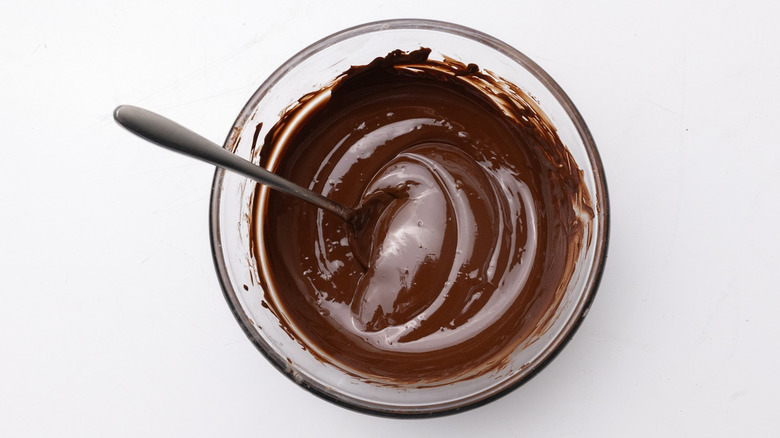
Step 16: Make the ganache
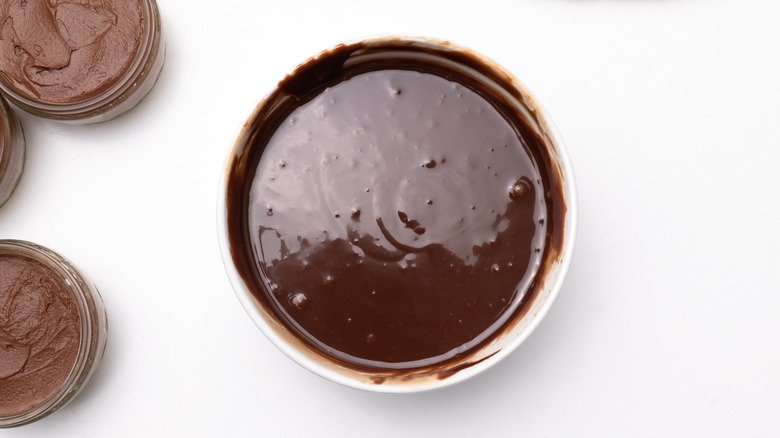
Pour the cream over the chopped milk chocolate, and then stir until it is completely melted.
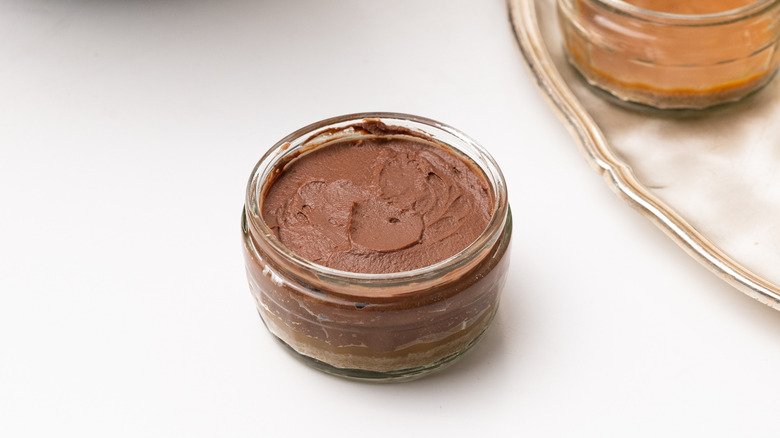
Step 17: Top the cheesecake pots with ganache
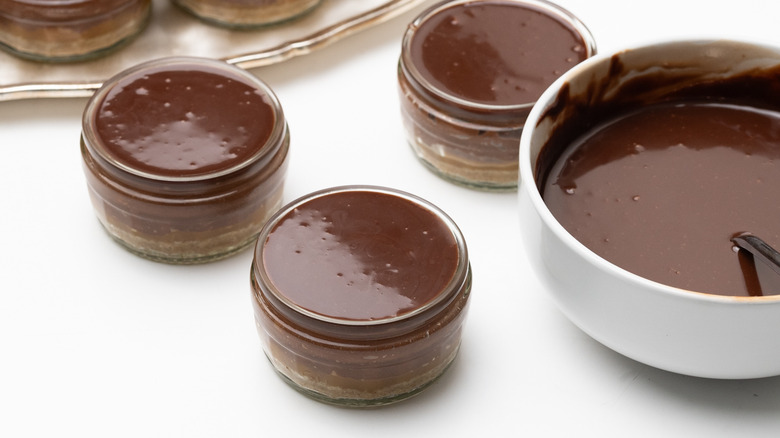
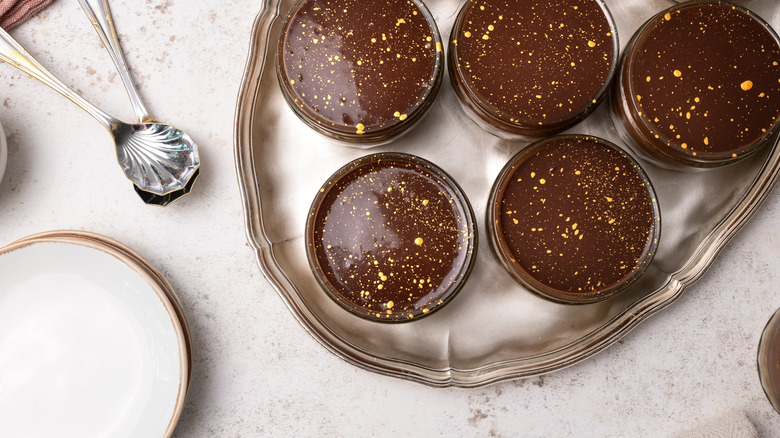
Spoon the chocolate ganache mixture over the top of each cheesecake pot so that it completely covers the layer beneath.
Step 18: Refrigerate once more
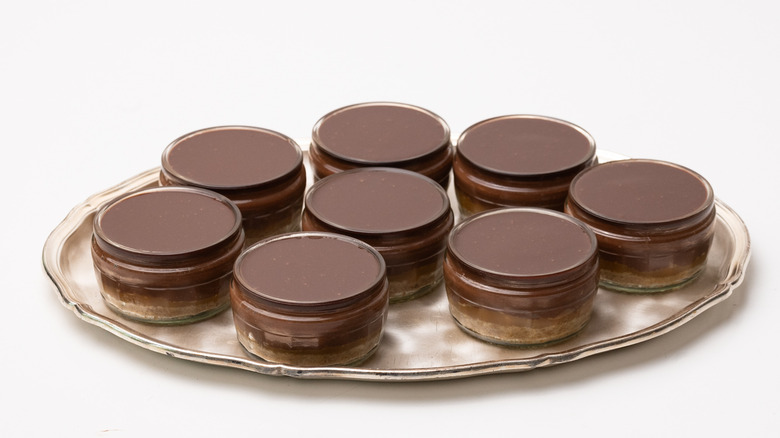
Place the chocolate pots back into the fridge for at least 30 minutes before serving.
Step 19: Serve
Decorate, as desired, and serve.
Chocolate and Salted Caramel Gluten-Free Cheesecake Pots Recipe
While these no-bake, gluten-free cheesecakes require a bit of patience for chilling and setting, that very quality makes them a perfect make-ahead dessert.
Ingredients
- 2 cups gluten-free graham cracker crumbs
- ⅓ cup unsalted butter, melted
- ¾ cup salted caramel sauce
- 10 ½ ounces semi-sweet dark chocolate, chopped
- 14 ounces cream cheese
- 1 ½ cups confectioners' sugar
- 1 heaped tablespoon cocoa powder
- 1 ½ cups heavy cream, divided
- 5 ounces semi-sweet milk chocolate, chopped
Optional Ingredients
- Decorations, as desired
Directions
- Combine the graham cracker crumbs and melted butter in a bowl.
- Stir until the mixture resembles wet sand.
- Using roughly 1 tablespoon of the mixture for each pot, press the mixture down into a small glass jar to form your cheesecake base.
- Repeat the procedure to make 10 total pots. Place the pots in the fridge for 15 minutes for the base to harden.
- Remove the pots from the fridge and add roughly 1 tablespoon salted caramel sauce to each pot, spreading it out so that it covers the biscuit base.
- Place the pots back into the fridge for a further 15 minutes.
- Meanwhile, place the chopped dark chocolate into a microwave-safe bowl.
- Microwave the chocolate on medium power in 20-second intervals until the chocolate is melted.
- To a stand mixer, add the cream cheese.
- Beat on medium-high for 30 seconds.
- Sift in the confectioners' sugar and cocoa powder, and beat again until combined.
- Pour in 1 cup heavy cream and mix until just incorporated.
- With the mixer still on, slowly pour in the now-cooled melted chocolate and keep mixing until the cheesecake batter is smooth.
- Remove the pots from the fridge and fill each pot with roughly ½ cup of the cheesecake mixture.
- Heat the remaining ½ cup heavy cream in a microwave for 45 seconds, until hot but not boiling.
- Pour the cream over the chopped milk chocolate, and then stir until it is completely melted.
- Spoon the chocolate ganache mixture over the top of each cheesecake pot so that it completely covers the layer beneath.
- Place the chocolate pots back into the fridge for at least 30 minutes before serving.
- Decorate, as desired, and serve.
Nutrition
| Calories per Serving | 746 |
| Total Fat | 52.4 g |
| Saturated Fat | 30.6 g |
| Trans Fat | 1.0 g |
| Cholesterol | 100.8 mg |
| Total Carbohydrates | 64.0 g |
| Dietary Fiber | 4.2 g |
| Total Sugars | 49.5 g |
| Sodium | 312.1 mg |
| Protein | 8.0 g |
How far in advance can you make cheesecake pots, and what is the best way to store them?
It's always helpful to have a list of recipes that you can make ahead of time, especially when you're planning a fun event like a dinner party. After all, nobody wants to be locked away in the kitchen all evening instead of socializing with their guests. While they do take a little time and patience to assemble, these cheesecake pots are ideal for such an occasion. You can easily make them a day or two in advance, giving you plenty of time to focus on your guests and other dish preparations.
Once you have assembled your chocolate cheesecake pots, simply make sure to keep them well covered, either with plastic wrap or in containers, and store them in the fridge. They will keep well for up to 5 days, meaning that you can continue to enjoy any leftovers at a leisurely rate. These chocolate cheesecake pots can also be frozen as long as they are well wrapped and then defrosted a day or so before you intend to consume them.
What other ingredients or flavors can you use in gluten-free cheesecake pots?
While salted caramel and chocolate make an excellent flavor combination for any chocolate lover out there, this pairing is definitely not the only option. For smaller changes, you can substitute the salted caramel layer for a variety of other flavors that pair well with chocolate. For a rich fruity finish, layer in a cherry compote for a Black Forest gateaux–inspired cheesecake pot. Alternately, a layer of raspberry puree and a few fresh raspberries on top will provide a fresh contrast to the rich, creamy chocolate as well as a lovely pop of color. Other flavors that pair well with the dark chocolate cheesecake mixture include coffee, mint, hazelnut, and orange, and you really can't go wrong with a swirl of peanut butter.
For bigger flavor changes, swap out the dark chocolate for another variety. White chocolate will pair well with a variety of different fruits, from berries, such as strawberries, raspberries, or blueberries, to more tropical fruits, like passion fruit, mango, or lime. Alternatively, you can serve these white chocolate cheesecake pots with a hazelnut or peanut butter flavoring. If you enjoy earthy flavors, matcha also pairs beautifully with white chocolate and will produce a delightfully green dessert.