A Cheat Sheet Guide To Using A Cocktail Shaker Set
We may receive a commission on purchases made from links.
In the movie "Cocktail," Tom Cruise aka Brian Flanagan, is a mixology machine. He's flipping bottles! He's shaking glasses! He's bartending with ease, making any cocktail enthusiast positively green chartreuse with envy. However, while the flipping and shaking are certainly nice, he's nothing without his cocktail making tools. Without his glasses, shaking tins, and strainers, Flanagan's cocktails would be more like cock-fails. His mojitos would be no-jitos. His Negroni? More like a Ne-groan-i. You get the idea.
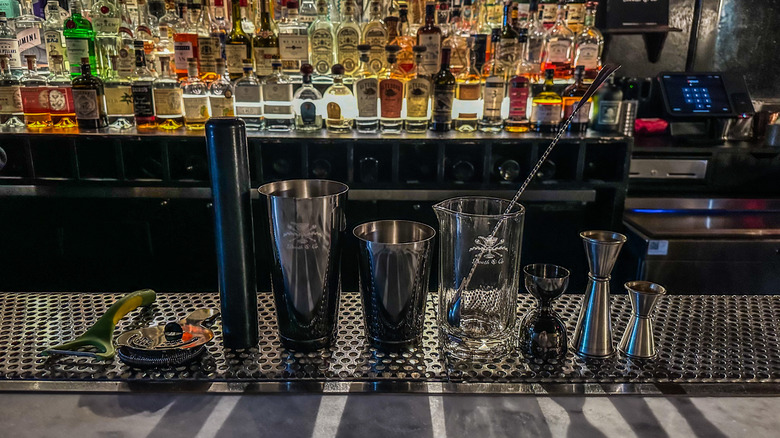
To get a more in-depth look at what makes up a standard cocktail shaker set and how to use it, I sat down with Javelle Taft, Bar Manager at Death & Co., a mixology bar in New York City. For Taft, any level of home bartender can benefit from having a cocktail shaker set and knowing how each tool works is crucial for success.
"I think it's very important to have in case you want to have any cocktails that have aeration," notes Taft. "A daiquiri, a margarita, a gimlet. Ingredients that don't just contain spirits, but they contain sugar or a citrus element. When you shake it, it adds a certain texture to the drink." In short? Cocktail creation cannot be achieved by ingredients alone. Having the tools and knowing how to use them will result in balanced, consistent cocktails. Consider this beginner's guide your cheat sheet to a basic cocktail shaker set, and to channeling your inner Brian Flanagan. Make his tagline your own: when you pour, you reign.
Mixing glass
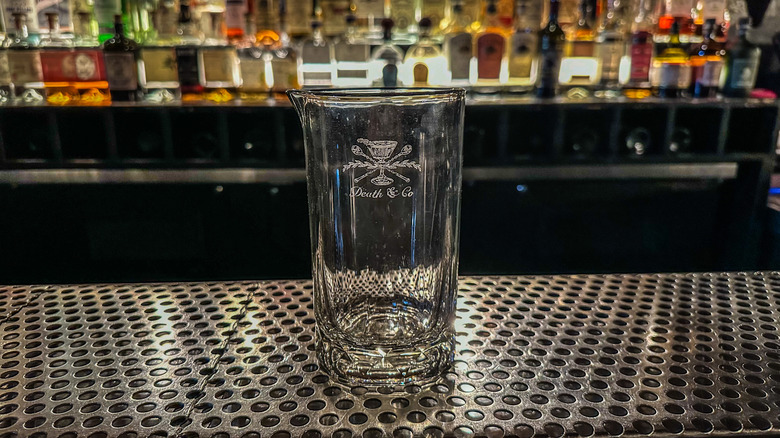
Fancy yourself a martini, Manhattan, or Negroni tonight? For Javelle Taft, anytime you're preparing a stirred cocktail, a mixing glass is necessary for incorporating ingredients that don't require aeration. Unlike drinks that include citrus or dairy ingredients — the kind that need a hefty shake before being poured into a glass — the purpose of the mixing glass is to do just that: provide a place to mix.
"You want straight spirits. Fortified ingredients like vermouth, sherry, and bitters," said Taft. "You're making Old Fashioneds, negronis, martinis, things of that nature."
When considering your cocktail shaker set, think of it like a team. Your mixing glass and your shaking tins are the team leaders. They're the central focal point, making the plays and calling the shots, without which the rest of the team can get lost. In terms of the style of the mixing glass, there are a variety of options. A cocktail shaker set will come with one, but if you want to use what you've got at home as well, you could always use a standard pint glass for your cocktail mixing needs.
Bar spoon
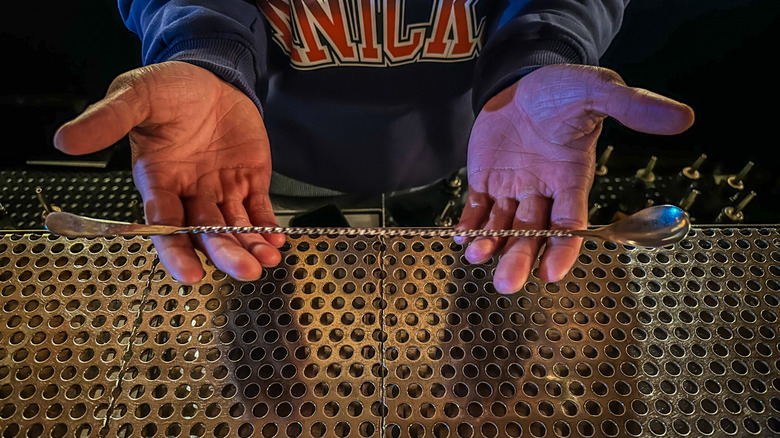
If you're making drinks in a mixing glass, you won't get very far unless you have something to mix those ingredients with. Enter the bar spoon. According to Javelle Taft, you could sub in a straw — metal only, so it can't be bent by the ice. Yet the bar spoon is for more than stirring. When it comes to cocktail creation, your bar spoon may be the best bartending tool you never knew you needed.
"You need a spoon to stir the ingredients, but there's a lot of classic cocktails that require bar spoon ingredients," explains Taft. "There's particular liqueurs, like maraschino liqueur and chartreuse, where a little goes a long way, right? So if you throw those ingredients into a jigger, you could potentially use a little bit too much of it. With a bar spoon, you stay a little bit more accurate." In the case of a Vieux Carré, a classic cocktail that requires a teaspoon of Benedictine, a bar spoon is crucial to get that measurement just right.
Additionally, Taft notes that not all bar spoons are created equal. Some are smaller to match up with smaller mixing glasses, allowing for tighter revolutions when stirring. Bigger bar spoons with a red tip on the end can be used to mix ingredients as well as crack ice. And the coils on the long handle of the spoon? They're not just for decoration — the tighter the coil, the smoother the spin in the glass.
Jigger
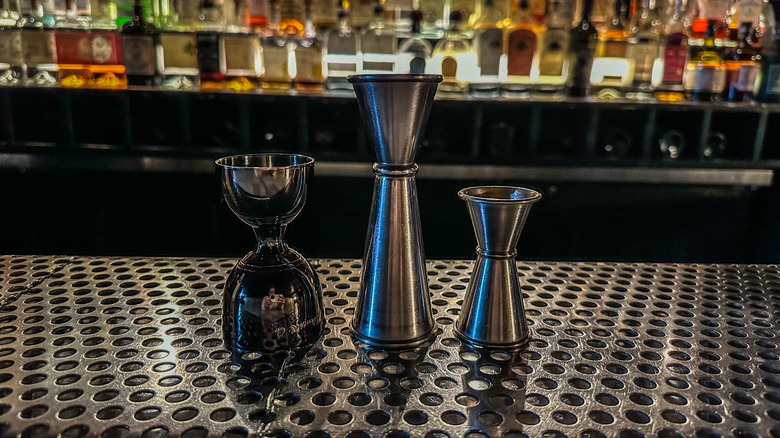
If the bar spoon is meant for ingredients that are needed in small amounts, the jigger is the exact opposite of that, ensuring accuracy for the ingredients that are going in at larger scale. While you can certainly opt to "free pour" a cocktail being made at home, using the jigger will ensure that no matter how many times you make it, your cocktail will taste the same every time.
"When you're getting into the realm of cocktails, you want to make sure that they're made accurately and appropriately," says Javelle Taft. "Someone could recommend a particular drink that you would maybe assume is easy to build. But if you put in too much Benedictine or not enough vermouth, now you have a completely different drink ... the jigger keeps us all honest."
Just like with the bar spoon, jiggers come in multiple sizes. For the smaller jigger, the measurements are a quarter of an ounce, a half ounce, and three quarters of an ounce. The taller jigger is one ounce on one side, and two ounces on the larger side. Styles abound when it comes to comfort and personal preference, but the measurements will remain consistent throughout.
Shaking tin
Sticking with this slightly sports-esque metaphor of a cocktail shaker set being a team, your shaking tin is another one of the team leaders, without which certain cocktails would cease to exist. While the mixing glass is necessary for the stirred drinks we mentioned before, the shaking tins are needed for the ones that require shaking — your classic daiquiris, your sour sidecar, your margaritas. Creamy drinks that have ingredients like heavy cream or egg white — think Ramos Gin Fizz or Whiskey Sour — need that vigorous shake in the tin to incorporate air into those ingredients.
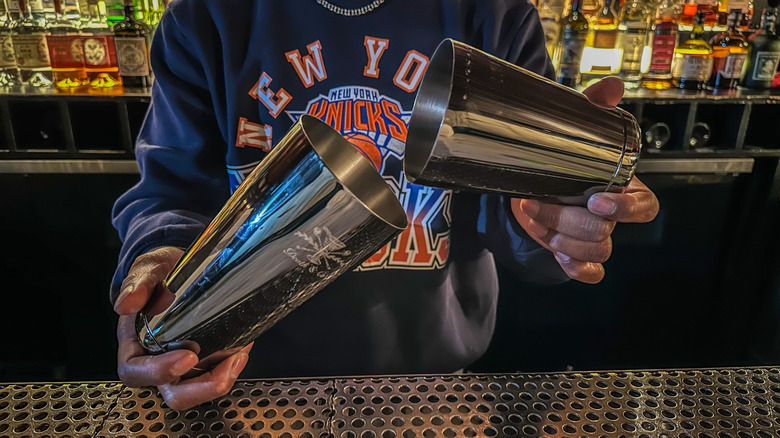
The shaking tin comes in two parts: a larger tin and a smaller one. Taft starts building his cocktails in the smaller tin, starting with the smallest ingredients first, like syrups and citrus. Then he moves onto the liqueurs, and then finally the base spirits which typically require larger measurements. Ice is added into the tin, it's closed with the larger tin to seal everything in, and then just like Brian Flanagan does, that tin gets a vigorous shake up down and all around, to make sure everything is combined.
While the standard cocktail set will come with equally standard shaking tins, you have room to get a little fancier if you so choose. Behind the bar at Death & Co, Taft and his team are using Japanese style shakers which are weighted, which allows you to shake the drink without the ice in the glass making your hand cold. Additionally, the Japanese style is more accurate and when closed, the seal won't break. You could also opt for a cobbler style shaker, which is slightly smaller and designed for single drinks, meaning more aeration is getting into the ingredients.
Cocktail strainer
The bar spoon is to the mixing glass as the cocktail strainer is to the shaking tin. Picture it: It's a hot day, and a mojito is most definitely on the menu. You've gently muddled some mint (more on the muddler in a moment), added in your ice, simple syrup, citrus, and rum, and now it's time to shake. You've shaken that drink like a polaroid picture, and your previously-prepared glass with ice is ready to receive the fruits of your brief upper body labor. Can you just pour everything into that glass? Sure, but it would be an absolute mess. A cocktail strainer cleans that right up, catching the loose ingredients in the shaker tin before they get into your glass, like that now crushed up ice, and the muddled mint leaves.
"If you're shaking with the mint and putting it into the drink, it can sometimes lead to an intensely bitter drink towards the end," says Taft. "You want to shake with the mint, open up the herbaceous quality, and then shake it out and toss it with the ice."
While there's more than one type of strainer, Taft recommends home bartenders opt for the Hawthorne strainer, mostly for its functionality. Not only can you use it to strain out of a mixing glass or a shaking tin, it also has a gauge that, when closed, will keep ice that has been heavily shaken from slipping into your drink.
Muddler
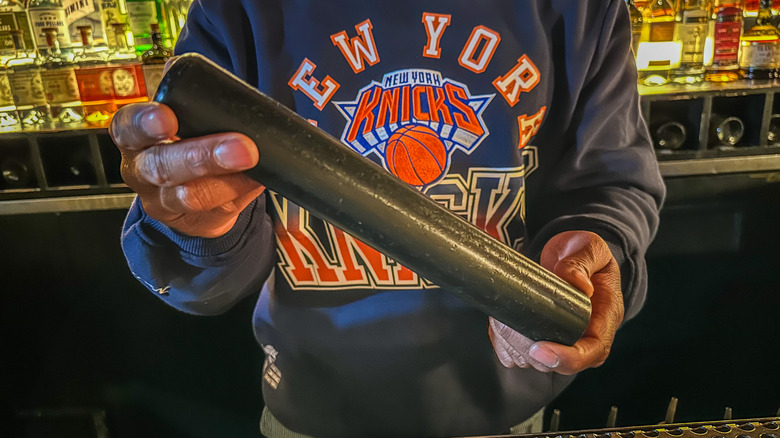
When you hear the word muddler, your mind may automatically go to the previously-mentioned mojito with the muddled mint leaves. And your mind is right to think that way — the muddler is meant for incorporating fresh herbs or fresh fruit into a cocktail by pressing down on them in the glass. According to Javelle Taft, a muddler with both a flat side and a rounded side, is what you want to look for. The flat side is used for the actual muddling, and the rounded side is meant to fit comfortably and ergonomically in the palm of your hand.
Before you get to crushing limes and mint with your muddler, take a beat. There's a technique to be learned to ensure you're treating your ingredients correctly. In order to explain this, let's focus on two drinks that require muddled ingredients: the Caipirinha and the Mojito.
Starting with the Caipirinha, your first ingredient is freshly muddled limes. You want three things from those muddled limes: the lime flesh, the citrus juice, and the outside skin where the oils are. In this case, you want to get a little aggressive with your muddling to ensure you get all the good stuff.
Changing to the Mojito, which has muddled mint leaves, you actually want to do the opposite. Rather than go full throttle on the leaves, you want a quick, gentle press to release the oils. Otherwise, after those leaves are shaken with ice, you may end up with a bitter mint flavor which will be incorporated into your cocktail.
Peeler
Imagine you've just created the perfect Old Fashioned. The ingredients have been perfectly measured out, using your bar spoon and jigger accordingly, and you've got yourself quite the well-balanced cocktail. However, one thing is missing. The garnish! That orange peel or lemon peel that gets nestled ever so gently in between your giant ice cube and the edge of the glass adds an extra citrusy essence to each sip. So how do we achieve such a garnish? A tool with mass (ahem) ap-peel.
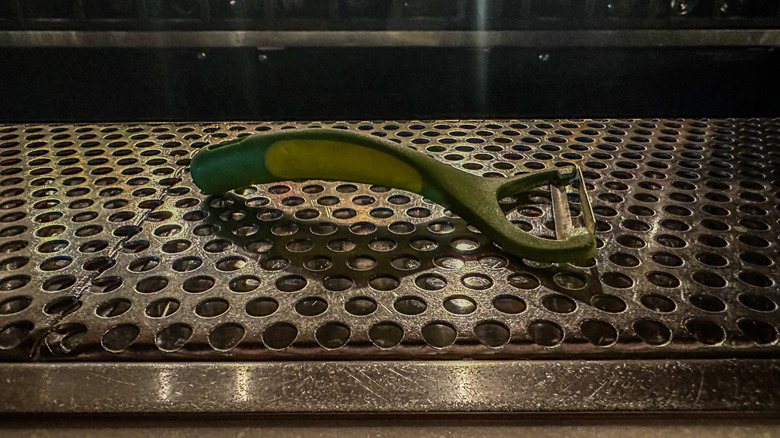
At Death & Co., Javelle Taft and his team are using a Y peeler, which you, as the home bartender, can easily purchase on your own or find in a more expansive cocktail shaker set. The purpose of the peeler is to easily remove the peel from the fruit for garnishing purposes, which has all those oils that you want expressed into your drink.
"If it's too thin, you're not getting as much oil as you'd like, and it doesn't really express too well," notes Taft. While a Y peeler isn't mandatory — any vegetable peeler you've got in your kitchen will do — the Y shape makes for a wider, more aesthetically pleasing, peel.
Paring knife
Perhaps you don't have a peeler and don't want to invest in one, but you still want that beautiful garnish to complete your cocktail. That's where a paring knife can and will come in to save the day. As with any sharp tool, you want to be careful with your paring knife to make sure you're just cutting the peel and not a finger.
"A paring knife is the quick way of getting a nice peel," notes Javelle Taft. "So you kind of have to use that with intent, too. If you're going to peel fruit, like a lemon, you just want the pith and the outside layer, you don't want any of the flesh because you don't want any of that juice seeping into your drink." In the case of the martini with a twist of lemon, for example, you can use the paring knife to carefully remove the peel from a lemon, and if any of the flesh does make its way onto the peel, you can lay the peel flat and cut off the flesh with the knife so you're just getting the oils without any juice.
