A Chef's Guide To Making The Absolute Best Biryani At Home
We may receive a commission on purchases made from links.
Biryani is thought to have originated from Persian pilaf, which is both a rice dish and grain cooking method. Popularized during the 16th century in the Mughal empire, which covered modern-day Afghanistan, Bangladesh, Pakistan, and India, biryani is now one of the most popular dishes in Indian cuisine. Over centuries, biryani has diversified and proliferated into dozens of recipes. But they all offer a complex flavor profile characteristic of the highly spiced cuisines of South Asia. Achieving such complexity requires a multi-faceted cooking process that retains many of its ancient methods. If making this dish at home seems daunting, take the tips of our expert Indian celebrity chef, who explains the ins and outs of scratch-made biryani.
Varun Inamdar's mastery has led to the success of his restaurants, New Light in Kashmir, Anokhi in Shanghai, and 27° West in Singapore. Speaking with Tasting Table, chef Inamdar shared helpful tips about making biryani at home. We've broken his advice down into a guide that covers key ingredients like meat, spices, and rice, as well as cooking methods and final touches that will collectively ensure that your homemade biryani has the best flavor, texture, and aroma.
Choosing the best meat for biryani
Biryani encompasses dozens of recipes. Some feature vegetables and hard-boiled eggs, while coastal recipes, like Goan biryani, incorporate locally caught fish and shellfish. Chef Inamdar sticks to the two most popular types of meat consumed in India: chicken and goat.
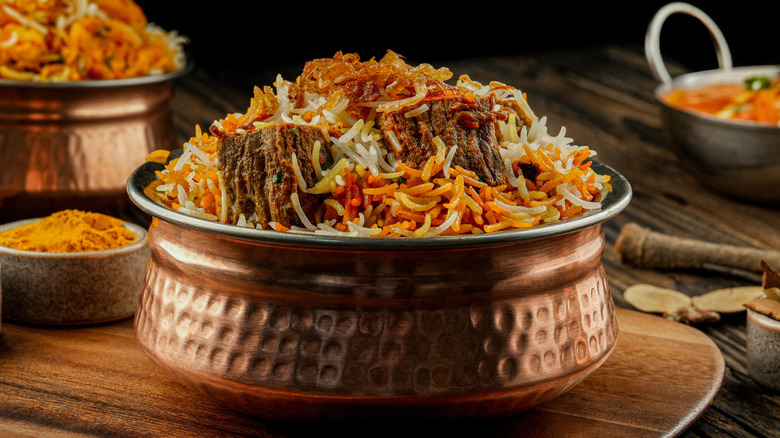
He says, "For biryani, goat shoulder is the best choice due to its robust flavor and ability to withstand slow cooking. Goat shoulder is better for curries and biryanis due to its higher fat content, connective tissue, and collagen, which break down during slow cooking, creating a richer, more flavorful, and tender dish." Many regional Indian biryanis revolve around goat or mutton, including Dhakaiya kacchi biryani (from Dhaka in Bangladesh — kacchi means raw and indicates that the meat is cooked with the rice), Dindigul biryani (named after a city in Tamil Nadu), and Kolkata biryani (after West Bengal's largest city).
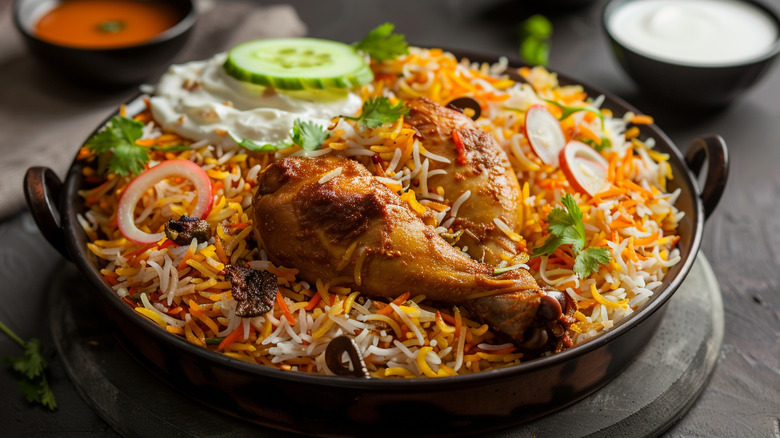
However, if you don't want to use goat or mutton, chef Inamdar says, "Chicken thighs and drumsticks are a great alternative, especially bone-in pieces, as they release natural juices into the rice, enhancing the dish." Chicken is the key ingredient in Hyderabadi biryani (from the city of Hyderabad), arguably the most popular type of biryani in South Asia.
We have recipes to accommodate both types of meat. You can substitute the fattier lamb in our celebratory lamb biryani recipe for the leaner yet nicely marbled goat shoulder recommended by chef Inamdar. Our recipe for one-pot chicken biryani calls for boneless chicken thighs, but you can easily switch them for bone-in thighs and drumsticks to optimize their flavoring potential.
What type of rice to use and how to prep it
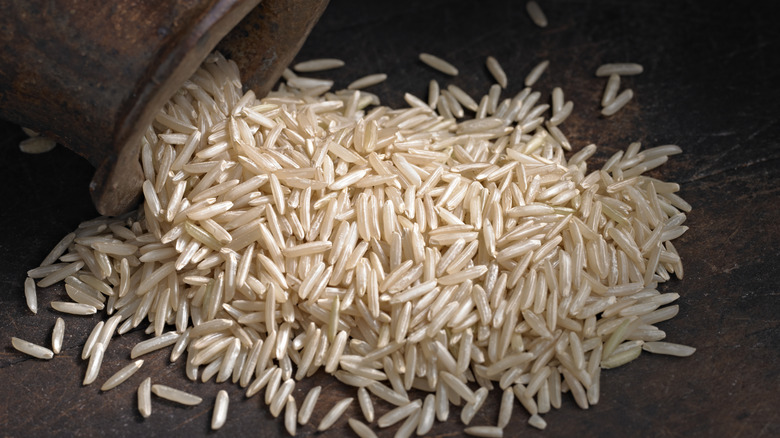
Spice blends, types of meat, and vegetables may change from region to region, but rice is the one constant that all biryani recipes share. Since rice is layered into the dish with numerous other ingredients that each have different cooking times, the type and preparation of the rice is key to achieving perfectly cooked, separate grains. Chef Inamdar specifically suggests using aged basmati rice. He says, "Long-grain rice gives the best texture."
Basmati is the type of rice used most in Indian cuisine, known for its fragrant nuttiness and dry, separate grains. Aged basmati like this premium Royal aged basmati ages for at least a year, effectively drying out the grains, concentrating their flavor, and firming them up. Since biryani slowly cooks rice and multiple ingredients by steaming and simmering, aged basmati is the best type of rice to prevent sticky, soggy, or otherwise waterlogged grains. Still, rinsing is crucial to rid the rice of any excess starch; in fact, Inamdar instructs, "Soak for 30 minutes in water after washing twice over."
Of course, rice steams more quickly than meat, so chef Inamdar thinks you should control the process. He says to "partially cook the rice before layering it with meat to avoid overcooking." Many biryani recipes call for you to cook the meat until nearly done before adding it to the pot with the par-cooked rice so that they will both finish cooking at the same time. Timing is everything with a successful biryani.
The perfect spices for biryani
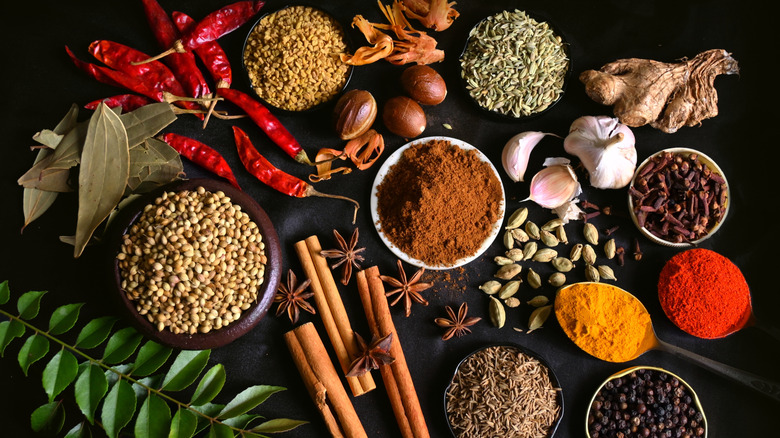
Most Indian dishes start with an array of toasted whole spices whose fragrance infuses meats, stews, and cooking liquids. According to chef Inamdar, biryani, like all Indian recipes, should start with "high-quality whole spices for aroma — bay leaves, cardamom, cloves, and cinnamon." We'd add black peppercorns, star anise, and mace to the list as well. And our recipes both use saffron, as well as turmeric, which both contribute to the sunshine colors often associated with biryani.
Some key characteristics of high-quality spices include a strong, potent aroma, a vibrant color, and consistent shape and size throughout the spice package or container. You can test the freshness and quality of your spices the same way you'd test the viability of eggs; when placed in a pot of water, fresh, high-quality spices should sink to the bottom. However, a good sniff should do the job — if the spices smell fresh and strong, they're probably good to use.
You can use whole spices to make the ground masala blend you'll stir into the meat marinade, stewing liquid, and rice cooking liquid for the biryani. Start by toasting the whole spices to bloom their aroma, then you can use a grinder to make the spice blend. A traditional pestle and mortar (like this heavy-duty one on Amazon) will do the job, or you could buy a dedicated electric spice grinder for the task. You can also add whole spices to the ghee or oil used to fry the aromatic foundation to which you'll add the marinated meat.
Biryani's slow steam-cooking method
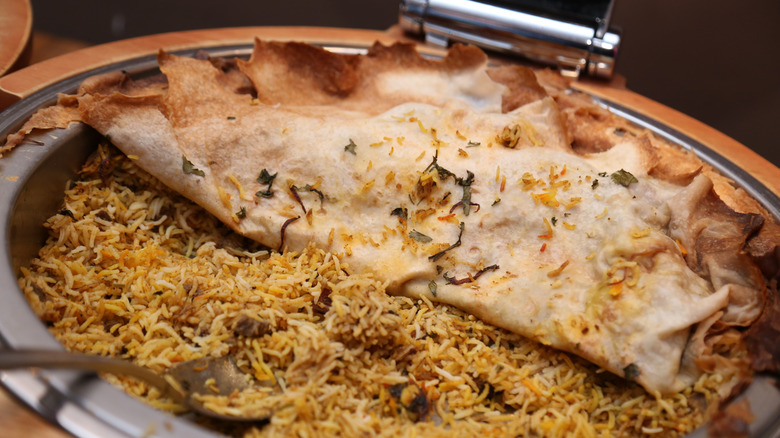
While you can boil the rice and stew the meat separately, there's one cooking method that unites all of biryani's different components under one pot and blends their flavors into a cohesive dish: slow steaming. This slow steaming method is known as dum style biryani and refers to layering the rice and stewed meats in a deep pot, topping the layers with a small portion of cooking liquid, then covering and cooking the pot over very low heat for at least an hour.
Although dum biryani is associated with Hyderabadi-style biryanis and isn't the only way to cook the dish, Inamdar considers it the best way to develop flavors, saying, "Dum cooking (slow steaming) is key — seal the pot with dough or foil for even flavor infusion." A thin layer of wheat dough is the traditional seal that traps more steam than the lid alone. But foil or even a damp cloth will also work. After layering the liquid, meat, rice, and fried onions in the pot, you'll then seal it with a layer of foil or cloth, making sure to press the foil or drape the cloth over the perimeter of the pot before placing the lid on top.
Resting isn't just for meat
After a long preparation and cooking process, you'll probably want to dig into the massive pot of biryani as soon as you turn off the stove's burner. However, chef Inamdar's final tip is to fight this urge just a little longer. He advises you to leave that lid snuggly on top and "rest the biryani for 15-20 minutes after cooking for the flavors to settle."
Resting is commonly the final step in cooking meat, poultry and fish. It is deemed carryover cooking, because the heat actually continues to rise for a while after removal from the heat source. The process also allows for a settling and redistribution of moisture and flavorful juices. When steaming rice, it's a good tip to let it rest covered for 5 to 10 minutes to let the trapped steam evaporate so you get evenly cooked, separate grains. Composed of both meat and rice, biryani needs 15 to 20 minutes to let all the aromatic juices from the gravy and meat evenly infuse into the layers of rice while also ensuring that the rice absorbs all of the excess moisture. The resting period not only results in an even flavor, but it also ensures that the grains of rice are separate and tender instead of mushy and sticky.