The Enormously Satisfying Way Cut Rock Candy Gets Its Shape
We may receive a commission on purchases made from links.
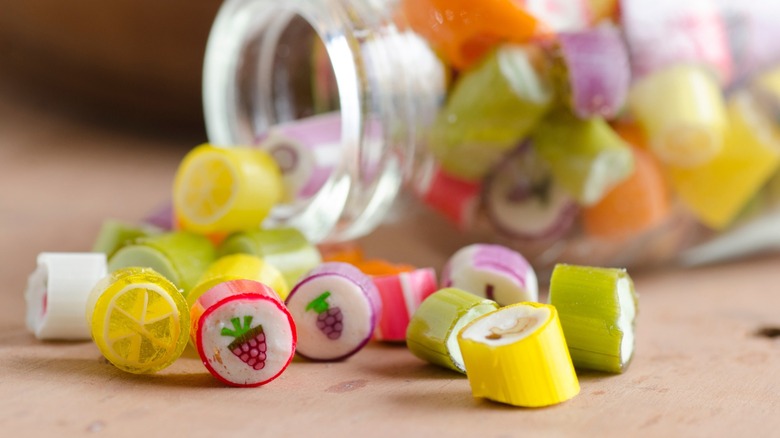
Cut rock candy carries nostalgia with it — days at the fair, picnics, or sucking on a sweet and satisfying piece after a family dinner. It just comes with the feeling of fun and good times. But it's not only the consumer who enjoys this sugary delight. The candy makers themselves have quite the adventure getting to the final candy cane or bite-size piece that we find on grocery store shelves. Believe it or not, your cut rock candy actually starts out many, many times bigger than the candy canes or bites that we know. It begins as a sugary liquid solution that is poured onto a non-stick surface, and is then colored in sections with food dye. As it starts to cool, the sections are divided so each can be rolled out separately, usually into long cylinders.
The cylinders are then layered next to and on top of each other to create the design that you often see in the center of your candy cane, with white strips used as fillings between and around the design. These are then rolled up in a thicker white layer of malleable candy, with the final layer of mixed colors completing the large cylinder. And this is where the most fun part starts. The huge cylinder is then stretched, and stretched, and stretched so it reaches the diameter that we're familiar with. Lengths of candy are then chopped off to form longer candy canes, or cut smaller into bite-size pieces. So satisfying to make, and even more satisfying to eat!
Where science meets art
Candy-making is a balance of science and art, with the science being how the mixture is made. Water is first added to sugar, which is then brought to a boil. Because the candy needs to be flexible to work with it, glucose syrup is added to make it malleable. Next comes the flavoring additives, which give your candy all the different flavors that you are able to choose from. A work surface is then prepared — often marble, which helps cool the molten-hot candy mixture down as you work with it.
The working area is also covered with a layer of edible beeswax to prevent the sugar mixture from sticking to it, which also happens to be one of many great ways to keep your cutting board clean. Next, the mixture is poured into the workspace, then various shades of food coloring are added to different sections of the mixture and stirred in to distribute them. These are then cut apart so they can be worked on independently. The pieces of flexible candy are kneaded by hand, then stretched on a hook in a process called pulling which traps thousands of tiny air bubbles in the candy to make it light and chewy, as well as helping tiny micro crystals to start forming.
It's in this process that the candy also gets its shine. The pieces are rolled into large cylindrical shapes, then the colors are layered to form a giant version of the final design inside the candy round. This is where the art part comes in. The collection of candies are then stretched out until they shrink to the right diameter, and when cool, they are cut up into your favorite delicious pieces of hard candy. While certainly fun to watch, making cut rock candy is best left to the pros. But you can try your hand at this homemade lemon rock candy or these 12 easy recipes for candy-making beginners – or snag a bag of cut rock candies from Primrose on Amazon.