5 Simple Ways To Make Espresso Without A Machine
We may receive a commission on purchases made from links.
Espresso is one of those simple delights in life, though some may call it a survival tool. High in caffeine and high in flavor, espressos can offer the kickstart you need on a drowsy afternoon or end a meal on a delicious high note. The problem, though, is that forking out dollars every time you crave one can really add up, quickly becoming an expensive indulgence. However, there are ways that you can make espresso at home without a fancy espresso machine, which can cost an arm and a leg. You just have to know how to do it. Some methods produce an espresso that is almost indistinguishable from the "real deal," while others aren't quite as smooth or rich as what your barista would whip up — but they'll certainly do the job.
From using a streamlined AeroPress to your traditional French press to even a milk frother, you can easily enjoy that espresso-on-demand from the comfort of your own home or office. Be sure that you have the basics ready first, such as good-quality coffee beans if you're grinding a fresh brew, a good grinder (burr grinders are the best for an even grind), and a scale to measure out the exact amount of coffee for your shot (or shots). Some of these methods do need a device to help you achieve your magical espresso, but the cost difference to a full-on espresso machine is significant, so these techniques may just be worth the investment.
AeroPress
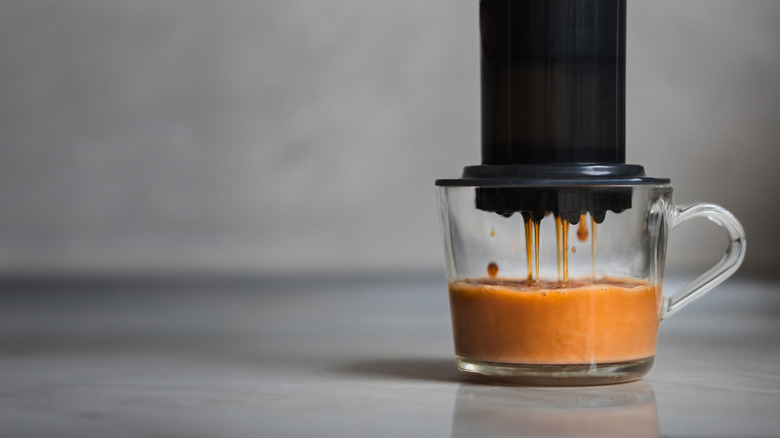
We love the AeroPress because it delivers a drink that is similar in flavor and caffeine levels to original espresso. In fact, the AeroPress website boasts that its air pressure produces "richness like an espresso," which sounds pretty hard to beat. This hand-operated device uses pressure and a super-fine microfilter to draw all the delicious oils from the coffee beans that end up in your cup, much like an espresso machine uses pressure to do the same. Additionally, the press cuts down on the bitterness and some of the acidity that can infiltrate coffee if it brews for a longer period of time, leaving you with a full-bodied, grit-free cup.
Start by getting your AeroPress ready. Rinse the filter and then pop it inside of the drain cap. Fit these into the press's compartment before placing it on top of your preferred cup or mug. Grind enough beans to make about 2 tablespoons of coffee, setting the grind size on your AeroPress to fine. Remove any bigger bits that you may see, as these can affect the evenness of the brew. Spoon the grinds into your AeroPress on top of the filter. Heat about 3 ½ ounces of water to 200 degrees Fahrenheit, and gently pour over your coffee grinds. Then, use some muscle strength to push down firmly on that press before enjoying your espresso.
Moka pot
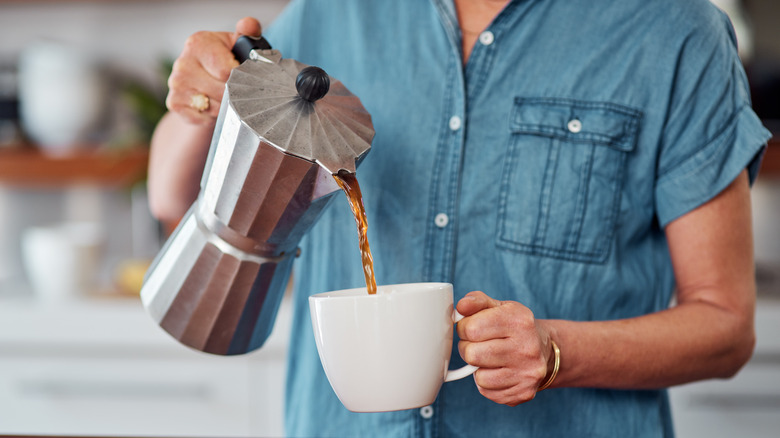
The fancy-looking moka pot, also called a stove-top espresso maker, was created by Italian engineer Alfonso Bialetti in the 1930s in a move to make restaurant and bar-quality coffee at home. We love Bialetti for this because the two-piece kettle really can make an outstanding espresso equivalent. Like the AeroPress, the moka pot — such as this 10 oz Mongdio Moka Pot — uses pressure to extract those gorgeous flavors from the coffee grounds, but instead of using muscle power to draw those flavors out, it uses steam, allowing you to pour it directly from the little kettle-looking device into your cup.
Get your excellent-quality beans together, and you will want to grind these to a medium grind, so not too fine. This is because larger grounds take longer to release their flavors, which allows the pot time to get that pressure build-up. Fill the bottom part of the moka pot with hot water (do not bring it to a boil), then pop your coffee grounds into the filter basket on top. Be sure not to pack them too tightly. Fit your top section pot securely on the bottom, then pop the pot onto your stove plate on medium heat.
As the moka pot heats, the water below turns to steam, which then rises through the coffee grounds, forcing the magical coffee oils and flavors into the top chamber. Keep an eye on the pot, or an ear, to be more precise, as a hissing or wheezing sound will indicate when your espresso is ready to be poured.
French press
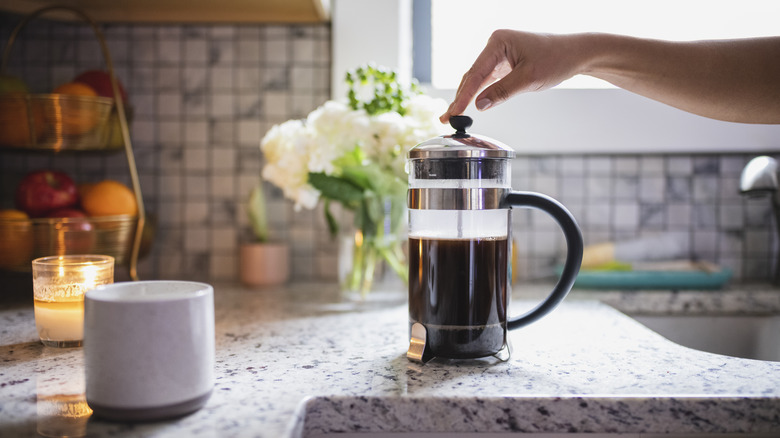
Then you have your French press, perhaps this 34 oz Mueller French Press, the coffee-making cousin of the AeroPress. The French press uses manpower just like the AeroPress, but it takes longer to brew, allowing for a bit more acidity. But it's okay that AeroPress drinks taste different than French press beverages, as the latter brings a more robust and fragrant coffee to the palate. However, you may find that the caffeine content is a bit lower than your barista's espresso, perhaps more oily as well.
To use your French press, preheat your jug with hot water to keep your espresso warm for longer. Like the AeroPress, add 2 tablespoons of finely ground coffee to the press and cover them with hot water. As with the moka press, aim for 200 degrees Fahrenheit for the best results. A few minutes should do it, but if you want to give your espresso an extra hard-hitting kick, let it steep for 5 or 6 minutes.
Then it's plunging time. Slowly but firmly push the plunger down to gather the soaked coffee grounds down below as the flavorful coffee gathers at the top. If you push down too hard or fast, the coffee water tends to spurt out, disrupting the extraction of all the flavors, making a mess, and ruining the espresso that you've longed for. It also mixes the grounds right back into the water, which is what you want to avoid.
Instant espresso powder
It's always good to have a quick and convenient way to get your espresso, especially if it's one of those hectic days where balancing everything feels impossible. If that sounds familiar, then this is a good option to keep up the sleeve. Instant espresso powder, like this Civilized Coffee Espresso Powder, can live in your pantry for those days when you don't have the time to plunge the French press or listen for a whistling sound to come from your stovetop. It's also the most affordable method listed here and can offer a lovely espresso flavor in just a teaspoonful or two.
If you're working from the jar, pour 1 tablespoon of espresso powder into a cup, add 4 tablespoons of hot water, and stir well. Keep in mind that this is very strong, so don't go wild with the powder. It will be unpleasantly strong and could lead to a headache. If you've got the espresso sachets, it's even easier. Simply empty a sachet into a cup, add some hot water, stir, and then enjoy. Alternatively, you can create your espresso shot using standard instant coffee. While this isn't considered "true espresso," it will do the job when it's all you have available. Take 2 to 3 teaspoons of your instant coffee and mix with 2 tablespoons of water (a classic 1:2 ratio, in case you're making espresso for more than just yourself). Allow the mixture to bloom for 30 seconds or so, then bottoms up.
Milk frother
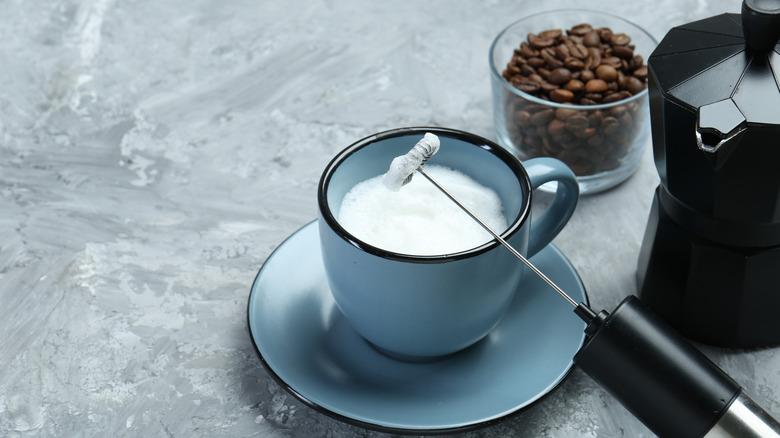
A more creative method to make espresso, using a milk frother gives your beverage that gorgeous frothy head for which the drink is traditionally often known. The humble milk frother, like this simple Bonsenkitchen Powerful Milk Frother, may have other coffee-related uses, but it can be easily repurposed to make espresso. There are plenty of other clever uses for a milk frother out there, but this is what you need to know to make espresso at home.
As with many of the other methods, grind up your coffee beans to a fine grind. You will need about 2 tablespoons when all is said and done. Add this to a tall heat-insulated glass or a mug and pour enough water over it to cover the grounds, but don't overdo it. Get in there with your milk frother and froth vigorously for 30 seconds before letting the mixture rest for the same amount of time. This way, the grounds can sink to the bottom of the cup and settle there. Preheat another mug with boiling water while you're waiting, then discard the water. Strain your espresso mixture into this mug using a coffee filter or some other strainer. Then, add some more hot water to top it off and enjoy your homemade espresso.