11 Tips That Make Installing Your Garbage Disposal A Breeze
While it may not look as flashy as those small smart kitchen appliances on your countertops, the garbage disposal is arguably one of the most important kitchen appliances. You don't think much of it until something goes wrong, and you're left to deal with a backed-up kitchen sink. Even if you know the best ways to dispose of used cooking oils (it isn't down the drain) and have learned about the food scraps that you should never put down the disposal, there will still come a time when you need to purchase a new model.
If you attempt to install a new garbage disposal, you want the project to go smoothly and as quickly as possible. We reached out to three plumbing experts for their best tips to make installing a new disposal a breeze. Kelly Russum is the owner of KC's 23 ½ Hour Plumbing and Air Conditioning, Geno Caccia is the CEO at Caccia Plumbing, and Nathan Hudelson is a master plumber at Schlueter Plumbing. Read on to learn what they shared when speaking exclusively with Tasting Table.
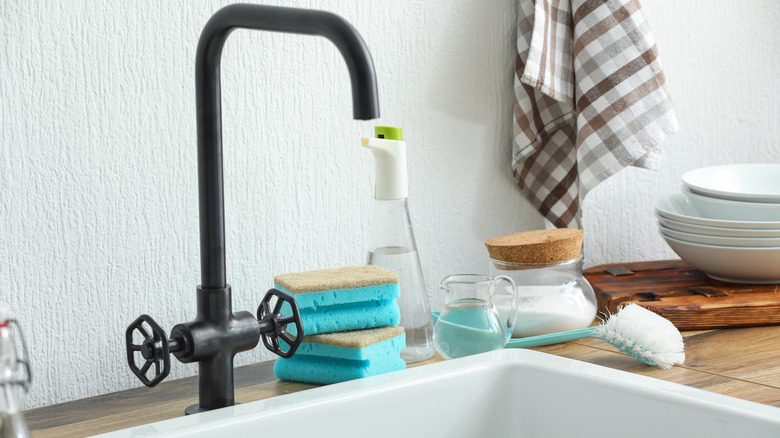
Make sure you have all the proper tools on hand for a smooth installation

Just as having the proper tools available is one of the best tips for completing a DIY kitchen remodel, it is also key when installing a garbage disposal. If you're prepared, not only will the task go more smoothly, but you'll also decrease the chances of an accidental injury. According to Geno Gaccia, "You'll likely need a screwdriver, adjustable wrench, plumber's putty, channel-lock pliers, and a bucket to catch any water." Kelly Russum also recommends having a flashlight, an old towel, and some painter's tape handy before you begin working.
'Wire strippers and wire connectors may also be needed if doing electrical work," explains Gaccia. However, Russum adds an important caveat to keep in mind when determining whether you can install the disposal yourself. "Keep in mind that if you need hardwiring (meaning you're installing a model that isn't a plug-in), some areas require a licensed electrician for the wiring. For example, here in California, all electrical work typically requires a licensed electrician. If replacing an old unit with the same type, it's usually fine to DIY. If you're installing a new one where there wasn't one before, you should check for electrical, plumbing, and permit requirements," he explained.
Check for compatibility before proceeding
You don't want to make a mistake when buying a refrigerator and choose one that is too tall or wide for the opening in your kitchen, do you? Well, you also don't want to make a mistake and buy a garbage disposal that isn't compatible with your setup. According to Kelly Russum, "Most disposals use a standard 3-bolt mount, but some brands have proprietary connections." To make sure that a given model will fit under your sink, he says, "Measure from the sink drain to the outlet pipe to ensure the new unit fits without major plumbing adjustments." Additionally, he recommends making sure you're choosing the correct power source (plug-in vs. hardwired) for your needs. If you don't have an outlet, he recommends hiring an electrician to hardwire the new unit.
Another key compatibility consideration relates to making sure that the garbage disposal you choose is powerful enough. "You should also confirm that the horsepower rating meets your needs (½ HP works for most homes but ¾ or 1 HP is best in my opinion)," says Geno Caccia. The number of people living in your home and the types of food scraps you want the new model to be able to handle can help you make the right choice. If you only want to be able to dispose of a few light fruit and veggie peels and live by yourself or with just one other person, then you might be able to get away with a ⅓ horsepower model.
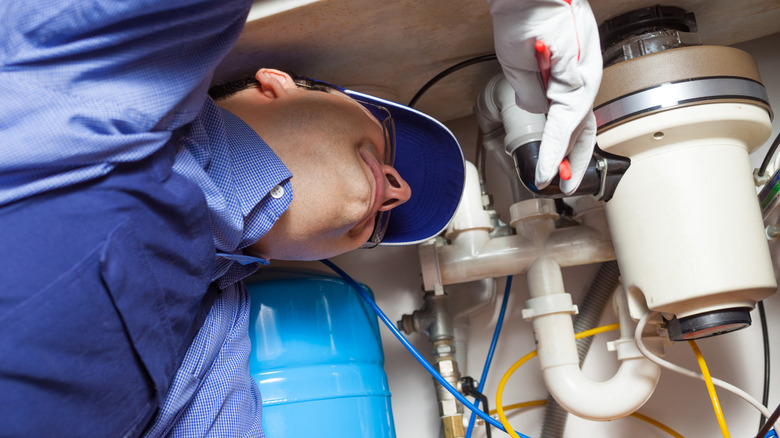
Always shut off the water and power before you begin the installation process
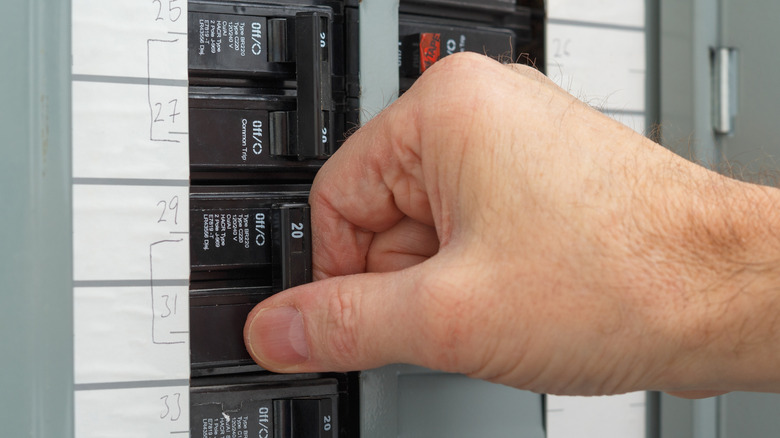
Before you start removing your old disposal or installing the new one, both Kelly Russum and Geno Caccia highlight the importance of shutting off both the water and the electricity. "Water and electricity is not a good mix, and considering you are going to work in a tiny, dark space, you don't need this water-and-electricity booby trap," explains Russum. He adds, "And in general, whenever you work with plumbing or electrical systems, you need to shut them down, otherwise you could turn a simple install into an emergency call." Russum also cautions against assuming that flipping the disposal switch off will be sufficient, reminding everyone that some models are hardwired. This means that they will still have live electricity running through them unless the breaker is switched.
Shutting off the water is also best practice before starting your installation. As Caccia explains, "turning off the water avoids leaks or spills during disassembly and reinstallation." You don't want to leave yourself with a big mess or, even worse, water-damaged cabinets to clean up because something leaked that you weren't anticipating.
Pay attention to how the existing disposal is connected before removing it

The task of installing your new garbage disposal will be so much easier if you pay attention to how the existing disposal is connected before you start removing it. "You should take note of your existing unit in regards to how it is mounted and wired. Most new disposals use the same type of brackets," explains Geno Caccia.
Kelly Russum offers some good advice to save you from remembering exactly what is connected where. He says, "Before removing wires and plumbing connections, take a quick pic for easy reference." You may want to snap a few pictures from different angles if you're worried about being able to get the new unit hooked up properly. As you put in the new disposal, look back over your pictures to make sure you're using the right connectors — and putting them in the correct places.
Save time by confirming whether the mounting ring is reusable
Before you start ripping out your old garbage disposal, Kelly Russum recommends slowing down to check out the mounting ring. He says, "Test if the mounting ring is reusable, if it's in good condition and fit to [the] new disposal." If the existing mounting ring checks all of these boxes, then you might decide to just leave it in place and to only remove the rest of the disposal.
This will save you two steps total: one when removing your old disposal and one when installing the new one. The amount of time you'll need to spend for the installation should be reduced, freeing you up to take on other home projects or to enjoy some much-deserved relaxation.
Address odors before completing the installation
Kelly Russum recommends keeping your senses active as you work — particularly your sense of smell. "As you disconnect the old unit, pay attention to smells — if your old disposal stinks, bacteria are likely inside the pipes," he says. Moving on to installing the new disposal without addressing these odors could allow them to worsen and become more noticeable in the future.
Instead, Russum recommends taking a little time to clean your kitchen sink drain before moving on. "A quick scrub with baking soda and vinegar before installing the new one prevents lingering odors." It shouldn't come as a surprise that Russum recommends using baking soda to clean the drain. After all, there are several genius ways to clean the kitchen with baking soda. Its odor-deodorizing properties and ability to loosen gunk and more (especially when combined with the vinegar that Russum also recommends) make it a valuable cleaning product.
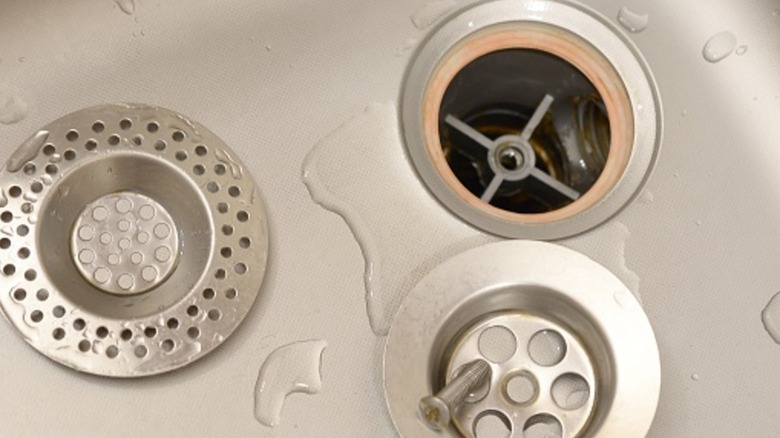
Know how to keep the drain flange from moving as you work

The flange is an important part of a functioning garbage disposal that helps ensure water drains properly into the unit. The flange sits inside the sink, right around the drain. When installing a new disposal, the flange may shift or move as you try to attach it to the mounting ring. This can make the task frustrating and result in it taking longer to complete the installation.
To prevent this issue, Kelly Russum offers a simple solution. He says, "Place a heavy object (like a weighted bowl) on top of the flange inside the sink. This keeps it from shifting while you tighten the mounting ring below. Some pros use a small block of wood across the drain opening for even pressure." As an alternative option to trying to hold the flange in place, Russum also notes that you can take steps to keep the mounting assembly where it belongs. He says, "Instead of balancing weights on the flange, you can use a single zip tie or rubber band to hold the mounting assembly in place while you work."
Consider using clear silicone under the flange instead of plumber's putty
When installing the flange, you'll often see recommendations to use plumber's putty to hold it in place. While this is one option to consider, Nathan Hudelson offers an alternative approach that he finds to be more effective and long-lasting. He says, " Forget plumber's putty under the flange and use a bead of clear silicone."
Hudelson explains why he recommends silicone over putty. He says, "Putty works for some, but we see a lot of leaks because putty needs time to work out of the flange, and most folks tighten it once and don't look back." If you decide that putty is the right fit for your project, be sure to follow Hudelson's advice of tightening the flange, giving it a few minutes to shift and move around, and then tightening it again. Kelly Russum offers a few additional tips related to working with the flange and the mounting ring. "Don't try too hard when tightening the mounting ring, too much force can warp the flange and cause leaks. Same about the plumber's putty, don't use it excessively, because it will lead to uneven seal," he advises.
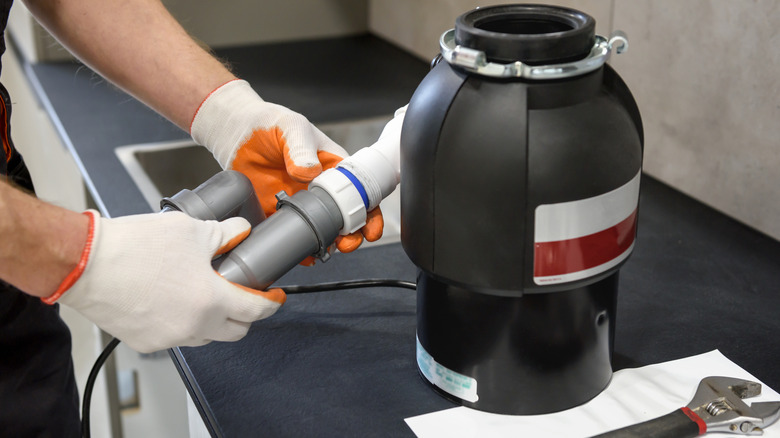
Don't forget to remove the plug in the disposal's inlet if it shares a drain with your dishwasher

There is one key step you won't want to overlook if your dishwasher and garbage disposal share a drain. As Kelly Russum explains, "if you're connecting a dishwasher, you MUST remove the plug inside the disposal's inlet, otherwise your dishwasher won't drain." After removing the plug — which will likely be easiest with a pair of needle nose pliers — you will need to attach the drain hose to the inlet.
While your disposal should come with a clamp to help you complete this step, Russum says, "The cheap metal ring that comes with some disposals corrodes fast." Instead of using the included clamp, he explains, "Spending a few extra bucks on a stainless steel or brass ring will prevent headaches later." The needle nose pliers you used to remove the inlet plug can also help you open and then tightly secure the clamp around the inlet to the disposal. Once these steps are complete, your dishwasher should drain properly through the disposal — but it would still be a good idea to give it a test run after you've finished the installation process.
Don't forget to check for leaks after installing the disposal
Once you've completed the installation process, it is a good idea to check for leaks. It will be much better to catch a problem immediately instead of letting water leak as you use your sink, disposal, and dishwasher over the next few days, weeks, or months. After a few preliminary checks, I like to fill both bowls to the top and let that set for a few minutes, and if no leaks, pull both plugs and turn on the disposal," says Nathan Hudelson. While a huge leak will be obvious, a smaller one might not be as visible. After filling and draining the sink, Geno Caccia says, "You can then wipe a paper towel along the drain connections to detect smaller and less noticeable leaks." If the paper towel is wet after wiping the pipes or connections, then you'll know you have a leak somewhere that needs to be addressed.
Kelly Russum points out an additional area to check before ruling it a successful installation. He shares, "Also you can gently shake the disposal, and if it moves too much, the flange might not be sealed tight, and might cause leaks in the future."
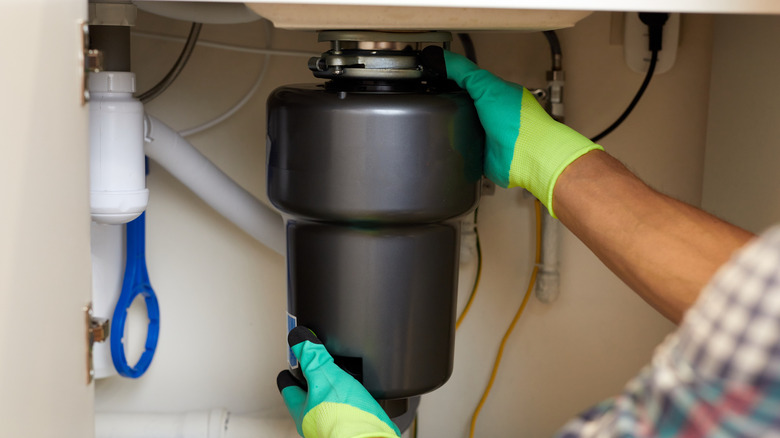
Many hands make light work
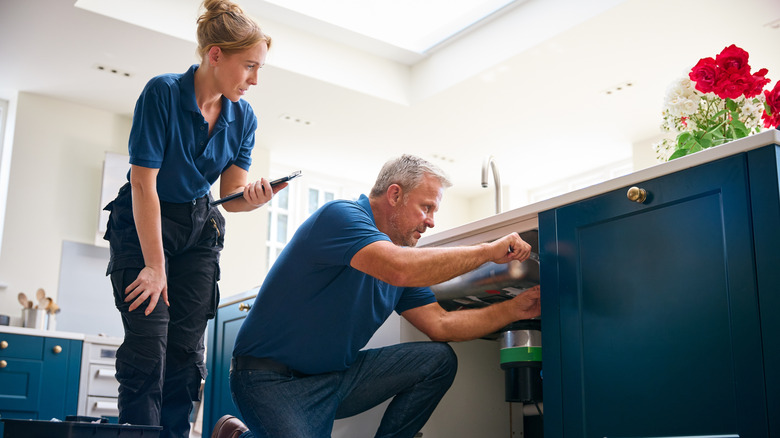
The saying many hands make light work applies to numerous tasks. One of those tasks is certainly installing a dishwasher. "Having a second person hold the disposal in place makes alignment easier," explains Geno Caccia. With someone else keeping the disposal from shifting, you'll be able to focus on properly securing it into place. If you attempt the job on your own, especially if you've never installed a disposal before, you'll likely find it challenging to try to balance the unit as you work to tighten and clamp everything into place.
If you don't know anyone who will be able to help you, consider whether you really are confident taking this project on by yourself. You can always call a professional plumbing company if you don't feel like it is within your skill set.