13 Common Mistakes Everyone Makes With Their Instant Pot
If you don't own an Instant Pot yourself, you likely know someone who does or are starting to miss electricity in your new life on that commune. But for as many people as there are praising and preaching the gospel of the countertop appliance as the savior of time and space, there are just as many making one mistake or another when using it.
While the appliance itself is fairly simple and straightforward, there are so many ways to use your Instant Pot that perfecting its operation does take a little bit of study. Still, even these mistakes prove its many advantages: from tastier food to loftier attempts at culinary projects to significant energy savings. Here are 13 mistakes you may be making with your Instant Pot and how to avoid them next time you use the appliance.
Using the wrong setting
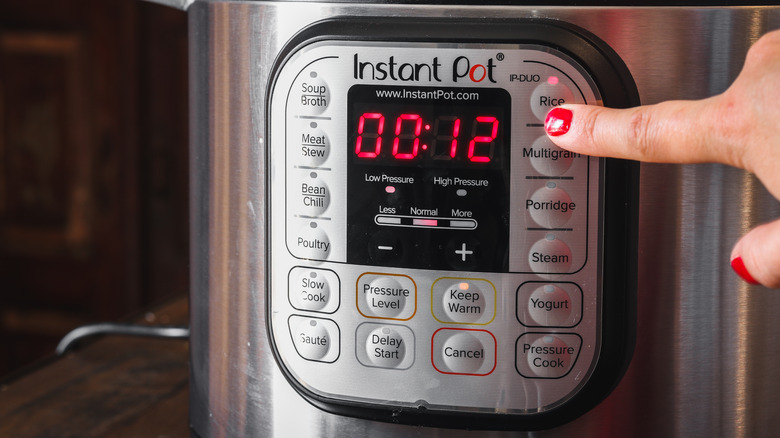
Your Instant Pot is a pretty simple device by design, but that doesn't mean it treats all food equally. The tested presets are a great way to set and forget your next meal. My Budget Recipes says a common cause of disappointment when using the appliance is food scorched to the bottom of the pot, as dishes like oatmeal or yogurt can burn easily if you're not mindful of the right preset for temperature and time. And since the entire reason you got an Instant Pot was to prevent mess and save time, who wants to lose it all on the backend by having to deep-scrub a half-inch of porridge in the sink?
Once you've learned what each Instant Pot preset does, you can educate yourself on the nuances of what they don't do. DetoxInsta notes that while most rices benefit from being cooked using the rice/grain preset, brown rice requires a longer cook time. Kitchn experimented with different methods for cooking the grain in an Instant Pot and found the manufacturer's recommendation to be one of their least favorites, so don't be afraid to do a little research into what each preset actually does and pick the one you think will work best for you.
Not using the steam rack
While it won't help you with the grains above, the steam rack (aka the trivet) is an excellent way to cook foods without bringing them into direct contact with the heated bottom of your Instant Pot. This can either prevent searing and sticking, or avoid boiling foods in the liquid at the bottom of the pot.
The Whole Portion's list of foods that benefit from this cooking method is extensive and contains some surprises (cheesecake, anyone?). They even say you can stack multiple dishes to save time and energy if two or more things you're planning to make in your Instant Pot can be cooked at the same setting and for the same length. (You will have to buy multiple steam racks to pull this off.)
Perhaps the trivet's most illustrative benefit is in pressure-steaming eggs, which can give you perfectly "hard-boiled" eggs that slide right out of their shells (via The Foodie Affair). Depending on how you like your yolk, you may want to adjust by a minute in either direction.
Using the wrong amount of water
Tweaking and testing the settings is crucial to creating food in your Instant Pot perfectly tailored to your tastes. The Veggie Queen notes that Instant Pot itself does this, having reduced the recommended water for cooking from two cups to one. The blogger writes that she feels even a cup at too much liquid for most dishes. Depending on the food's water content, it could be even less than half a cup, she says, as some foods release water as they cook, while others — such as beans and grains — absorb it.
The Veggie Queen states that even a cup of beans doesn't need to be covered in liquid when cooking with an Instant Pot as they would on the stove. In the appliance the steam cooks the food, so all that's really necessary is enough liquid to be absorbed by whatever you're cooking without the bottom of the pot going dry and scorching. The blogger puts this at ½ to ¾ cup for most dishes.
The silicone gasket isn't properly sealing
If you've ever noticed an excessive amount of steam coming out of the sides of your Instant Pot, thought it was taking longer than usual to come to pressure, or found your carefully measured water levels running dry before the grains are cooked, your first move should be to check the silicone gasket.
The pressure cooking experts at Miss Vickie say that although the valve could also be faulty or attached wrong, you'll likely know the ring is the problem by the steam leaking out from multiple spots around the circumference rather than a single point. It could be that your seal is improperly flush to the ring and requires a simple adjustment or cleaning to remove food grime, but it could also be permanently out of sorts due to damage to the lid or an aging seal. In either case, don't risk it! Order a new silicone sealing ring and cook with confidence.
Even if your pot isn't leaking steam from all directions, My Crazy Good Life recommends replacing the seal every six to 18 months based on how frequently and heavily you use it. Which leads us to our next point ...
Waiting to order a replacement silicone gasket
Long before you're ready to order a new lid, the silicone gasket ring will likely wear out, shares Real Simple. Fortunately, the part is fairly cheap to replace, especially if you buy them in sets as we advise for a few reasons.
First and foremost, you don't want to get caught flatfooted 20 minutes before suppertime when the seal fails and your prize-winning beans suddenly need a few more hours to cook. Second, as Real Simple says, the silicone is the part of the pot most likely to catch and retain funky odors. (Anybody who's ever tried to get a stale freezer smell out of a silicone ice mold knows this pain as well.) For this reason, we like the outlet's suggestion that you keep two rings handy so you can use one on savory dishes and the other on sweets. While your chana masala may not greatly suffer from notes of cinnamon sugar, that cheesecake you're making might not benefit from the faint flavor of cumin and garlic.
You'll want to be careful to not order too many sealing gaskets at once. As the rings do crack and deform over time, you don't want them to age out before you can ever put them to use. Unless you own multiple Instant Pots and are using them simultaneously, three is probably the most you'll ever need on hand at once.
Overloading your Instant Pot
One of the biggest fears with pressure cookers is ... well, the pressure. While Crock-Pots may have been the great boogeyman of 2018 thanks to "This Is Us," some people still fear the live bomb that is their grandparents' pressure cooker; but they shouldn't transfer this trepidation to the modern design of the Instant Pot. Kitchen Appliance HQ enumerates the many safety features designed to prevent your appliance from exploding. The one pitfall that remains is in your hands, and it's what happens when you fill your pot past the maximum level.
If you overfill your Instant Pot, it is possible to block the release valve, which automatically trips when the pressure inside the pot goes above 15.23 psi. While simply having unregulated pressure won't automatically make the appliance explode, it is a good idea to not touch the lid until it releases naturally.
One other issue that can come from overfilling your Instant Pot? Under or overcooked food. You will either end up adding too much liquid, which creates extra steam that gets trapped inside your appliance and leads to a bland, mushy meal, or not enough and find your food burnt and stuck to the bottom. Trust us, your family and friends would prefer a smaller portion to a disappointing dinner.
Locking the lid during non-pressurized cooking
Sure, the Instant Pot is a pressure cooker, but it's also designed to be a multipurpose slow cooker, saute pot, yogurt maker, and more. Not all of those functions are going to require pressure to build up, and the ones that don't may be less effective if it does.
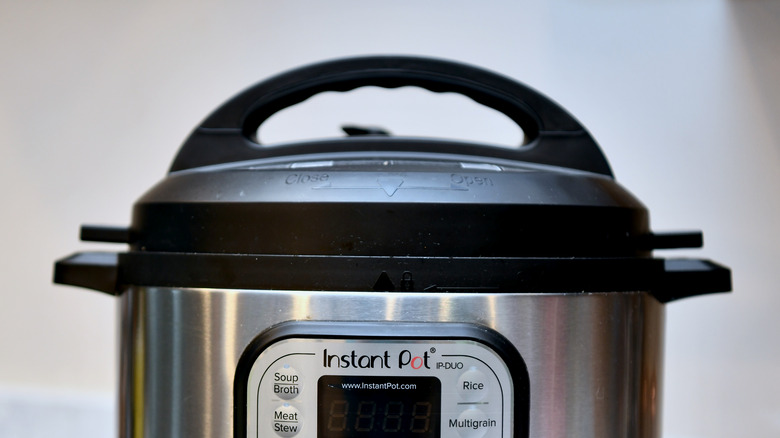
When properly in place, the standard Instant Pot lid seals as heat and pressure build up in the pot. You can avoid this by using a dedicated tempered glass lid when slow cooking, but Allrecipes says it's possible to use the pressure lid for this purpose, you'll just want to ensure the appliance doesn't pressurize by setting the lid to vent. Instant Pot Eats agrees, emphasizing how important it is to avoid a locked lid. It explains two possible ways to avoid this, depending on the Instant Pot model you have. Some will give you the option of locking the lid into the vent position using the quick release button, while others require you to turn the steam release handle to vent.
Forgetting the basket when air frying
While the basket isn't, strictly speaking, required for air frying in your Instant Pot, it is essential for doing so effectively. This is because (unless you're, say, standing a beer-can chicken up in the pot) skipping the basket will cut a portion of your meal off from the circulating air, and as The Spruce Eats explains, you can't really air fry without it. The process works through convection, so any food touching the bottom of the pot will conduct heat through surface contact rather than by having the hot air move across it.
Consumer Reports shares that you can also purchase an air fryer lid for your Instant Pot, which comes with an air fryer basket. The outlet explains this special lid is useful when baking bread and browning meats in addition to air frying, as it essentially turns the appliance into a convection oven. Consumer Reports does caution the air fryer lid is fairly large, so it may not be the best choice if you're looking to save space.
Not using your Instant Pot on hot days
Anyone who's ever made soup during the summer knows just what Kitchen Appliance HQ means about how unpleasant a bubbling pot can make an already-hot home, but this doesn't mean you have to stick to the canned stuff till fall. Ecophiles asserts an Instant pot can do the same job with a much cooler surface relative to other cooking methods.
In addition to the comfortable climate benefits, the Instant Pot uses less electricity than other cooking methods (like your oven), thanks to its insulation, smart temperature monitoring, and extremely fast cooking time. Factor in the cooler household again, and My Budget Recipes points out that you're reducing overall household energy consumption by sparing your air conditioner the extra labor. So go ahead and work that chicken tortilla soup into your meal plan, your kitchen will stay cool thanks to the Instant Pot.
Releasing the steam the wrong way
To flip your lid, or cool down? Your Instant Pot's quick release switch is all about precision. Pressure Cooking Today says that natural release times range from five minutes to 30, which can mean a lot of extra cooking.
For faster cooking foods — say, eggs — a minute can make a world of difference, and you should let the steam valve fly to depressurize as quickly as possible. However, if your dinner is in it for the long haul consider letting the pressure come down naturally.
As bean company Camellia shares, beans often foam when cooking, which may clog the float valve. The company recommends adding a little oil to your recipe prevent this, but it is also a good reason to opt for a natural release. Pressure Cooking Today issues similar warnings for soup and starchy foods like pasta or oats, which are prone to spraying.
For tough cuts of meat, Pressure Cooking Today recommends using the natural release time as a controlled rest, same as if you pulled a brisket off the grill; but if you're quickly cooking more tender cuts or fish, Food Network advises a quick release to prevent their falling apart.
And not waiting a few minutes to release the valve
The choice about how to depressurize your cake is a lie! You can absolutely combine quick and natural release methods to avoid the disadvantages of either, as long as you know what you're doing.
Blogger Dad Cooks Dinner solves the starchy pasta and beans problem mentioned above by waiting five minutes to let the liquid settle down before depressurizing. They explain that doing so can prevent the contents of your Instant Pot from coming to a boil beneath the still-sealed lid. In a full-enough pot, the boil may cause the contents of your Instant Pot to reach the float valve and spray out in addition to the steam; with starchy foods (which have a propensity to foam up) this can even happen at a lower level. Waiting five minutes means less spray, which in turn means a lower likelihood of clogged valves or painful surprises.
Dad Cooks Dinner also advises you to exercise caution and use an oven mitt or towel when releasing the valve, just so you don't accidentally burn yourself if five minutes wasn't quite enough time.
Venting it where the steam can cause damage
Now that you've got a handle on both ways to release your Instant Pot, it's time to think about what is going on around it before you throw that switch. Are your face and hands clear of the steam? How about any cabinetry?
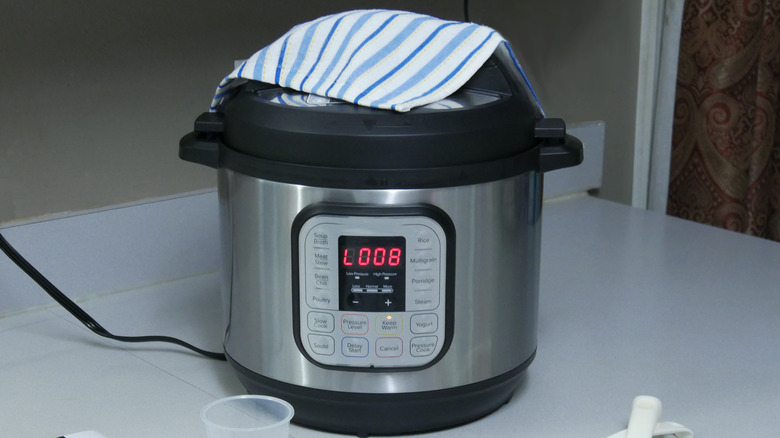
While Kitchn says this isn't a huge problem as a one-off, cooking regularly with your Instant Pot and venting under cabinets could warp the paint and wood. The solutions are as easy as you might expect: positioning the pot away from cabinets ... or at least aiming the vent outward. If that's not an option, the outlet recommends a specialized steam diverter. It cautions against draping a kitchen towel over the valve, on the basis of not wanting to create a reverse vacuum, though you should of course feel safe following the tip above to use a towel when flipping the valve open, as Dad Cooks Dinner suggested above — just don't leave it sitting on top of your Instant Pot.
Forgetting to run Instant Pot through a cleaning cycle
One great thing about the Instant Pot is just how simple it is to clean. The appliance can be easily disassembled, and Taste of Home explains that almost all of the parts are dishwasher safe (please, do not try to load your entire Instant Pot into the washer). But even so, you may want to give it an extra deep clean from time to time, flushing the float valve out or removing any funky smells from the silicone ring if the dishwasher doesn't quite complete the job.
Why not do like Miss Vickie suggests and clean your Instant Pot from the inside out? Fill the pot with water and a generous amount of white vinegar, which can cut through grease and gunk and eliminate odors. (Home Talk says this can also remove discoloration.) If that doesn't do the trick, Instant Pot guru Tried Tested and True recommends adding baking soda to the mix to de-crust those deep-seated stains.
