16 Pie Crust Crimping Techniques Every Home Baker Should Try
We may receive a commission on purchases made from links.
Pie-making is deceptively easy. Not only is it important to nail down a tasty filling for your pie of choice, but you also have to perfect your flaky pie crust. Getting the best pie crust ever doesn't just involve combining your fats and flour; it's also a matter of shaping, placing, and, of course, crimping your dough into the right shape.
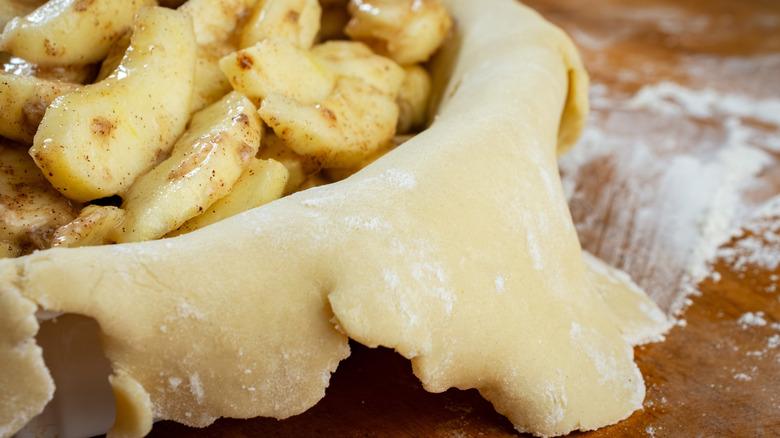
Crimping can achieve two objectives, depending on the shape and style of your pie. If you're working with a double-crusted pie, like what you would use for chicken pot pie, then the crimp will fuse the two layers together and prevent any of the liquid inside from seeping out. If you're working with a single-layer crust, like for an open-faced pumpkin pie or pecan pie, then the crimping is a neat way to tie up any of the loose, scrappy edges that would otherwise burn if they were left to droop over the sides. Moreover, crimping is also done for aesthetics; a well-crimped pie can be the centerpiece for any dessert table.
As a home baker myself, I understand how crimping can be anxiety-inducing (especially if you classify yourself as someone who lacks a strong attention to detail). But here are some ways to reinvent your crimping style for beautiful and seamless (both literal and figurative) pies that look like they just came out of a professional shop.
Use a fork to seal your pie crust
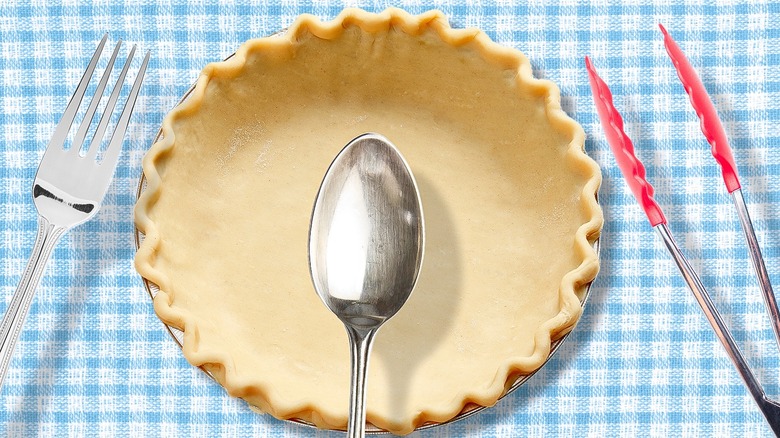
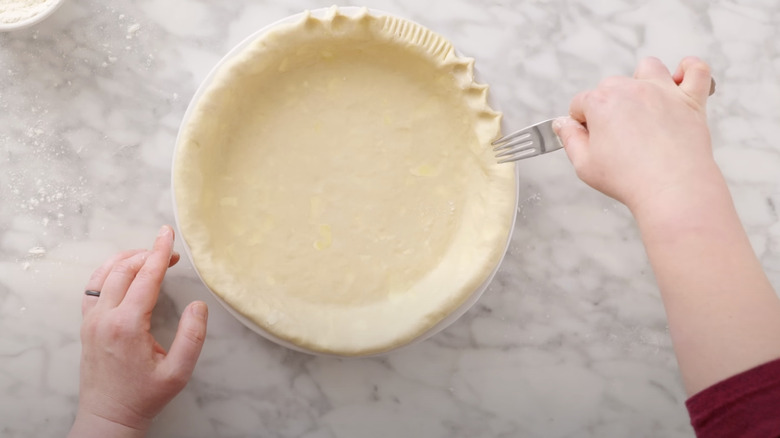
A fork is like the Swiss Army Knife of pie baking. Not only can you use the tines to prick the top of your crust before you slide it into the oven (which allows the steam to escape) or dot your bottom crust before blind baking (which prevents an unanticipated puff), but you can also use it to simply and effectively seal your pie crust. After you have layered on the top crust, use a fork to gently press around the edges. The tines will leave a rustic impression in the crust, all while sealing the two layers shut.
The good thing about this method is that it's relatively foolproof. You'll just want to make sure you're applying enough pressure to seal the pie crust but not slice down through it. Moreover, it's also a great technique to employ if you're working with young bakers who want to contribute or for when you don't want to spend the time scalloping the edges of your crust.
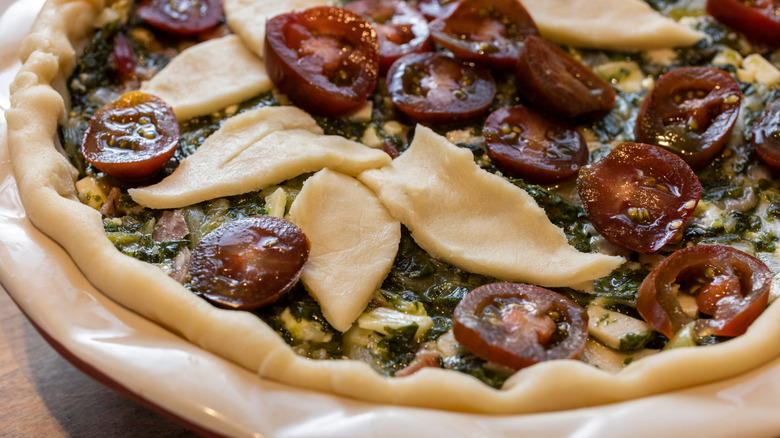
Finish your galettes with a simple foldover
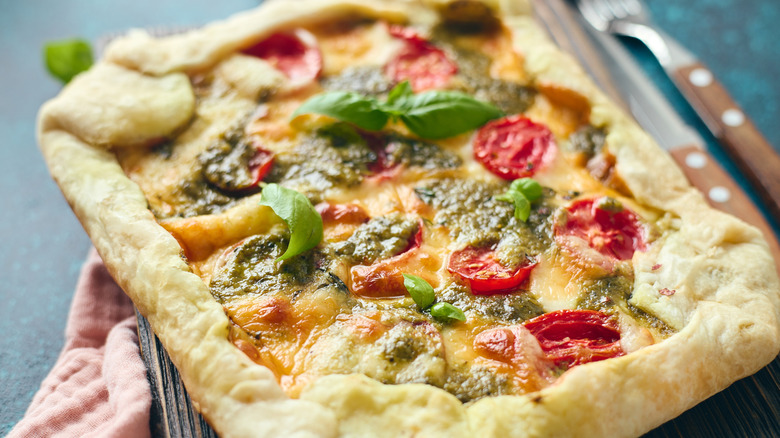
Galettes are not the same thing as pies, but they often call for a pie crust base. The major difference between the two is that pies are baked in tins while galettes are baked on a flat sheet pan. And when you're working with a flat surface, you have a little more room to play with when it comes to decorations.
A common method for "crimping" a galette (it doesn't technically seal the edge of the crust, which is why I'm hesitant to call it "crimping") is to just flop the leftover edge dough over the top. If you were to leave it flat, your galette would turn into more of a pizza. Rather, the fold-over technique allows the galette to retain its rustic appearance, all without letting all of the toppings slosh off to the side. The major drawback to this method is that it really only works for flat, open-faced galettes, as the bubbling filling of a pie crust and bowl-like shape may not hold the dough in place.
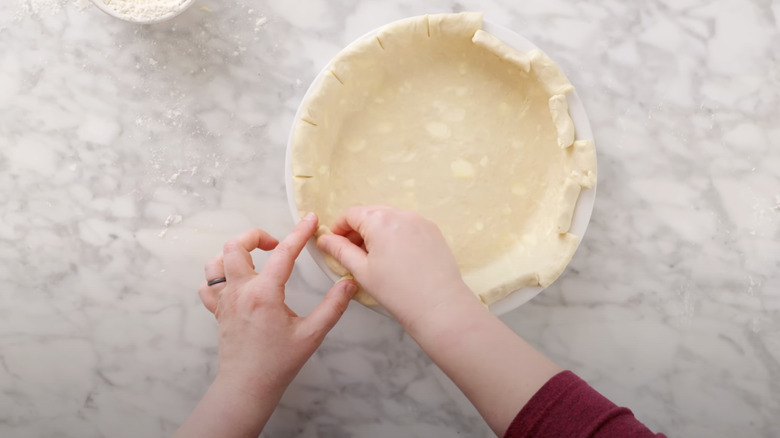
Use your thumbs to easily crimp crust
Crimping is one of the techniques that you need to learn how to master as you make your way through the pie-baking world. If you're looking for a technique to effectively seal your double-crusted pie, but don't think that you can make meticulous little scallops on your dough, you may want to turn to a method called the simple angled crimp.
To do this at home, hold your thumb horizontally (like a 50/50 thumbs up) and gently press toward the edge of the pie plate in a scooping motion. Once your thumb hits your index finger, which is waiting on the edge of the plate, you'll have a neat little design left over. The pressure of your thumb will create a little divet in the crust, and then the pressure of your thumbnail will seal the top and bottom crust together. It's important not to apply too much pressure to your thumb as you push, as you don't want to break through the thin top layer.
Tongs or a sauce whisk can give your pie a beautiful edge
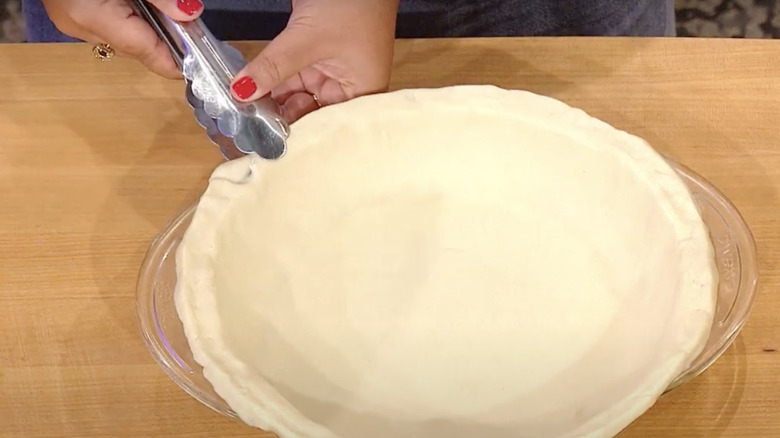
Work smarter, not harder — it's a sentiment that can be applied to a lot of different things, including pie crust. Luckily, as long as you have access to kitchen tongs, crimping your crust will be a piece of cake (err ... pie). Once you have your layers of pie crust in your pan, gently open your kitchen tongs and clamp them along the edge. As with other crimping methods, you're going to want to go easy here, as using too much force will cause little holes in the pie crust — which will allow all of your liquid to leak out.
Another tool that could be of use when crimping your pie crust is a sauce whisk like this OXO Good Grips Stainless Steel Sauce & Gravy Whisk. These little whimsical tools, which are also known as gravy whisks, can give your pie an edge that almost resembles a spring. Be sure just to use the edge of this tool, rather than pushing it down in the middle of the crust, to get the perfect crimp. A wine bottle opener pushed horizontally into your dough can also impart a funky shape and seal together the two layers without too much effort on your part.
Combine designs together to create something unique
Who says you have to stick to one design to crimp your pie dough? Once you've mastered the basics, like the fork crimp, cross-hatch, and the basic scallop, then you can start playing with them and combining them to create your perfect pie crimp. For example, you can try making your scallop crimps a little farther away from the edge and then pressing the rest of your dough with a fork. Or, if you're feeling like giving your dessert an elevated twist, consider scalloping the edges and then using the dough trimmings to create a neat little pleat around your entire pie.
The major con of this method is that it requires a lot of work, as well as attention to where the crimps are placed. Moreover, if you have one crimp that's thick, like a classic scallop or a pleat, and one that's thin, like a fork press, then you may see that there is a big difference in bake and color between these two areas.
A rope crimp will give you a rustic edge
Rope crimps are a little more of a hands-off design choice. Essentially, all you need to do is gently roll the two edges of the pie together, then lightly pinch them all around to seal them together. There are no tricky designs or intensive work that you have to do for this method, which makes it excellent for folks who are in a rush. Start by placing your two index fingers parallel and close together. Pick a place on your crust to start, position your fingers at a slight angle, then sandwich your fingers on either side of the crust and push upwards. Your next crimp should start where the first one ended and adhere to the same angle.
This design is very basic and relatively hands-off. That being said, you don't have to leave your crust with just this ho-hum design. You can kick things up a notch by making little diagonal dashes across the top of the rope with a sharp knife to create a more satisfying visual effect.
Use a pairing knife for a defined scallop edge
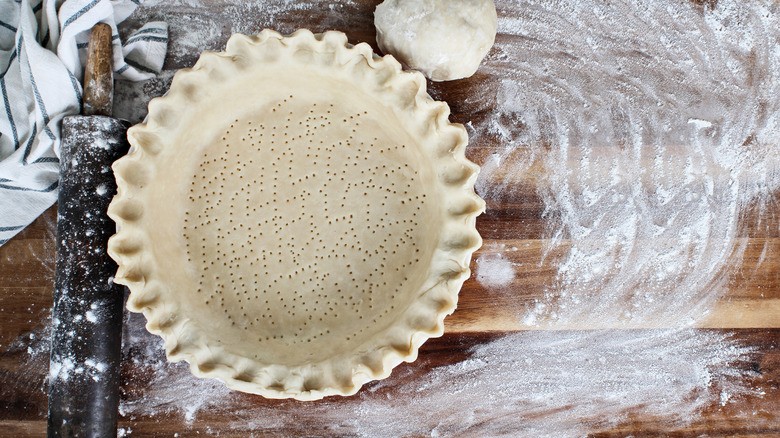
If you've ever bought a pie from a bakery, chances are that it came with a scalloped edge. The classic scalloped pie crust is made by gently inserting the pointer finger into the pie crust and pushing outwards towards the rim. When your index finger meets the thumb and index finger pinch of your other hand, it will create a scallop. However, you can also create larger and more spread-out scallops by widening your index finger and thumb.
If you're looking for sharp, petal-like scallops, your best bet is going to be to use a paring knife. Press imprints with your index finger into the dough like you were trying to leave a fingerprint. Then, with a paring knife in your non-dominant hand, press down on the indentation with your dominant hand and gently push the paring knife into the space between the indentation you're working on and the one next to it. The knife needs to push inwards towards the center of the pie, while your finger needs to push outwards towards the pie's rim. This method will give you sharp and precise scallops, but it will require some intensive work to get there than just doing the regular ones.
Consider pleating your crust if you want something more technical
A pleated pie crust is bound to get the attention of everyone at your dessert table. And honestly, it may be easier to make than you think to make.
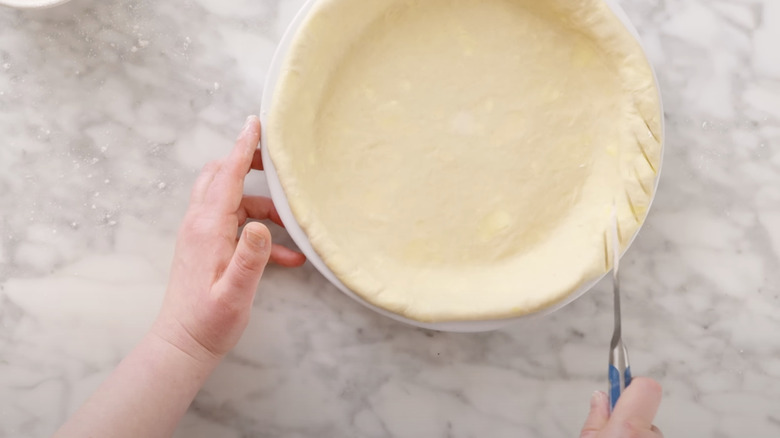
You'll want to start with dough that's hanging a little bit over your pie crust. Then, using a clean pair of kitchen shears or scissors, cut small diagonal slits in the pie crust. Once you've done this around the whole circumference of your pie and added your filling (and/or top crust), you can gently flip the pieces over towards the center of the pie crust and seal them gently with your index finger and thumb. This will give your pie a little more visual definition than just a fork crimp, and it requires very little work on your part.
A braided pie crust adds sophisticated appeal
If you have experience braiding hair, then making a braided pie crust is going to be right up your alley. You'll want to start by slicing three strands of dough. Be sure to measure your strips before you cut them, as you'll want them to be the exact circumference of your pie tin. Then, gently braid the pieces together, making sure to flatten the slices as you go. If you want a little bit more of a 3D effect, consider layering on several layers of braids (like three separate braids with three strands each) or roll the dough strips into logs to give them more height. Then, when you're ready to seal your crust, apply egg wash with a pastry brush and attach your braid to the dough. You may also want to press down gently to ensure that your dough braid adheres to the bottom crust.
It's also important to note that a thick braid will take longer to cook through than a scalloped edge or a fork-crimped dough. So, be sure to keep an eye on your pie to ensure that all parts of it are fully cooked before you remove it from the oven.
Use a spoon for moon crimps
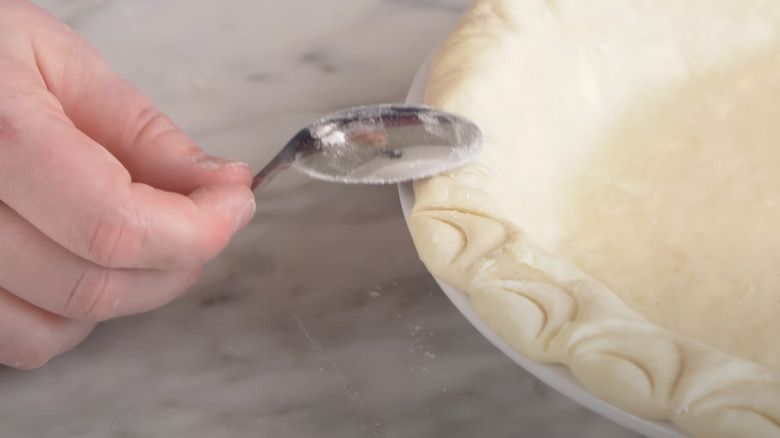
There's a lot of potential to crimp your pie crust with a simple kitchen spoon. For one, you can make little moon-shaped crimps with the edge of the spoon.
Start by layering the pie crust in the pan, tucking the leftover pie crust underneath so that it sits neatly around the rim. Then, gently press your upside-down spoon into the crust. You can leave two separate "moon" shapes, one closer to the center of the pie and one near the edge, to create a whimsical, rainbow-like design that will look as good as it tastes. If you're using an antique spoon, you can also try to flip it over to press those designs into your dough instead.
Upgrade your fork crimp with a cross-hatch
The fork crimp leaves some things to be imagined when it comes to pie baking. But, this handy tool also allows you to make unique plays on the classic design.
For one, you can try to do a cross-hatch on your pie. Instead of pressing the twines in towards the center of the pie, cross them diagonally so that the marks form an X-shape around the entire rim of the pie. You can also make a chevron (or a V-shaped) pattern by angling your fork 45 degrees to the left, then switching to the right as you make your way around the pie.
Use a citrus juicer for a creative approach to crimping
It turns out that a wooden citrus juicer, like the OXO Good Grips Wooden Citrus Reamer, is actually a really useful tool for more than just lemons and grapefruits. You can make an easy crimp on your pie crust by using the indents on the tool. Simply lay the tool so that the narrow end is pointing towards the center of the pie crust. Then, slowly, and while applying equal pressure, roll the juicer around the rim of the pie crust. This will give you thick, even indents that are a little more dramatic than ones made with a fork.
If you don't have a citrus juicer, you could also try this technique by rolling a piping tip. For the best results with either method, use a pie tin with a flat edge so that your chosen tool has something to roll on.
Layer on cutouts to give your pie a cute appeal
Leftover pie crust is something I always have on hand. One of the most creative ways to put this crust to use is to make small cutouts to adorn the edges of your pie.
You can either use cookie cutters or the lip of a cup to slice through your dough. You'll want to avoid using massive cookie cutters for this hack; ones that are about 1 to 2 inches in size should work well. Then, once you have your pie shape slices, you can gently place them on the edge of the pie and use an egg wash to help them adhere to it. You can select your cutters based on the season. For example, you may want to use some harvest wheat and apple shapes for an autumnal apple or pumpkin pie, or little petals for a summery blueberry or peach pie.
A checkerboard crimp can elevate the look of your pie
If you've ever seen a checkerboard pie crimp, you know how much of a statement piece it can be. As its name suggests, it is a popular design used for chess pie, though you could also use it for almost any single-crusted pie that you can think of. In order to make this design, you'll need to have about an inch of pie crust hanging over all of the edges of your pie. Then, cut a straight line ½ inch to 1 inch into the dough. From there, you can cut your next piece on the other side of the dough to create a square flap. Rectangular flaps are also an option, though they don't have as striking of a look as checkerboard squares.
The one tricky part about this design is that you need to make sure you have an even number of cuts in your dough by the time you get back around to where you started. When your pie is filled, alternate flipping the flaps into the center of the dough. This will give you the striking 1950s vibe that you're going for.
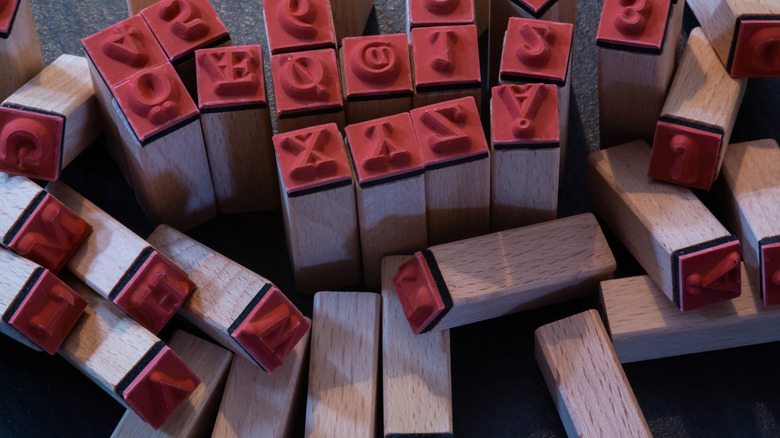
Use a stamp to add some fun accents to your pie
Another really easy way to add a decorative flair to your pie is to add stamps to it. While it might seem a bit childish to use this tool to add some unique patterns to your crust, it proves to be both an effective way to seal your pie crust and add a creative touch. (Xs and Ox for a cherry pie on Valentine's Day, anyone?)
You can use the same stamps that you would find in a children's craft set. The rubber coating on the letters will prevent too much of the pie crust from sticking to them, which makes cleanup easy. Like the braided crust, this one works best when you use a pie pan with a flat lip.
Fold your pie leftovers like ribbon candy for a 3D effect
Many traditional crimping techniques fall flat in more ways than one. But if you want to give your pie a decorative edge, try recycling those leftovers to add volume to your dessert. Essentially, what you'll need to do is collect all of those scraps (or use fresh dough entirely) and roll out a single long strip. The exact width is dependent on the size of your pie tin; I'd recommend a ½ inch to start. Then, gently drape the ribbon over itself in big loops and work your way around the pie. This effect will give you height and ruffles that will turn any ho-hum apple or blueberry pie into a showstopper.
Once your ribbon has been draped, you can tack it to the pie crust underneath with a little bit of egg wash. Since this crimp has considerably more dough than the other styles, be sure to modify your baking time so that it comes out perfectly baked.
